Projects
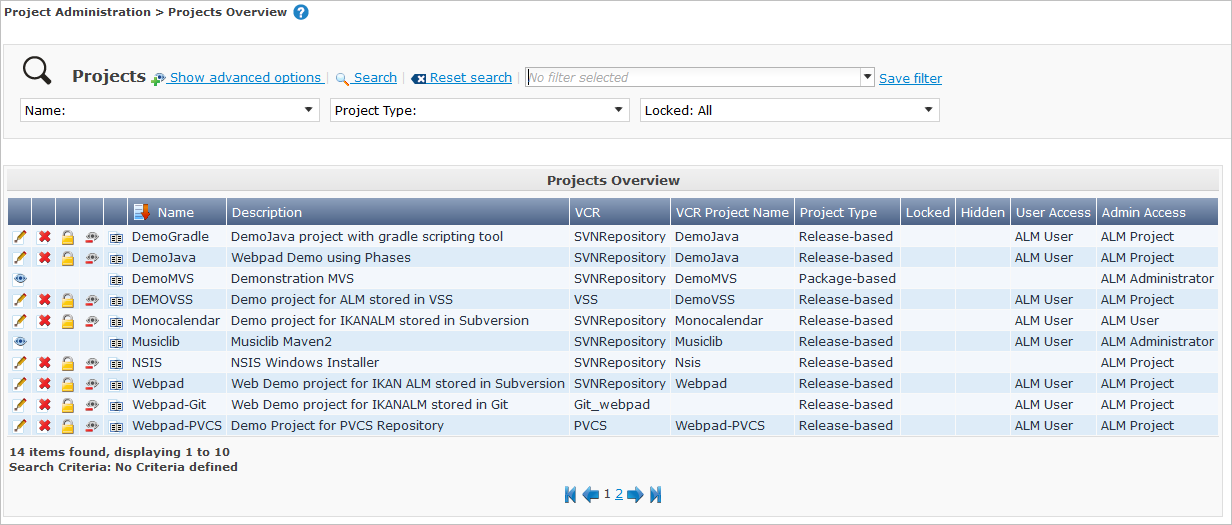
The Projects Overview screen provides information about the IKAN ALM Projects. All IKAN ALM Users can display the Projects Overview page. However, only users with view rights (belonging to the Project’s Users group) can view the Projects’ settings, and only users with Project Administration rights (belonging to the Project’s Administrators group) can edit the projects.
Refer to the following procedures for more information:
The Projects Overview Screen
-
Click the _Project Administration
 icon on the Main Menu.
The Projects Overview screen is displayed.
-
Define the required search criteria on the search panel.
The list of items on the overview will be automatically updated based on the selected criteria.
You can also:
-
click the Show/hide advanced options link to display or hide all available search criteria,
-
click the Search link to refresh the list based on the current search criteria,
-
click the Reset search link to clear the search fields,
-
select a filter from the drop-down menu (if filters have been defined) or use the Save filter link to save the current search criteria as a filter for future use.
For more information on the usage of filters, refer to the section Defining Search Filters
-
-
Verify the available information on the Projects Overview panel.
For a description of the fields, refer to Creating a Project.
-
Depending on your access rights, the following links may be available on the Projects Overview panel:

View
This option is available to IKAN ALM Users with Project User Access Rights. It allows viewing the selected Project definition.

Edit
This option is available to all IKAN ALM Users with Project Admin Access Rights. It allows editing the selected Project definition and switching to the other Project Administration options.

Delete
This option is available to IKAN ALM Users with Project Admin Access Rights. It allows deleting a Project.
 /
/ 
Lock / Unlock
This option is available to IKAN ALM Users with Project Admin Access Rights. It allows locking or unlocking the selected Project.
 /
/ 
Hide / Show
This option is available to IKAN ALM Users with Project Admin Access Rights. It allows hiding the selected Project.

History
This option is available to all IKAN ALM Users with Project User Access Rights. It allows to display the History of all create, update and delete operations performed on a Project.
Viewing Project Settings
|
This option is only available to IKAN ALM Users with User Access Rights. |
-
Click the _Project Administration
icon on the Main Menu. -
Click the
View link on the Projects Overview panel.This link is available if you have User Access Rights to the Project.
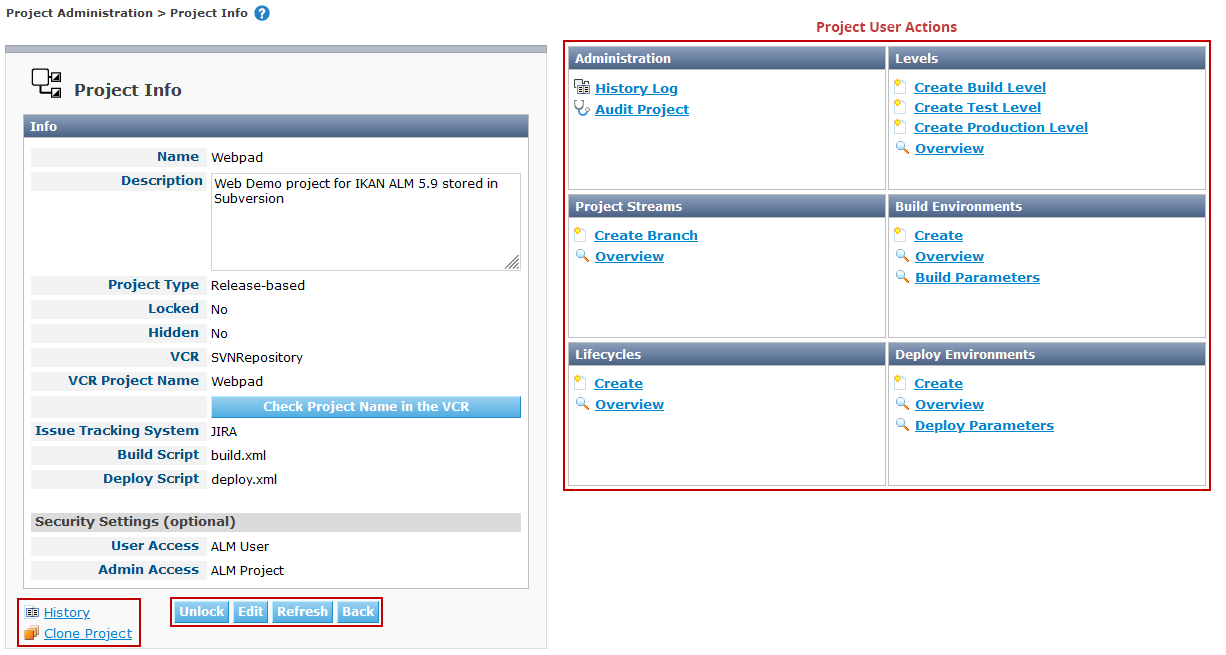
The Project Info screen is displayed:
-
Verify the settings.
For a description of the fields, refer to Creating a Project.
Underneath the Project Info panel, the following links and buttons are available:
-
History. This link will display the Project History View screen.
-
Clone Project. Creates a new project by copying the current project in Global Administration.
-
Lock / Unlock. Block or unblock all activity on this Project.
-
Edit this project info.
-
Refresh to retrieve the settings from the database.
-
Back to return to the Projects Overview screen.
To make it easier to view all project’s settings, the most important Project User actions have been grouped in subpanels aside the Project Info panel.
-
Editing Project Settings
-
Click the Project Administration
icon on the Main Menu. -
Click the
Edit link on the Projects Overview panel.This link is only available if you have Project Admin Access Rights to the Project.
The Project Info screen is displayed.
-
Click the Edit button.
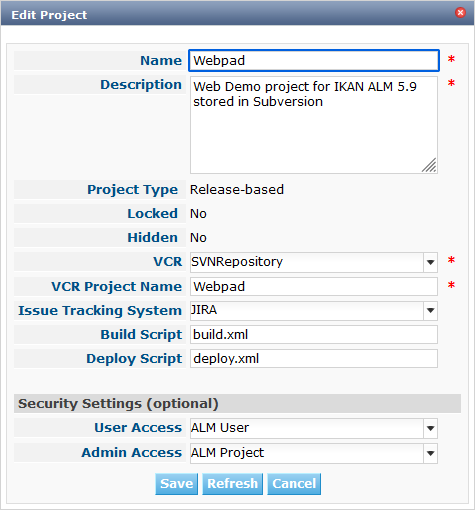
The Edit Project window pops up.
-
Edit the fields as required and click Save.
Once Builds have been created for a Project, changing the Project name has a big impact as all Builds already saved in the Build archive will become inaccessible.
You can always move the old builds to the new Build Archive location for the different Streams of the project. This will be indicated when you audit the project.
The following fields are available for each Project:
Field Meaning Name
This field contains the Project Name.
Description
This field contains the Project Description.
Project Type
This read-only field contains the Project Type:
-
Release-based
-
Package-based
The type of the Project is defined at the moment the Project is created (or cloned) by the Global Administrator. Creating a Project
Locked
This read-only field indicates whether or not the Project is locked:
Level Requests cannot be created for a locked Project.
Hidden
This read-only field indicates whether or not the Project is hidden.
By default newly created Projects are not hidden. For more information on hiding Projects, refer to Hiding/Showing a Project.
VCR
This field contains the VCR used for the Project.
VCR Project Name
This field contains the VCR Project Name.
Issue Tracking System
This field contains the name of the external Issue Tracking System.
If an Issue Tracking System is selected, IKAN ALM will from then on automatically create an Issue Tracking Level Phase when a new Level is created for the Project. Issue Tracking Phase
This field is only visible when there are external Issue Tracking Systems defined in IKAN ALM. See also Issue Tracking.
Build Script
This field may contain the Build Script used for the Project.
If the Build Script file is located in the root folder of the Project, it refers to a file name directly, e.g., build.xml
If the Build Script file is located in another folder belonging to the Project, it refers to the relative path to that folder, e.g., /dir1/build/build.xml.
If this field is left blank, the Build Script may be specified on the Build Environment, or as a Phase Parameter of the Execute Script Phase.
Deploy Script
This field may contain the Deploy Script used for the Project.
If the Deploy Script file is located in the root folder of the Project, it refers to a filename directly, e.g., deploy.xml
If the Deploy Script file is located in another folder belonging to the Project, it refers to the relative path to that folder, e.g., /dir1/deploy/deploy.xml.
If this field is left blank, the Deploy Script may be specified on the Deploy Environment, or as a Phase Parameter of the Execute Script Phase.
User Access
This field contains the name of the User Group whose members have regular access rights to this Project and are notified when Level Requests are created.
Admin Access
This field contains the name of the User Group whose members have administrative access rights to this Project.
-
-
You can also click:
-
Save to save your changes.
-
Refresh to retrieve the settings from the database.
-
Cancel to close the pop-up window.
-
-
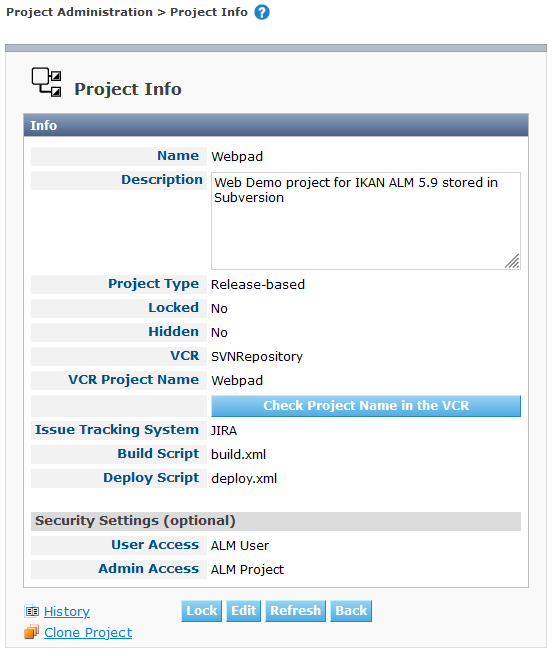
When clicking the Save or Cancel buttons, the Project Info page will be displayed.
On this page the following buttons are available:
-
Check Project Name in the VCR to check if the VCR Project name is available. This function will use the settings in the Global Administration connect to the VCR linked to the Project, in order to check if the VCR Project Name exists in the VCR.
-
History to display the Project History View screen.
-
Clone Project to display the Clone Project screen. For more information, refer to the section Cloning an Existing Project.
-
Lock to lock the Project. This means blocking all activity on that Project, such as manual or scheduled Level Requests. You may want to lock a Project, if configuration parameters are changed, or if administrative actions are required on the VCR.
-
Unlock to lift the blocking of all activity on this Project, like manual or scheduled Level Request. You must unlock a Project after having completed the maintenance.
-
Refresh to retrieve the settings from the database.
-
Back to return to the Projects Overview screen.
-
-
Notice the submenus at the right containing the Project Administration options.
To make setting up a project easier, the most important project administration actions have also been grouped in subpanels aside the Project Info panel.
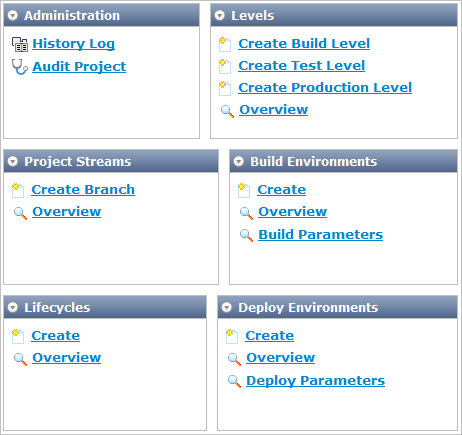
For an overview of the submenu options, refer to section Project Administration Options.
Deleting a Project
-
Click the _Project Administration
icon on the Main Menu. -
Click the
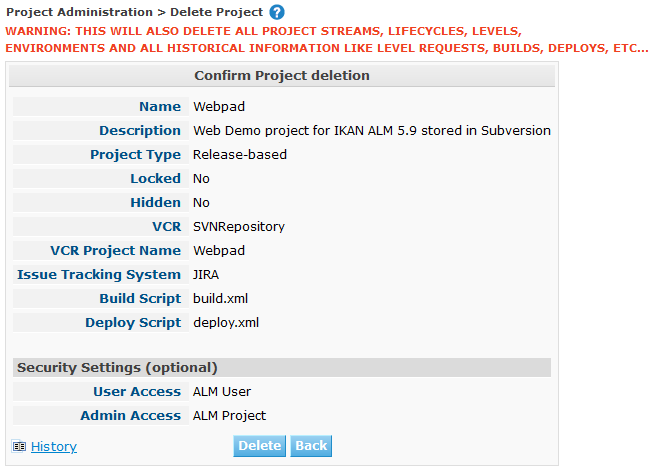
Delete link on the Projects Overview panel.The Delete Project screen is displayed:
-
Verify if you really want to irrevocably delete the Project.
Deleting a Project will also delete all Project Streams, Lifecycles, Levels, Environments and all historical information (Level Requests, Builds, Deploys, etc.) of that Project.
-
Click Delete to confirm the deletion.
You can also click Back to return to the Projects screen without deleting the Project.
Locking/Unlocking a Project
Locking a Project means blocking all activity on that Project, such as manual or scheduled Level Requests.
You may want to lock a Project, if configuration parameters are changed, or if administrative actions are required on the VCR.
Unlocking a Project means reallowing these actions on a Project.
-
Click the _Project Administration
icon on the Main Menu. -
Click the
Lock or Unlock link on the Projects Overview panel.This functionality is also available via the Lock/Unlock button on the Project Info panel. Editing Project Settings
Hiding/Showing a Project
Specifying that a Project is “hidden”, causes it not to be displayed by default on Overview panels. This can be very useful to hide older Projects on the overviews, without losing the historical information (Level Requests, …) associated with those Projects.
-
Click the _Project Administration
icon on the Main Menu. -
Click the
Hide link in front of the Project you want to hide.The Project will disappear from the overview since Hidden Projects will not be shown by default. In order to show it again, you have to set the Show Hidden Projects search criterion to Yes or All in the Search panel.
-
To “unhide” a hidden Project, click the
show link.The icon will be changed appropriately.
The criterion Show Hidden Projects has been added to the Search panels to specify whether or not you want to display hidden Projects. Click the Show advanced options link to display this criterion.
Viewing the Project History
-
Click the _Project Administration
icon on the Main Menu. -
Click the
History link on the Projects Overview panel to display the Project History View.For more detailed information concerning this History View, refer to the section History and Event Logging.
Click Back to return to the previous screen.
This link is also available on the Project Info panel. Viewing Project Settings