SAP Integration User Guide
ABAP Part for developers
In this chapter, we will show you how to use the Application Lifecycle Management system for saving and versioning your source code in few easy steps.
-
In the SAP GUI, enter the transaction
/n/IKANALM/COMMIT.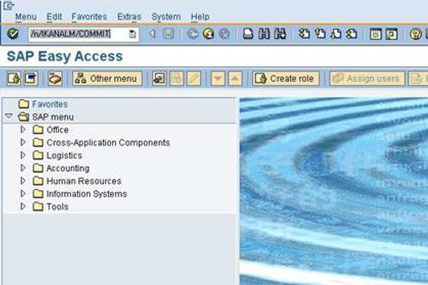
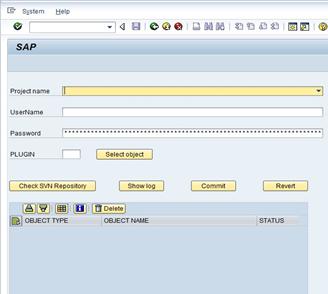
The IKAN ALM program will be displayed. You will us this program to organize your developments. The entire process is carried out in one place, including all commit, update, delete and other related actions.
-
Enter the required information
To start working with the SVN Repository, you must enter the following information:
-
Project name: This field will automatically be filled up with all available IKAN ALM Projects. Choose the Project to commit to.
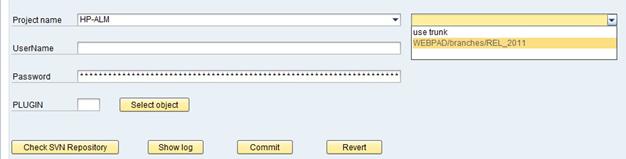
SVN branches:
If the selected project uses branches, you will immediately notice the drop-down box which allows you to choose the branch you want to work on.
In our example, the project “HP-ALM” has only one branch, i.e.,“WEBPAD/branches/REL_2011”. You can use it or use the trunk. Select what you need.
-
User name (SVN user name)
-
Password (SVN password)
The program can run without a connection to IKAM ALM.
To use the same functionality, you only need the SVN repository URL. Therefore, you must maintain the table “/IKANALM/CUST”, the key IKANALM should have an empty value.
If the value = ‘X’ , you can choose a project from the drop-down menu.
-
-
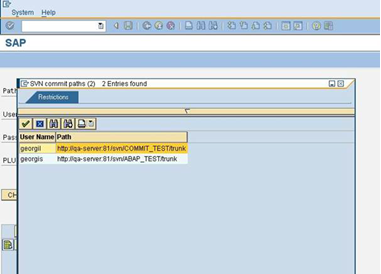
Select the User.
If your User exists in this table, you can select it and use it.
-
Check your SVN repository by clicking the Check SVN Repository button.

The following information is displayed:
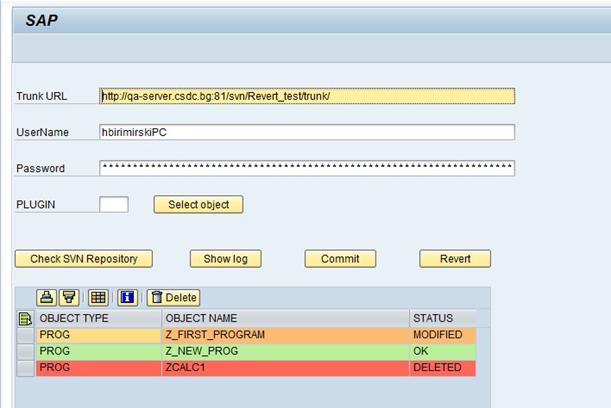
Color Explanation Green
Objects in green with status “OK” exist in the SAP Workbench and have the same version and source code.
Orange
Objects in orange with status “MODIFIED” have been modified and committed to the SVN repository and exist in your SAP Workbench, but with a different source version.
Red
Objects in red with status “DELETED” exist in the SVN repository, but do not exist in the SAP Workbench.
-
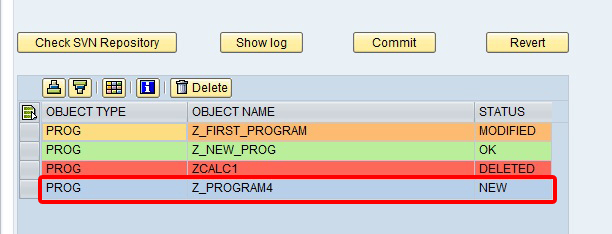
To commit new objects to SVN, select PLUGIN and click the Select object button.
-
Search and select the objects one by one while holding down the CTRL key, then click Accept (or press Enter). The new objects are marked in blue with status “NEW”, but they have not been committed yet.
-
To commit , click the Commit button at the bottom of the screen. The following screen will be displayed:
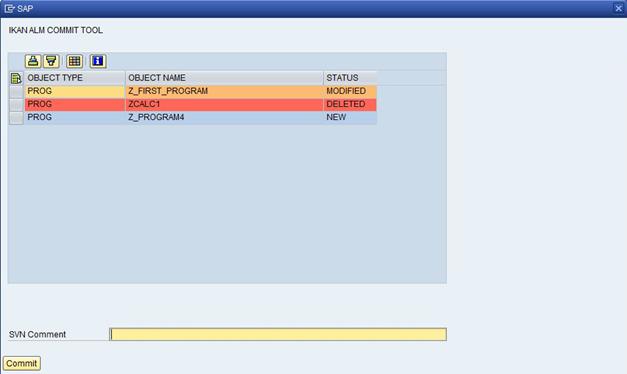
You can commit all objects on this screen or just some of them. Only selected objects will be committed to the SVN repository.
In this case we only marked “PROG Z_FIRST_PROGRAM”, because we made a mistake on the previous screen and we want to commit only this program. If, in this example, you would have marked “PROG ZCALC1”, it would have been deleted from SVN Repository.
The other functionality that we can use is to commit modified objects. In this case, objects on your SAP workbench will be updated in the SVN Repository.
Further down on the screen, you will find an SVN comment input box where you must enter SVN comment.
-
Enter an SVN comment and click the Commit button.
Next, the SVN log will be displayed showing every change on this repository.
Note: Each time you want to check the log, you should click the Show log button.
-
Check the SVN log
On the log, the author, date, message and revision are displayed.
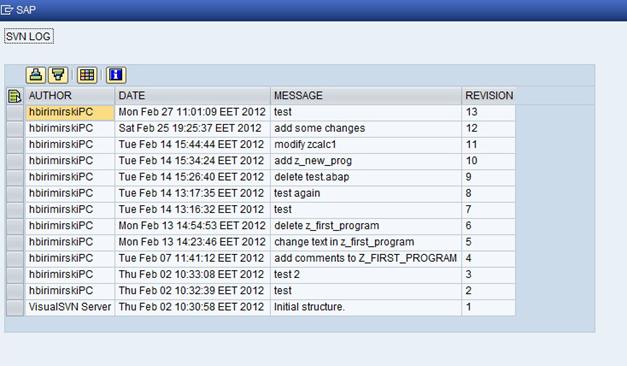
This information will be useful in the following example.
Example - Revert functionality
If you made a mistake and committed a defective source, or if you want to use a previous version of the code, you can use the “Revert” functionality.
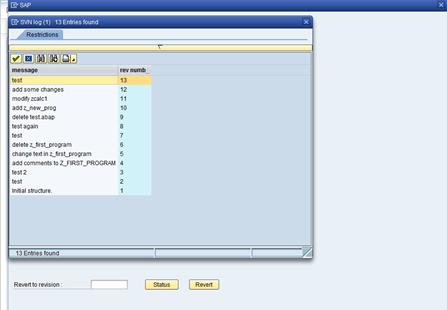
From the text box, you can click the Help button. A pop-up window will be displayed showing only the message and revision number: this is for your convenience, the information is exactly the same as the information on the “log window”.
Next, select the revision that you want to revert and click the Status button.
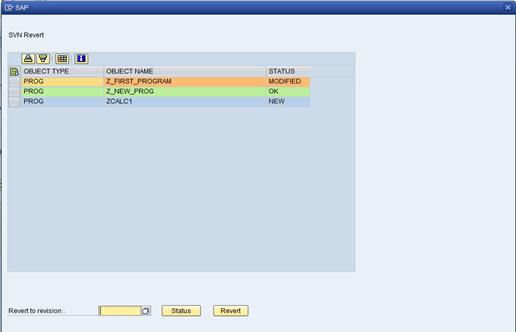
The program now compares the current ABAP source code with the selected revision to revert. In our case, this is version 12. As you will notice, the program “ZCALC1” is marked with status “NEW”. On the previous screen, when we executed “Checkout”, “ZCALC1” is marked with status “DELETED”, this means that in revision 12, “ZCALC1” exists, but in the current ABAP workbench it does not. So the program informs about this situation.
Now there are two options:
-
you can mark this program and revert. The program will import “ZCALC1” and it will appear again in the system, or
-
you can skip the revert process for this object.
Program “Z_NEW_PROGRAM” has the status “OK”, so it is identical to version 12 – no difference.
Program “Z_FIRST_PROGRAM” has the status “MODIFIED”, so they exist in ABAP workbench and in SVN repository, but there are some differences.
When you have decided which objects must be reverted, select them and click the Revert button.
-
-
JAVA Part for Developers
Java developers who work with SAP system will use Sap Netweaver Developer Studio 7.0x for their developments.
To use an SVN repository, they must install an SVN Plugin to work with Subversion. We recommend Subversion Subclipse 0.9x which is free, very flexible and user-friendly.
Adding the Subclipse Plugin to Eclipse
You can add the Subclipse plugin to Eclipse by creating an update site in Eclipse and download and install Subclipse.
-
Create an update site for Subclipse
-
Select Help > Software Updates > Find and click Install.
-
Select Search for new feature to install and click Next.
-
Click the New Remote Site button.
-
Give the update site a name, for example
Subclipse, and enter the following address:http://subclipse.tigris.org/. -
Click OK.
The new update site will be added to the list.
-
Press the \+ next to your Subclipse update site.
Eclipse will connect with the site and will list all of the updates available.
-
Select the most recent Subclipse update by checking the box next to the update and click Next.
-
Check the Subversion feature that you want to install and click Next.
-
Accept the terms of the license agreement and click Next.
-
Make sure that the Subversion feature is selected and click Finish.
You will be asked to verify the feature that you wish to install. Next, click Install.
-
You will now be asked to restart the Workbench. Click Yes.
Subclipse Perspectives
To change to the Subclipse perspective select Window > Open Perspective >Other … > SVN Repository Exploring.
The SVN Repository Exploring provides three new views:
-
SVN Repository
The SVN Repository view lists all current repositories you have access to. You can also create a new SVN Repository.
-
SVN Annotate
The SVN Annotate view shows the annotations of a file in the repository. In order to view the annotations of a file, you must right-click on the file and select Team > Show Annotations.
-
SVN Resource History
The SVN Resource History shows the revision history for a file that is selected in the SVN Repository view.
Adding a New Repository
-
Right-click in the SVN Repository view and select New > SVN Repository.
You can also click the add repository button in the toolbar of the SVN Repository view.
-
Enter the URL for the repository.
-
Enter you User ID and Password.
-
Click Finish.
The newly created repository will be displayed in the SVN Repository view.
Checking In: Adding an Existing Project to the Repository
-
Switch to the Java perspective or Plugin perspective where your project is located.
-
Add the project to the repository
To add a project to the repository, right-click the project and select Team > Share Project …
-
Select SVN from the list of repository types and click Next.
If the project had not been shared previously, Eclipse will ask if you would like to create a new repository to share the project in, or if you would like to use an already existing repository to share the project in. Choose the repository that you have already created for your project and click Next.
-
Select the module name
Select the radio button Use project name as module name and click Next.
You can choose to have other module names if you are afraid of name space conflicts.
-
Click Finish.
If the project has been shared previously, Eclipse will ask if you wish toe establish a connection. Click Finish.
Checking Out a Project from the Repository
-
Switch to the SVN Repository Exploring perspective.
-
Click the + sign next to your repository.
-
To check out a project right-click on any folder/project and select Check Out as Project.
If the project that you are checking out already exists in the workspace, the old project will be destroyed and the project from the SVN repository will be created in its place.
Otherwise, a new project will be created in the workspace.
-
Switch back to the Java or Plugin Development perspective to modify the code.
Sample screenshots
This section provides some screenshots from Sap Netweaver Developer Studio to show you how to work with Subclipse.
-
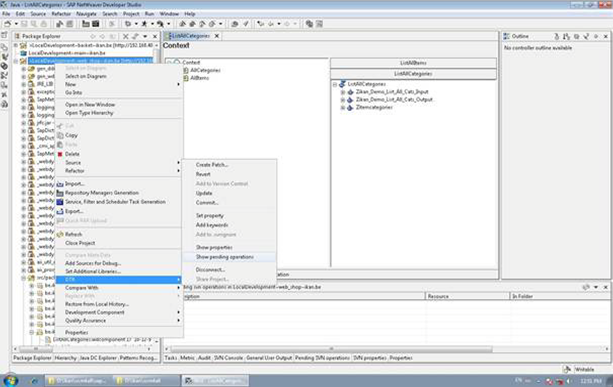
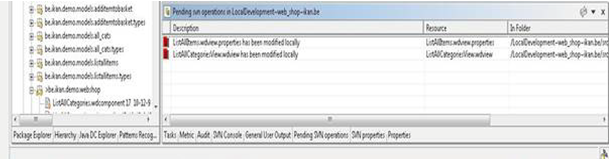
In Java Perspective, right-click the project and select DTR >Show pending operations.
In the SVN Operation window, nothing is shown as no changes have been made yet.
-
Go to the Web DynPro Perspective and make some changes.
If you repeat the same action, you can already see the modified sources which will be ready to commit.
-
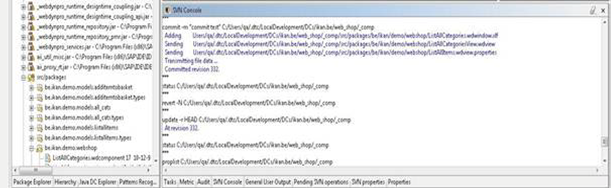
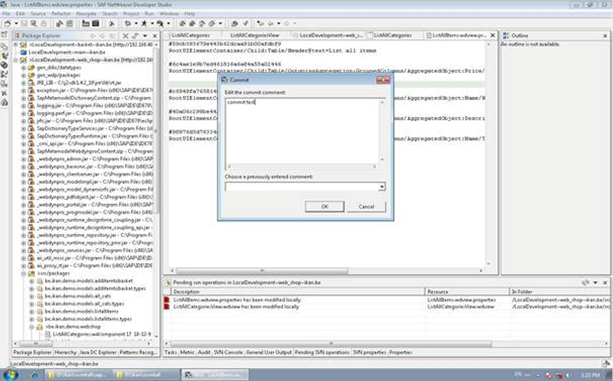
Right-click the project again and select DTR > Commit project.
SVN selects all objects that have been changed and opens a pop-up window to add a commit comment.
-
Add the comment and click OK.
The SVN Console panel will display all SVN logs.