Installing IKAN ALM on Apache Tomcat Using the Console Installer
Purpose
This technical document explains how to install the IKAN ALM Server under Apache Tomcat (version 7.x or 8.x).
The IKAN ALM Server consists of 3 different components that will be installed on the same machine as the Tomcat server:
-
the IKAN ALM Web Application,
-
the IKAN ALM Server daemon,
-
the IKAN ALM Server environment.
The IKAN ALM Web Application is an interface to the IKAN ALM administration, and is in this case deployed to Tomcat.
The IKAN ALM Server daemon itself consists of 2 sub-components, a Scheduler and a Monitor. The IKAN ALM Scheduler is responsible for observing the VCR (Version Control Repository) and creating a Build request when changes (modified sources) in the VCR are detected. The IKAN ALM Monitor will manage the different build and deploy actions that are executed by the IKAN ALM Agent(s).
Both the IKAN ALM Server and the IKAN ALM Agent run as OSGi bundles in Apache Karaf containers, benefiting from the advantages of a modular architecture. The IKAN ALM Server daemon will be installed in the IKAN ALM Server Environment, and may be launched by scripts or started as a Windows service or Unix/Linux daemon.
The IKAN ALM Server Environment contains the following important files and folders :
-
Build Archive Location:
The location where the build results will be stored,
-
Scripts Location:
The location to be used for storing centralized build and deploy scripts,
-
Work Copy Location:
The location where the sources that are checked out from the repository are stored before they are transported to the Agents,
-
Phase Catalog Location:
The location where Phases that have been imported will be stored, ready to be retrieved by remote Agents when needed,
-
Configuration with the (external) security system:
Refer to Appendix: JAAS Configuration for more information.
-
Documentation in PDF format.
Prerequisites
Hardware Requirements
-
RAM: minimum 1 GB (gigabytes), recommended 2 GB (gigabytes) or more.
Note that these are just indicative values. If the IKAN ALM Server will also act as a Build Server, it might have more demanding memory requirements depending on the number of builds that run concurrently. For a more mathematical approach, we refer to the article Capacity Planning For Software Build Management Servers on the CM Crossroads website: (https://www.cmcrossroads.com/article/capacity-planning-software-build-management-servers).
-
Disk Storage Space: minimum 10 GB (gigabytes), recommended 40 GB (gigabytes) or more.
There is no hard and fast rule for disk storage space. The actual amount you will require depends on the number and size of the projects managed with IKAN ALM, and on the size of the build results stored in the build archive. More projects and larger build results mean more required disk space.
Java SE Runtime (JRE) 1.7 or 1.8
All IKAN ALM components need at least a Java Development Kit (JDK) or a Server Java Runtime (Server JRE). IKAN ALM has been tested to run with both Oracle Java and OpenJDK. The Java SE Server Runtime Environment (Server JRE) or Software Development Kit (SDK) can be freely obtained from Oracle’s website. Both 32-bit and 64-bit versions are supported.
The latest version of Java SE can be downloaded from http://www.oracle.com/technetwork/java/javase/downloads/index.html
Tomcat 7 or 8
IKAN ALM requires at least a Java EE 5 compliant web container, supporting the Servlet 2.5 to or 3.1 and JSP 2.1 to 2.3 specifications, so earlier versions of Tomcat are not supported.
Tested with Apache Tomcat 7.0.55 and later versions. When choosing a version of Tomcat, please check that version’s own prerequisites (e.g., Tomcat 8 requires at minimum Java SE v 7).
IKAN ALM has been proven to run on Tomcat on different Operating Systems, including recent versions of Windows and Linux, Sun Solaris, HP Unix, MacOS X, zLinux, … If a suitable Java Runtime is available (see Java SE Runtime (JRE) 1.7 or 1.8), IKAN ALM may run on other Operating Systems. Consult the detailed Technical Requirements on https://www.ikanalm.com.
Enable Unicode support in Tomcat
When using Unicode symbols in IKAN ALM (for instance, projects containing files with special characters in the name), an extra setting should be applied to the Tomcat’s server.xml configuration file.
Modify the TOMCAT_HOME/conf/server.xml file by adding the attribute URIEncoding="UTF-8" in the http connector:
<Connector port="8080"
protocol="HTTP/1.1" URIEncoding="UTF-8" connectionTimeout="200000"
redirectPort="8443" />
The fix is based on the article: https://wiki.apache.org/tomcat/FAQ/CharacterEncoding
Tomcat memory settings
It is recommended to set the following memory settings for running IKAN ALM in Tomcat with Java 8:
-
initial Java heap size (-Xms) : 128m
-
max Java heap size (-Xmx) : 384m
-
max Metaspace size (-XX:MaxMetaspaceSize) : 128m
If you launch Tomcat from the startup scripts, you need to create the file TOMCAT_HOME/bin/setenv.bat (Windows) or TOMCAT_HOME/bin/setenv.sh (Linux/Unix), containing a line like:
For Windows:
SET JAVA_OPTS=-Xms128m -Xmx384m -XX:MaxMetaspaceSize=128m
For Linux/Unix:
JAVA_OPTS=`"-Xms128m -Xmx384m -XX:MaxMetaspaceSize=128m`"
If you run Tomcat as a Windows service, you need to set the memory settings in the file TOMCAT_HOME/bin/service.bat. Modify the line that sets the "++JvmOptions":
"%EXECUTABLE%" //US//%SERVICE_NAME% \++JvmOptions
"-Djava.io.tmpdir=%CATALINA_BASE%\temp;-Djava.util.logging.manager=org.apache.juli.ClassLoaderLogManager;-Djava.util.logging.config.file=%CATALINA_BASE%\conf\logging.properties;-XX:MaxMetaspaceSize=128m" --JvmMs 128 --JvmMx 384
After these modifications, you need to re-install the service by running "service.bat remove", followed by "service.bat install". You need Administrative privileges to run these commands.
If you use Java 7, replace the setting “–XX:MaxMetaspaceSize=128m” with “-XX:MaxPermSize=128m”. See http://javaeesupportpatterns.blogspot.co.uk/2013/02/java-8-from-permgen-to-metaspace.html for an explanation.
When starting with Tomcat 8.5, the recommended method to set these values is by adding them as SET statements after the setlocal statement at the beginning of the service.bat file.
Database
IKAN ALM supports MySQL, MsSQL, Oracle and DB2 database as the back-end. During the installation, it is possible to initialize the existing database with the default data. Beware that when the DB initializing option is selected, the existing data will be overwritten.
Before initializing the database, make sure the database/scheme exists. For MySQL, it is recommended that the database has a character set of UTF8. Here is an example of the MySQL script creating a database from scratch:
CREATE DATABASE alm
CHARACTER SET utf8 COLLATE utf8_unicode_ci;
Consult your database documentation for more information on the appropriate UTF8-collation for your system.
When using DB2 as the IKAN ALM database, some additional configuration is required. For more information, refer to Appendix: DB2 Configuration.
IKAN ALM Server Installation
IKAN ALM comes with a console-based installer that can be run from a Windows command prompt or a Linux shell. To install IKAN ALM, you will need to configure the install properties of the install script. In the next sections, we will explain the necessary steps to install IKAN ALM and deploy it to a Tomcat web server.
Configuring and Running the Console Installer
The IKAN ALM installation scripts are delivered as an IKAN_ALM_5.8_console_win.zip or IKAN_ALM_5.8_console_linux.tar.gz file. Expand this file somewhere on the target IKAN ALM server. The expanded folder containing the IKAN ALM installer files (ANT scripts) will be denoted as INSTALL_DIR.
The included console installer will install the IKAN ALM Server components in the specified destination folders.
Configuring the install.properties File
Configure the different properties which will be used by the installation scripts, by editing the INSTALL_DIR/install.properties file.
|
Do NOT use backward slashes ('\') in path properties, otherwise the installation may fail. Use forward slashes ('/') instead! |
The IKAN ALM Server installation combines the deployment of the IKAN ALM web application to Tomcat together with the IKAN ALM server environment installation, so make sure that in the “General Settings” alm.server.install=true.
It is possible to also install an IKAN ALM Agent and IKAN ALM Commandline on the IKAN ALM server machine or to set up a secure communication between IKAN ALM Server and Agents. Check the readme.txt in the INSTALL_DIR or the appropriate installation docs for more information concerning the other “General Settings” properties.
|
For the remainder of this document, we assume that all these other “General Settings” are set to false. |
-
Provide the general “IKAN ALM Server Settings”: the alm.server.installLocation (further on referred to as ALM_HOME) and the alm.server.javaHome.
The files will be copied to the install Location, and a file will be modified in a sub-folder of the javaHome folder, so make sure that the user who will run the installation has write access to those locations. Also make sure that the provided alm.server.javaHome is the same as the JAVA_HOME that is used to start tomcat. If they are different, authentication problems may occur (See Appendix: JAAS Configuration).
-
Next, provide the “IKAN ALM Server Runtime parameters” :
# IKAN ALM Server Runtime parameters : # serverPort : port IKAN ALM Server is listening on (default=20021) alm.server.serverPort=20021 # agentPort : port Agent should be listening on (default=20020) alm.server.agentPort=20020 # Karaf ports, no need to change unless you have port conflicts alm.server.karaf.rmiRegistryPort=1100 alm.server.karaf.rmiServerPort=44445 alm.server.karaf.sshPort=8102 -
The IKAN ALM Server daemon will be installed in
[alm.server.installLocation]/daemons/server, and can be started with the startServer.cmd (Windows) or startServer.sh (Linux/Unix) startup scripts, or as a Windows service. -
By default, the IKAN ALM Server is registered as a Windows service which will be started automatically at system start-up.
Alternatively, you can control the service via Start > Settings > Control Panel > Administrative Tools > Services. The name of the IKAN ALM Server service is “IKAN ALM 5.8 Server”.
-
Change alm.server.serverPort, if you do not want to use the default 20021 port number for communication between the IKAN ALM Server and its Agents.
You must use this same port number in subsequent IKAN ALM Agent installations, otherwise the Agent-Server communication may fail.
alm.server.agentPort: the port number the local IKAN ALM Agent is going to listen on (default port =20020). If you change this, you must use this port number when you install the IKAN ALM Agent on the server machine (= local Agent).
alm.server.karaf.xxxPort: the port numbers specific to the Karaf container hosting the IKAN ALM Server daemon. Normally, there is no need to change those port numbers unless you have port conflicts.
For more information, refer to the Karaf 4.0 documentation at https://karaf.apache.org/manual/latest/.
-
Next, provide the “Database configuration” properties to define the used database (MySQL, MSSQL, Oracle or DB2) and the connection parameters.
The SQL script to initialize your database will be generated based on the chosen database and the other installation properties provided.
Setting the 'alm.server.rdbms.initALMDatabase' parameter to true will cause dropping all the existing tables in the target database and populating them with the new data!!
Here some sample values for a MySQL database:
# Database configuration : # type : accepted values are MYSQL,MSSQL,ORACLE,DB2 alm.server.rdbms.type=MYSQL alm.server.rdbms.server=localhost alm.server.rdbms.port=3306 alm.server.rdbms.user=root alm.server.rdbms.pwd=alm # dbname : database name or Oracle SID or Service name alm.server.rdbms.dbname=alm # dbschema : database schema (for DB2) alm.server.rdbms.dbschema=ALM # Flag to indicate whether to initialize the IKAN ALM database # WARNING : when set to "true", all IKAN ALM related tables in the target # database will be dropped and populated with initial data !! alm.server.rdbms.initALMDatabase=false -
The default setting is to deploy to Apache Tomcat. Make sure that it is set to true:
alm.server.tomcat=true -
In the “Apache Tomcat Configuration”-section, provide the correct parameters for your Tomcat application server:
alm.server.tomcat.home: Apache Tomcat installation directory. This represents the CATALINA_BASE variable of the Tomcat instance. (default = “C:/Program Files/Apache Software Foundation/Tomcat 7.0”)alm.server.tomcat.port: the Tomcat HTTP Connector port (default = 8080)Files will be copied to sub-folders of alm.server.tomcat.home, so make sure that the user who will run the installation has write access to this location.
alm.server.tomcat.catalina.home: The CATALINA_HOME of the Tomcat instance. If this value is left empty, ALM will assume CATALINA_HOME=CATALINA_BASE (default = empty). You will need to set this property if you installed Tomcat on Linux using a package manager (like apt), or if you configured your Tomcat to run multiple instances. Refer to https://tomcat.apache.org/tomcat-8.5-doc/RUNNING.txt for more information. -
Verify the IKAN ALM Server Settings before running the installer.
Tip: do not remove the install.properties file after installation, you can reuse it for future installations of IKAN ALM.
Running the Console Installer
Normally, the install script detects the system default JAVA_HOME and uses that to launch the installation.
If the detection fails you will need to edit INSTALL_DIR\install.cmd (Windows) or INSTALL_DIR/install.sh (Unix/Linux) and set JAVA_HOME to the installation directory of a Java Runtime, e.g., SET JAVA_HOME=D:\java\jdk1.8
Or on a Unix/Linux machine: JAVA_HOME="/opt/jdk1.8"
Before proceeding with the installation, do a final check of the installation parameters:
-
Check once again the installation locations.
-
Make sure that the provided javaHome is the same as the one used to run Tomcat.
-
Make sure that the user running the installation has write access to the correct locations.
-
Make sure that the provided database parameters are correct.
-
When UAC is enabled (Windows Vista and later), the command prompt must be started with Administrative privileges (the title of the prompt must start with "Administrator:"). If the command prompt does not have administrative privileges, the installation may run successfully, but the IKAN ALM Server Daemon will not be registered as a Windows service.
Run INSTALL_DIR/install.cmd (Windows) or INSTALL_DIR/install.sh (Unix/Linux), preferably from a MSDOS prompt or a shell, so that the progress of the different tasks can be followed.
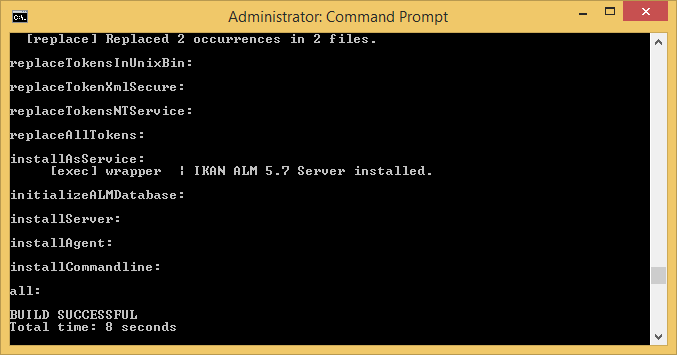
When the installation succeeds the “BUILD SUCCESSFUL” message appears.
Initializing the IKAN ALM Database
The initialization of the IKAN ALM database can happen either during or after the installation of IKAN ALM.
To initialize the database during installation, set the 'alm.server.rdbms.initALMDatabase' installation property to 'true'.
As a result, the target database tables are dropped and populated during the installation process.
To initialize the database after the installation, set the 'alm.server.rdbms.initALMDatabase' installation property to 'false'.
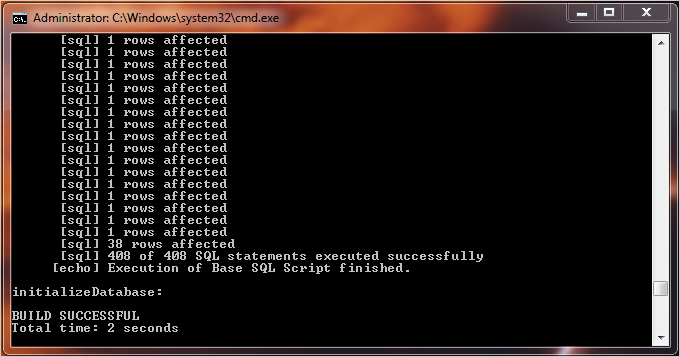
After the installation, launch the script INSTALL_DIR/initializeALMDatabase.cmd (Windows) or INSTALL_DIR/initializeALMDatabase.sh (Linux/Unix). This script will drop and populate the IKAN ALM tables in the target database.
Starting the IKAN ALM Server
Starting Tomcat
Start tomcat (tomcat_HOME/bin/startup.sh or tomcat_HOME/bin/startup.sh) and wait until it has finished starting up.
In its console window, Tomcat will report something like: INFO:
Server startup in 18595 ms
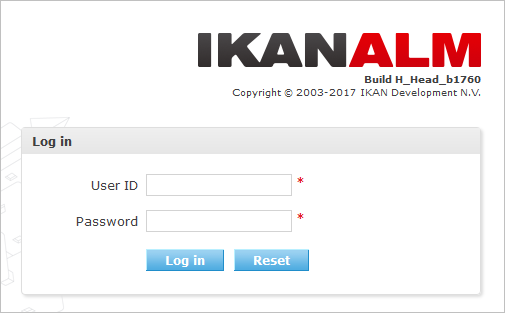
The IKAN ALM web interface can be reached by starting up a browser and pointing its URL to [tomcat.url]/alm, e.g., http://localhost:8080/alm, or http://mycompany.com/alm.
Log in with User ID “global” and Password “global”.
Starting the IKAN ALM Server Daemon
The IKAN ALM Server runs as an OSGi bundle inside a Karaf container. To start the IKAN ALM Server, the Karaf container must be started first. On Linux/Unix, from a shell: * Launch the shell script “ALM_HOME/daemons/server/startServer.sh”. * Use “ALM_HOME/daemons/server/stopServer.sh” to stop the IKAN ALM Server.
-
On Windows, as a Windows Service:
-
By default, the IKAN ALM Server is registered as a Windows service which will be started automatically at system startup.
-
Alternatively, you can control the service via Start > Settings > Control Panel >Administrative Tools > Services. The name of the IKAN ALM Server service is “IKAN ALM 5.8 Server”.
-
-
On Windows, from a Command Prompt:
-
Launch the command file “ALM_HOME/daemons/server/startServer.cmd”.
-
Use “ALM_HOME/daemons/server/stopServer.cmd” to stop the IKAN ALM Server.
-
Uninstalling IKAN ALM
To completely uninstall IKAN ALM from your system, do the following:
-
Normally, the uninstall script detects the system default JAVA_HOME and uses that to launch the uninstall.
If the detection fails, you will need to edit INSTALL_DIR\uninstall.cmd (Windows) or INSTALL_DIR/uninstall.sh (Unix/Linux) and set JAVA_HOME to the installation directory of a Java Runtime.
For example:
SET JAVA_HOME=D:\java\jdk1.8Or on a Unix/Linux machine:
JAVA_HOME="/opt/jdk1.8" -
Next, configure INSTALL_DIR/uninstall.properties.
Basically, you should match the settings to those used in INSTALL_DIR/install.properties when installing IKAN ALM.
More specifically, set alm.server.javaHome to the used Java runtime.
When uninstalling the IKAN ALM Server and Web Application, set alm.server.uninstall=true, alm.server.installLocation to the install location of the IKAN ALM Server (see IKAN ALM Server Installation) and set alm.server.tomcat.uninstall=true.
-
Finally, run the uninstaller.
Execute INSTALL_DIR/uninstall.cmd (Windows) or INSTALL_DIR/uninstall.sh (Linux/Unix)
|
The uninstall process will not delete the IKAN ALM Build Archive (default location : “ALM_HOME/system/buildArchive”). If required, it has to be deleted manually. |
When UAC is enabled (Windows Vista and later), the command prompt must be started with Administrative privileges (the title of the prompt must start with "Administrator:"). If the command prompt does not have administrative privileges, the uninstall may run successfully, but the IKAN ALM Server Daemon will not be unregistered as a Windows service.
Upgrading IKAN ALM
The general approach to upgrading IKAN ALM is straightforward: first back up the current installation and the database, then reinstall the application and upgrade the database to a higher version.
If the upgrade process fails, you can restore the back-up, and continue running the previous version of IKAN ALM (and contact support).
You should at least back up the following:
-
IKAN ALM database
-
Build Archive Location: configured in System Settings
(default = ALM_HOME/system/buildArchive)
-
Deploy Scripts Location: configured in System Settings
(default = ALM_HOME/system/deployScripts)
-
Phase Catalog: configured in System Settings
(default = ALM_HOME/system/phaseCatalog)
|
For safety reasons, it is highly recommended to back up the entire ALM_HOME directory. Experience has shown that, sometimes, one needs to restore a configuration like a security setting or the configuration of the log files. |
IKAN ALM Upgrade Procedure
-
Stop the IKAN ALM Server/Agent and the IKAN ALM application server (Tomcat) and make the back-up.
This is necessary to make sure you have the latest version of everything.
-
Uninstall the IKAN ALM Server and (if it has been installed) the local ALM Agent.
To do so, run the uninstaller on the IKAN ALM Server machine.
Information on how to do this can be found in the section Uninstalling IKAN ALM.
-
Highly recommended: also back up the ALM_HOME folder to keep the configuration.
-
Uninstall the remote agents.
Configure and run the uninstaller on each remote IKAN ALM Agent machine.
Information on how to do this can be found in the section Uninstalling IKAN ALM or in the guide HowToALM 5.8_AgentInstall.pdf.
TIP: Keep a copy of the INSTALL_DIR/install.properties file after you uninstalled. You can reuse the values in the file when you need to configure the installer for the new version (like the database connection parameters). Do not copy the old install.properties over the new though! Some properties may have been renamed, removed or added.
-
Configure and run the installer of the ALM Server and local ALM Agent.
Refer to the section IKAN ALM Server Installation or to the document IKAN ALM 5.8 Installation Guide.pdf.
-
Migrate the IKAN ALM database to the latest version.
To do this, run the Database Migration Tool (described in section Database Migration Tool.
-
Finally, run and configure the installer of the remote ALM Agents.
Refer to the guide HowToALM 5.8_AgentInstall.pdf.
Database Migration Tool
The Database Migration Tool is a command line tool launched by the migrateALMDatabase script. The tool automatically detects the current database version and, if needed, attempts to migrate it to the latest one.
As pointed out in the previous section, you should back up the IKAN ALM database before starting the DB migration.
To start the migration, you need to run the DB migration tool located in:
INSTALL_DIR/migrateALMDatabase.cmd (on Windows) or
INSTALL_DIR/migrateALMDatabase.sh (on Linux installations).
By default, the DB Migration Tool uses the database connection parameters defined in the INSTALL_DIR/install.properties file.
You can also define a custom path to the install.properties by using the -installProperties switch (see the migrateALMDatabase script file contents).
The default Java executable is used to run the migration tool. In case it cannot be found, you may have to set the JAVA_HOME variable in the migrateALMDatabase script file.
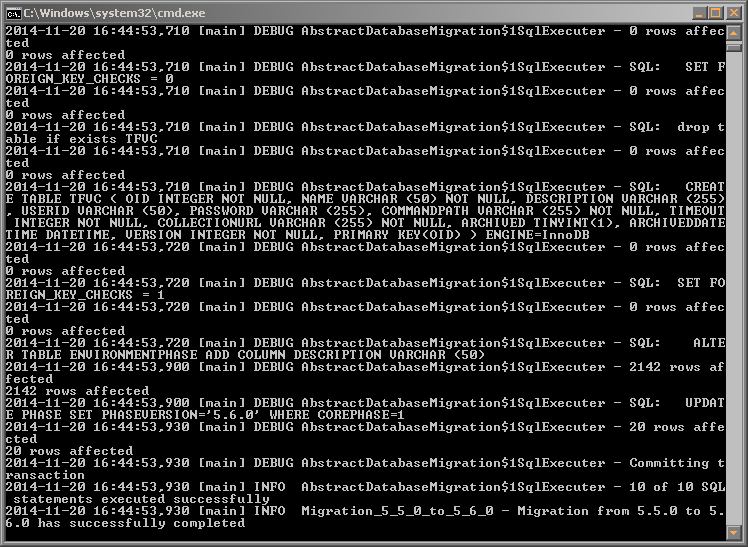
The Database Migration will be done in different steps: when migrating from the older 5.2 version, first the 5.2 to 5.5 migration will be executed, before migrating version 5.5 to the (latest) 5.8 version.
|
Migrating the older IKAN ALM database 5.2 to version 5.5 includes significant changes. Therefore, depending on the size of your database, it may take a while (up to a few hours). |
A migration log is created in the INSTALL_DIR/almDbMigration.log file and will also be displayed in the console window.
Manually Installing and Removing the IKAN ALM Server as a Windows Service
By default, the IKAN ALM installer registers the IKAN ALM Server Daemon as a Windows service. However, for convenience purposes, the IKAN ALM installation includes scripts to unregister or re-register the IKAN ALM Server Daemon as a service.
-
To unregister the service:
Execute "ALM_HOME/daemons/server/karaf/bin/karaf-service.bat remove".
-
To register the service:
Execute "ALM_HOME/daemons/server/karaf/bin/karaf-service.bat install".
If you want to reconfigure the service, edit the file ALM_HOME/daemons/server/karaf/etc/karaf-wrapper.conf.
You can, for example, change the amount of memory the ALM Server can use (in MB) by changing : wrapper.java.maxmemory = 512.
|
It is generally not recommended to change any of the other properties in the karaf-wrapper.conf file, as it may cause the ALM Server to stop working. For more information on the configuration file, refer to: |
Manually Installing and Removing the IKAN ALM Server as a Daemon Processon Linux/Unix Systems
The IKAN ALM installer does not automatically install the ALM Server as a Linux/Unix daemon. These steps must be performed after installation.
Since the ALM Server uses Apache Karaf as the OSGi runtime environment, this basically comes down to using the Apache Karaf Wrapper feature (see the Karaf 4.0 manual: https://karaf.apache.org/manual/latest/#_service_wrapper).
As an example, we will describe this procedure for installing and removing the ALM Server as a service on a CentOS Linux.
-
If you are currently running the ALM Server, stop it by executing
ALM_HOME/daemons/server/stopServer.sh. -
Launch the ALM Server Karaf by executing
ALM_HOME/daemons/server/karaf/bin/karaf_server.sh.This will launch the ALM Server with the Karaf console enabled, which we will need to use the Karaf Wrapper feature.
-
After the startup messages have finished, press <enter> and you will see the Karaf console prompt:
"karaf@root>". -
In the Karaf console, execute
"feature:install wrapper".This will install the Karaf Wrapper feature.
You can verify that this worked by executing
" feature:list | grep wrapper".This should give the output:
wrapper  | 4.0.7 | x | Started  | standard-4.0.7
| Provide OS integration[
. -
Now we must call "wrapper:install" which will generate the necessary files to install the ALM Server as a Linux service.
In the Karaf console, execute
'wrapper:install -s DEMAND_START -n almserver58 -d "IKAN ALM 5.7 Server" -D "IKAN ALM 5.8 Server Daemon"'.When this command succeeds, it conveniently reports the commands that we need to execute as subsequent steps.
-
Shut down the ALM Server Karaf.
In the Karaf console, execute
"shutdown -f". -
Adapt the ALM_HOME/daemons/server/karaf/etc/almserver58-wrapper.conf file that was created, by adding the following options:
-
Just before the KARAF_HOME, in the section of the general wrapper properties, set the path to the Java runtime you selected during the IKAN ALM Server installation :
set.default.JAVA_HOME=/opt/java/jdk1.8 -
Change the path to the java executable:
wrapper.java.command=/opt/java/jdk1.8/bin/java -
In the section of the JVM Parameters, add following parameters:
wrapper.java.additional.10=-XX:+UnlockDiagnosticVMOptionswrapper.java.additional.11=-XX:+UnsyncloadClass
-
-
At this point, everything is configured so we can install, remove, stop and start the IKAN ALM Server Linux daemon.
All of these commands need administrative privileges, so you will need to execute them with "sudo".
-
To install the service:
ln
-s /home/ikan/ALM/daemons/server/karaf/bin/almserver58-service /etc/init.d/
chkconfig almserver58-service –add -
To start the service when the machine is rebooted :
chkconfig almserver58-service on -
To disable starting the service when the machine is rebooted:
chkconfig almserver58-service off -
To start the service:
service almserver58-service start -
To stop the service:
service almserver58-service stop -
To uninstall the service:
chkconfig
almserver58-service --del
rm /etc/init.d/almserver58-service
-