IKAN ALM Agent UI Installation
Purpose
When build or deploy actions are planned on a local or remote environment which requires interaction with the target system, an IKAN ALM Agent must be installed on that machine. This technical document explains how to do an installation of an IKAN ALM Agent through the IKAN ALM web application.
|
The term “remote environment” refers to a system different from the IKAN ALM Server system. A local build or deploy will happen on the IKAN ALM Server machine itself. |
As a consequence, this document can be used for different purposes, so check if the following situation applies to you:
-
You have installed the IKAN ALM Demo (which installs both the Server and the Agent daemon on a Tomcat webserver/Karaf OSGi container) and you want to run builds and/or deployments on a different machine than the one on which you installed the IKAN ALM Demo.
Note that for a demo installation we run both the Agent and the Server inside the Java VM of the same OSGi container, which is not the recommended configuration of a production system, as a heavy, memory-intensive build can cause your OSGi container to stop functioning due to OutOfMemory errors.
-
You have installed or you are installing the IKAN ALM Server and want to install (together with the Server installation or as a separate installation) an IKAN ALM agent on the same machine, so that you can run local builds (even deployments in some cases) on the Server machine. This is the advised way of running local builds.
-
You have installed the IKAN ALM Server and you want to install an IKAN ALM Agent on a different, remote machine, so that you can run distributed builds, or deploy and control remote machines.
Prerequisites
Hardware Requirements
-
RAM: minimum 512MB (megabytes), recommended 1GB (gigabytes) or more.
Note that these are just indicative values. The amount of RAM needed by a machine that runs an ALM Agent greatly depends on the amount of resources needed by the build and deploy scripts and custom phases used by the projects that are being built and deployed on it.
-
Disk Storage Space: minimum 1 GB (gigabytes).
There is no hard and fast rule for disk storage space. The footprint of a bare installed IKAN ALM Agent (with distribution files) is under 180 MB (megabytes). The actual amount an Agent will require depends on the number and the size of the projects managed with this agent, and the size of the resources needed to run a build or deployment. More projects and larger build results mean more required disk space.
A Java 11(LTS) JDK
All IKAN ALM 5.9 components need a Java 11 Development Kit (JDK).
IKAN ALM Agent has been tested to run with Oracle Java, Adoptium Eclipse Temurin (formerly AdoptOpenJDK) Azul Zulu Builds of OpenJDK and OpenJdk on several Linux distros. Oracle Java can be obtained from Oracle’s website for non-production environments using an Oracle account. Adoptium OpenJDK can be obtained from https://adoptium.net and Azul Zulu Builds of the OpenJDK from https://azul.com/downloads/?package=jdk.
PowerShell (Windows) or SSH (Windows/Linux/Unix) Connection
The UI IKAN ALM Agent Installation is managed and pushed from the IKAN ALM Server to the (remote) Agent Machine. This may be done through a PowerShell (Windows) or SSH Connection (Windows, Linux or Unix). Both connection types need a User and Authentication data in order to operate on the Agent Machine. This User needs sufficient Access Rights on the Machine: write files, create directories, install and run services or daemons, etc. See further for more details about the specific operations and connection parameters.
When opting for the SSH Connection type, the target Agent machine must be running an SSH server. It is advised to test the connection from the IKAN ALM Server to the target Agent Machine before attempting an Agent installation. This can be done in a command shell or with an SSH Client like OpenSSH client outside the scope of IKAN ALM. This assures that the known_hosts file and other SSH details are correctly configured.
The PowerShell Connection type needs minimum PowerShell Version 5 installed on the IKAN ALM Server and some specific Security settings on both the IKAN ALM Server and Agent Machine.
On the IKAN ALM Server the PowerShell execution policy should be set to Unrestricted. If this is not the case, it can be obtained by running following command in an elevated PowerShell prompt:
Set-ExecutionPolicy -ExecutionPolicy Unrestricted -Scope LocalMachineThe scope should be set to LocalMachine to allow the IKAN ALM Server running as a Windows service under the Local System Account to run PowerShell scripts.
On the target IKAN ALM Agent Machine PowerShell remoting needs to be enabled. Run following command from an elevated PowerShell prompt if it should be changed:
Enable-PSRemotingThis is needed so that the remote Agent machine accepts remote PowerShell sessions.
It is also important that the PowerShell User has Administrative rights to be able to install/uninstall the IKAN ALM Agent as a Windows service.
HTTP or HTTPS Connection with IKAN ALM Server
The communication between the Server and the Agent daemons is done over XML-RPC. This means that IKAN ALM enables distributed computing (remote procedure calls) using HTTP or HTTPS as the transport protocol and XML for the encoding (for more information, refer to www.xmlrpc.com. In order to enable XML-RPC interaction, the target machine for the new Agent must have a correct TCP/IP connection to the Server machine.
Scripting Tool
In order to execute a build or deploy script on the remote machine, the correct scripting tool must be installed on the target Agent system. IKAN ALM supports Ant, Gradle, NAnt and Maven2 as scripting tools. Other scripts (Perl, make, …) can be easily called via these supported scripting tools.
Contact IKAN ALM support if more information is needed. Check the different websites http://ant.apache.org, http://gradle.org, http://maven.apache.org and http://nant.sourceforge.net) for downloading and installing the appropriate scripting tool.
|
The installation of the Agent can be launched without any scripting tool installed on the target machine. It is no problem to install and configure the scripting tool after the Agent is up and running. |
IKAN ALM Agent UI Installation
The IKAN ALM Agent UI Installation can be configured, started and managed from within the IKAN ALM Web Application. After you have created the Machine definition in Global Administration, an Install functionality is available in the Global Administration > Machines Overview. Selecting it will open the Agent Install Configuration UI. After configuring the General and SecureShell or PowerShell installation details the Agent Installation can be started and followed up on this page. Depending on the chosen Connection Type the IKAN ALM Server will automate the following steps through a Secure Shell, or execute PowerShell scripts that act on the (remote) Agent Machine:
-
Create a temporary directory on the IKAN ALM server, copy configurable Agent installation files to it and replace variables in the installation files
-
Create an Agent Distribution Folder on the remote Machine
-
Copy the compressed Agent Distribution File, a compressed Apache ANT archive and the Agent installation files (Apache ANT script and properties, cmd and shell files) to the Agent Distribution Folder.
-
Launch a cmd or shell prompt that will
-
Verify the JAVA_HOME on the Agent Machine
-
Uncompress the copied Apache ANT archive
-
Start an orchestrating ANT script that will execute steps 5 to 13 on the Agent Machine
-
-
ANT script: detect the Operating System details of the new Agent Machine. This is needed to (un)install services or daemons. Currently Windows, several Linux flavors and AIX are supported. For Linux Redhat and Debian flavors both Systemd and SystemV are supported
-
ANT script: uncompress the agent distribution
-
ANT script: Copy installation properties and cmd or shell files
-
ANT script: Stop the ALM Agent service or daemon if it is running
-
ANT script: Uninstall the previous ALM Agent if requested
-
ANT script: Install the new IKAN ALM Agent: it will start a (different) ANT script, that will perform in the same way as the console IKAN ALM Agent installation
-
ANT script: Register the IKAN ALM Agent as a Windows service or Linux daemon
-
ANT script: Start the registered service or daemon
-
ANT script: cleanup temporary directories
-
Finally delete the files that were copied in step 3. This action will always run, even if some of the previous steps failed, or if the installation was cancelled or aborted
Before the installation can be started, General fields and SecureShell or PowerShell connection parameters should be filled out.
In the Global Administration context, select Machines > Overview
Click the ![]() Install link on the Machines Overview panel next to the Machine you want to Install an Agent on.
Install link on the Machines Overview panel next to the Machine you want to Install an Agent on.
Fill out the fields in the Installation Configuration panel. Fields marked with a red asterisk are mandatory
If the "Display Form Help" option is activated, an inline description will be shown for each of the fields.
General Installation Fields
| Field | Explanation |
|---|---|
Java Home |
The location of the Java Virtual Machine used to launch the Agent. This should be a Java 11 JDK. For example: Note: On Unix or Linux systems, specify the path of the real Java installation (and not to a symlink), as the installation will verify the existence of specific jars under the provided path. |
Agent Installation Location |
This is the location where the Agent will be installed, e.g.,
Further on in this guide we will refer to this location as ALM_HOME. |
Agent Distribution Folder |
The location on the Agent Machine where the Agent Installation files
should be copied to. e.g., It is recommended to make this directory different from the Agent Installation Location, and not make it a subdirectory, for example. After a successful installation the used installation files will be stored in a current subdirectory of this location. |
Secure Server-Agent Communication |
Flag to specify secure communication between the ALM Server and Agent. |
Agent Port |
Optional, defaulted to the value of the Machine definition. The port the Agent will be listening on. The default value is ”20020”. If you change this value, you will also have to change the ”Agent Port” property of the Machine representing this Agent in the IKAN ALM GUI. |
Server Hostname |
Optional, defaulted to the value of the Machine definition. The hostname (or IP address) of the IKAN ALM Server machine. The Agent will try to connect to the Server by using this name or IP address. |
Server Port |
Optional, defaulted to the value of the Machine definition. The port the IKAN ALM Server is listening on. The Agent will try to connect to the Server on this port. The setting can be verified in the IKAN ALM Global administration: Go to Global Administration > System Settings Panel Local Environment: the value of “IKAN ALM Server” represents the IKAN ALM Server Machine Go to Global Administration > Machines > Overview Check the “Server Port” property of the IKAN ALM Server Machine. If no Server Port is defined on the ALM Server Machine, port 20021 will be used. |
Agent Hostname |
Optional. Leave this field empty unless you want to override the automatically detected hostname of the Agent. For example, to use a fully qualified domain name like
|
Agent IP Address |
Optional. Leave this field empty unless you want to override the automatically detected IP address of the Agent. For example, to use an IP Address which differs from the internal IP address for communicating with the IKAN ALM server. It is important that the IP address entered here matches the IP address of the Agent Machine (in the IKAN ALM GUI). |
The following first three fields are the port numbers specific to the Karaf container hosting the IKAN ALM Agent daemon. Normally, there is no need to change those port numbers unless you have port conflicts. For more information, refer to the Karaf Container 4.0 documentation: https://karaf.apache.org/manual/latest/#_instances
| Field | Explanation |
|---|---|
Agent Karaf RMI Registry Port |
The Karaf RMI registry port. The default value is “1099”. |
Agent Karaf RMI Server Port |
The Karaf RMI server port. The default value is “44444”. |
Agent Karaf SSH Port |
The Karaf SSH port. The default value is “8101”. |
Agent Karaf Logfile Path |
Relative path to the Karaf log of the IKAN ALM Agent log. This setting is used by the IKAN ALM Server when displaying the Machine Log of an Agent on the Machine Detailed Status screen. |
Run Agent Uninstaller |
Flag to indicate if the uninstallation process should run first to uninstall the previously installed IKAN ALM agent. The default value is “Yes”. |
Agent Uninstaller location |
Optional. Location of the Uninstaller for manually installed Agents. There is no need to set this for Agents that have been installed using this page. You need to set this if you want the installation procedure to
automatically uninstall an Agent that was previously installed manually.
For example, if an ALM 5.8 Agent was installed using the console
installer, you need to set this field to the location of that console
installer, like: The installation procedure will detect the version of the Agent and stop and remove the old Agent service. Note that this will only work correctly a) if the Agent service was installed using its default service name and b) if the uninstall.properties file from the console installer contains the correct values for uninstalling the Agent. |
Agent Stop/Start Timeout |
Timeout in seconds to wait for the Agent service to stop or start. |
Connection type |
Connection Type between the IKAN ALM Server and the target Agent Machine. Possible options are SSH (SecureShell) or PowerShell. After you have selected the Connection type, the appropriate SecureShell or PowerShell panel will be displayed underneath.. |
Connection Fields
Depending on the chosen Connection Type, fill out the fields in the SecureShell or PowerShell panel. Fields marked with a red asterisk are mandatory:
SecureShell
| Field | Explanation |
|---|---|
Hostname |
Optional. Hostname used when establishing an SSH connection with the Agent Machine. Leave this field empty unless you want to override the hostname or the ip address of the Agent Machine definition. |
Port |
SSH Port to connect to the Agent Machine, defaulted to 22. |
Authentication Type |
Select the required Authentication type. Available options:
|
User Name |
User Name to connect to the SSH Agent Machine. Note that this User will also be used to register the Agent daemon on Linux and Unix Machines |
Password |
Required Password for User and Password Authentication. Note that this Password may also be used to register the Agent daemon on Linux and Unix Machines |
Repeat Password |
Repeat the Password for User and Password Authentication |
Key File Path |
Required Path to the Key File containing the private key for Key Authentication. We advise you to generate the keys in the PEM file format. This can be done by adding |
Passphrase |
Optional Passphrase for Key Authentication. |
Repeat Passphrase |
Repeat the Passphrase for Key Authentication |
Shell type |
SSH Shell Type of the Agent Machine, Different processes will be executed depending on the Shell type. Available options:
|
Connection Timeout |
Timeout in seconds for establishing an SSH connection. The default value is 20 seconds. |
PowerShell
| Field | Explanation |
|---|---|
Hostname |
Optional. Hostname used when invoking remote PowerShell commands on the Agent Machine. Leave this field empty unless you want to override the hostname or the ip address of the Agent Machine definition. |
User Name |
User Name used when invoking remote PowerShell commands on the Agent Machine |
Password |
Password used when invoking remote PowerShell commands on the Agent Machine |
Repeat Password |
Repeat the Password used when invoking remote PowerShell commands on the Agent Machine |
Executable name |
Optional. PowerShell executable. When left empty, powershell.exe will be used. |
Executable Path |
Optional. Path to the PowerShell executable. When left empty, it is assumed the PowerShell executable is present in the PATH. For Example |
Timeout |
Optional. Timeout in seconds after which the PowerShell process will be forcibly terminated. |
|
See the Requirements section (2.3) with some specifics about the SSH and PowerShell connection. |
Once you filled out the fields as required, click Save.
If the Action is successful, you can proceed and run the Agent Installer.
Running the Agent Installation
Start the Installation by clicking the Install button in the Machine Info panel.
The Installation Configuration will be validated. When it is ok the "Confirm Agent Installation" popup window is displayed.
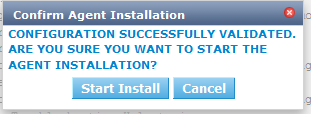
Click Start Install to Start the Agent Installation.
The Agent Installation will be started by the IKAN ALM Server. The different installation steps will be executed as described in the introduction of this chapter. The process will be logged in the "Agent Installation Status" panel. Its status will change from "No Installation Running" to "Installation in progress".

You may activate the "Auto Refresh" option, it allows you to follow the execution steps of the Agent Installation. Once the Installation has finished, the "Auto Refresh" function will be stopped automatically.
You may abort the installation process by clicking the "Abort" button below the "Agent Installation Status" panel.
The Confirm Install Abort popup window is displayed.
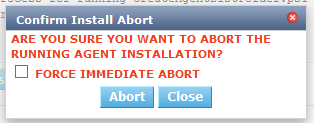
Click Abort to Abort the Agent Installation.
The IKAN ALM Server will try to cancel the installation during execution. When you select the "Force Immediate Abort" option the server will kill the running processes abruptly.
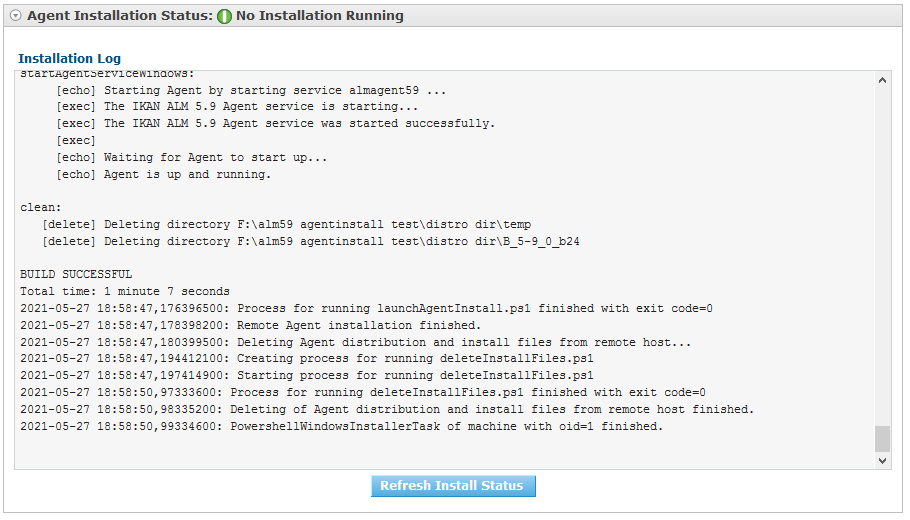
When the installation has finished, the value of the "Agent Installation Status" panel changes to "No Installation Running".
Verify the Installation Log to see if the Installation was successful. Depending on the "Run Agent Uninstaller" option you should see multiple "BUILD SUCCESSFUL" messages in the log. Below a screenshot of a Successful installation with a PowerShell connection:
You may check the Activity of the newly installed Agent and verify whether it is running correctly.
Select the Back button in the Machine Info panel.
You will return to the "Machines Overview" screen.
Click the ![]() Status link of the newly installed Agent on the Machines Overview panel.
Status link of the newly installed Agent on the Machines Overview panel.
The "Machine Detailed Status" page will be shown and you can verify the "Current Activity" and "Machine Log".