Demo Installation Guide for Linux
Introduction
Many IT organizations control their application development with the aid of tools. These tools vary depending on the size of the development team or the complexity of the applications being developed. Most of these tools enable some form of version control, maybe even some form of defect tracking and probably some form of change management to assure control over the development process of the code. But what happens when code leaves the development team(s)? To what extent is your (re)build process for QA and Production automated? How sophisticated are your deployment capabilities?
IKAN ALM extends the control beyond the development teams. IKAN’s (r)evolutionary approach combines existing development tools with automated build and deploy management and lifecycle support for any size of organization. You do not want to miss the (r)evolution!
This document describes how to install the IKAN ALM 5.8 Demo application. This demo version offers most of the functionality of the full version, although it is limited in the following ways:
-
Time-limited: the license expires 30 days after installation
-
Usage-limited: 2 defined machines, 2 floating users, 2 reserved users.
-
Database-limited: a light-weight HSQLDB database is used, the full version supports MySQL, Oracle, DB2, MS SQL Server and (on demand) any other JDBC compliant database
-
Server and Agent processes will run in the same JVM of the OSGi container. In the full version they may be installed as daemons running independently on local or remote systems.
This document will guide you through the installation of the IKAN ALM 5.8 Demo application. However, if you need additional assistance, don’t hesitate to contact our support services via e-mail at support@ikanalm.com.
Prerequisites
Before starting the installation, verify and, if necessary, update the configuration of the target install system.
|
It is recommended to uninstall previous IKAN ALM Demo installations before doing a re-install. Uninstalling the IKAN ALM Demo Application |
Linux-based Operating System
The IKAN ALM 5.8 Linux Demo installation has been tested on current versions of:
-
Redhat Fedora
-
SUSE Linux Enterprise
-
OpenSUSE
-
Ubuntu
-
Debian
-
Mandriva
-
CentOS
However, the IKAN ALM Demo Application should also work on different Linux flavors.
Java SE Development Kit
Java SE Development Kit (JDK) V1.7.x or 1.8 is required.
All IKAN ALM components need at least a Java Development Kit (JDK) or a Server Java Runtime (Server JRE ). IKAN ALM has been tested to run with both Oracle Java and OpenJDK. The Java SE Server Runtime Environment (Server JRE) or Software Development Kit (SDK) can be freely obtained from Oracle’s website. Both 32-bit and 64-bit versions are supported.
The latest version of Java SE can be downloaded from http://www.oracle.com/technetwork/java/javase/downloads/index.html.
It can both be installed as root or as a regular user (e.g., in the user’s home directory) and multiple versions can coexist on your system. You can also install it via your Linux distribution’s package manager. Note that most distributions only include OpenJDK by default and that the Oracle repositories must be explicitly enabled, e.g., for Ubuntu you must enable Canonical’s "partner" repository.
Subversion Server (OPTIONAL)
|
IKAN ALM can be installed without Subversion. That is the reason why this prerequisite is optional. However, if you want to run the included demo project, Subversion version 1.8 or higher must be installed. |
IKAN ALM integrates with existing versioning tools like Subversion (SVN), Git, Microsoft Team Foundation Version Control (TFVC), Concurrent Versions Systems (CVS), … You must establish a connection with an existing Version Control Repository (VCR) in order to make builds or to deploy build results with IKAN ALM.
This repository may reside on the same system as the IKAN ALM Demo, or on a remote host. In both cases you must specify the parameters to connect with this repository. This can be done after the installation of IKAN ALM.
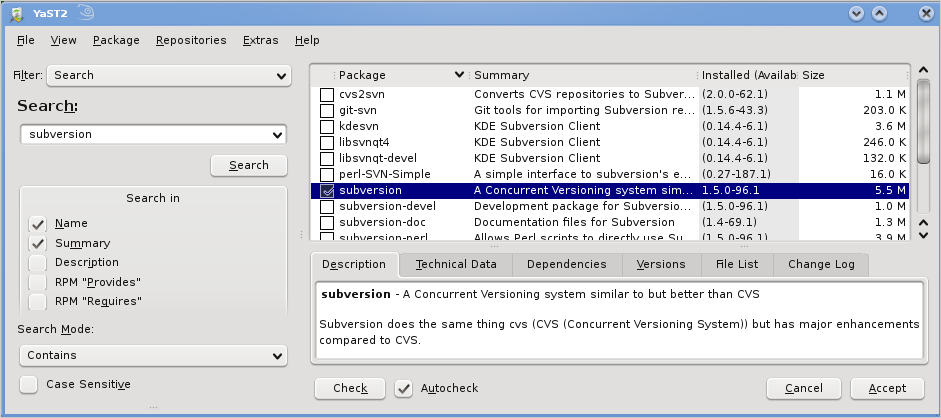
This Demo installation includes the creation of a Subversion repository. In order to connect to this repository, you need Subversion version 1.8 or higher installed on the IKAN ALM Demo system. Subversion can be downloaded from the apache website http://subversion.apache.org.
You can also install Subversion via a Package manager installed on your Linux. For example on Suse Linux, with YAST:
Installation steps
|
The screenshots used in this document assume the English language has been selected. For the other languages the screens will be similar. The layout of the screenshots can be different, depending on the Linux distribution you are using. |
Step 1: Starting the Installation
IKAN ALM Demo 5.8 will be distributed as a .tar.gz file named ikanalm_trial.tar.gz.
Once extracted, you will find an executable .jar file, this installation guide and a license file.
Run the executable jar by using the following command in a shell:
java -jar alm_demo_5-8.jarThe following window will pop up:
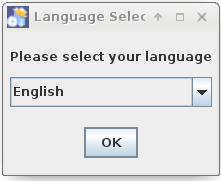
Select your preferred installation language and click OK.
The following welcome screen will pop up:
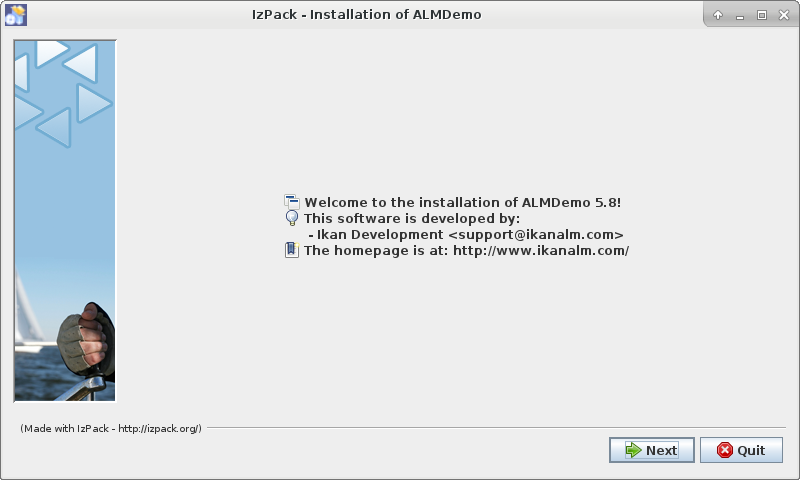
Click Next to continue.
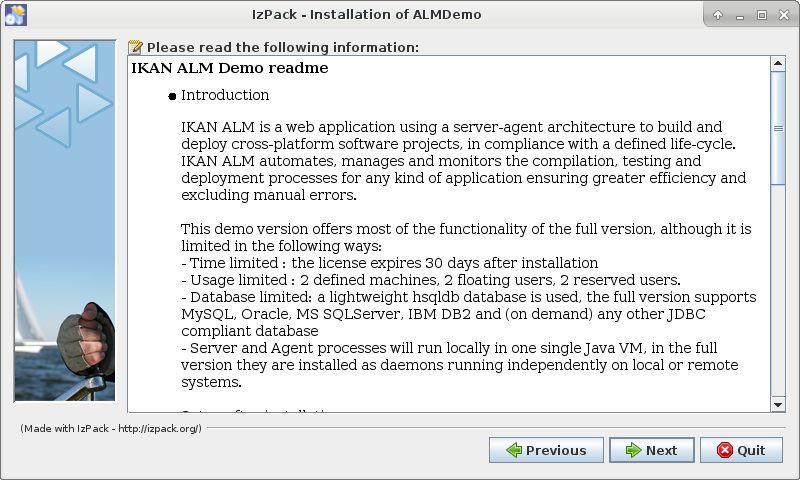
Carefully read the readme information. Click the Next button to continue.
Step 2: License Agreement
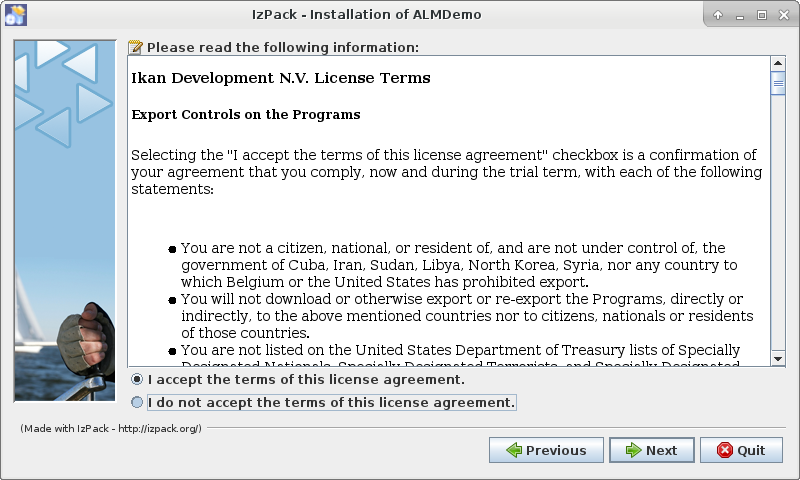
Read the license agreement carefully, select the option I accept the terms of the license agreement, and click the Next button.
Step 3: Installation Location
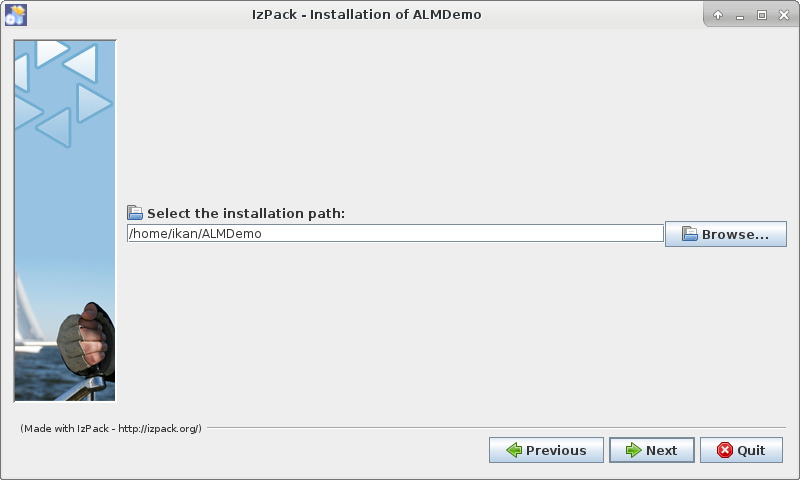
Select the home directory for installing the Demo application on your file system. You can change this location with the Browse button.
Further on in this document, this location will be referred to as ALM_HOME.
Click Next to continue.
If the directory already exists, a warning message will appear.

All installation packs must be installed.

Click Next to proceed to the selection of a Java Development Kit (JDK).
Step 4: Select a Java Development Kit
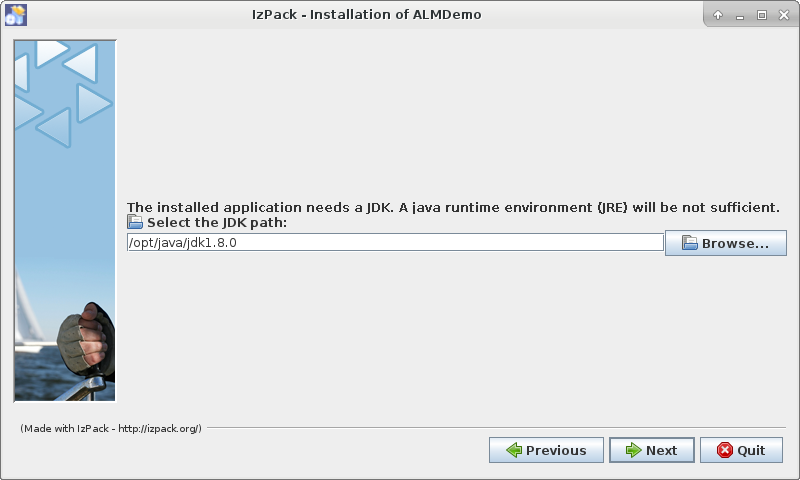
As mentioned in the section Java SE Development Kit, a Java Development Kit (JDK) version 1.7 or 1.8 is required.
|
A Java Runtime Environment (JRE) will not be sufficient! |
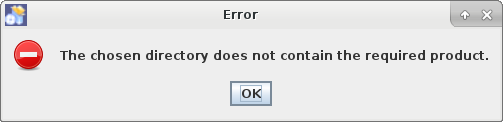
If the selected directory does not contain a proper JDK, the following error message will be displayed:
Step 5: Configuration Settings
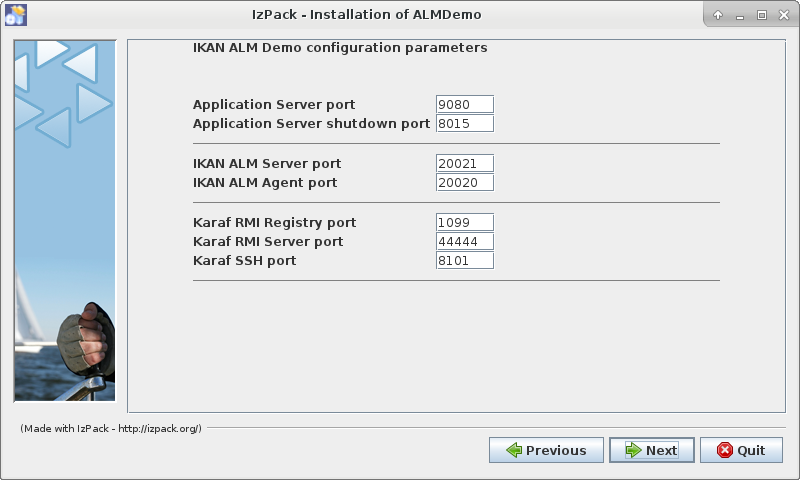
Configure the network ports used by IKAN ALM. Normally, the defaults presented should be OK, but it is important that these port numbers are not in use by other processes.
You may check the ports in use with the netstat command: open a shell and provide netstat
-ltun in order to show the listening TCP / UDP ports.
In the remainder of this guide, the Application Server Port will be referred to as ALM_APPSERVER_PORT.
Click Next to obtain an installation summary.
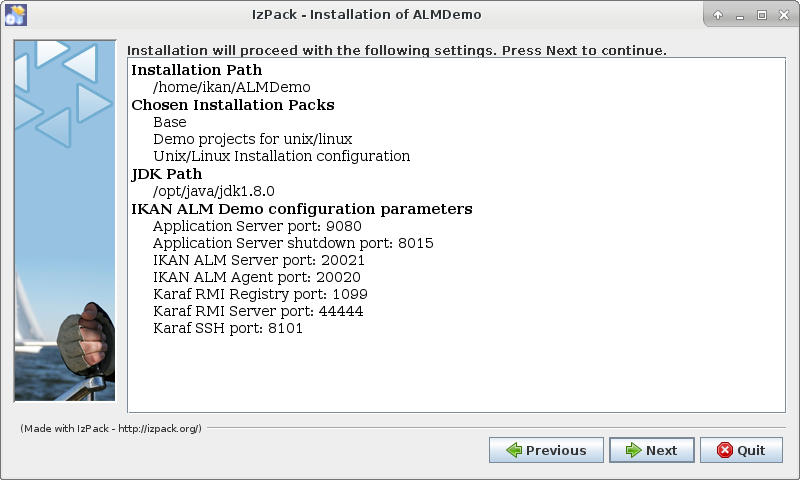
Click Next to start the installation with the given settings:
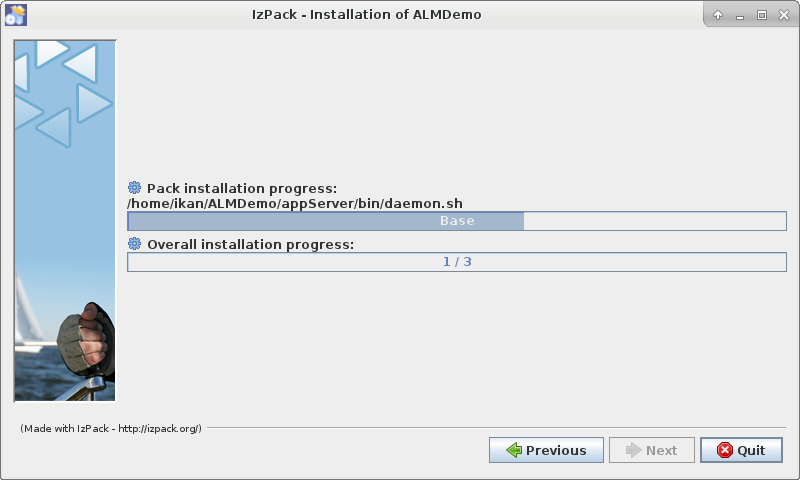
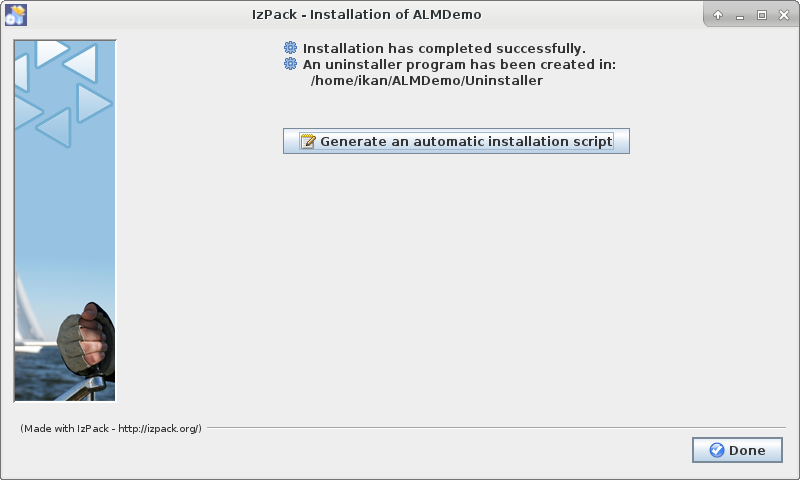
Once the installation is finished, click Next to proceed with setting up the Menu items.
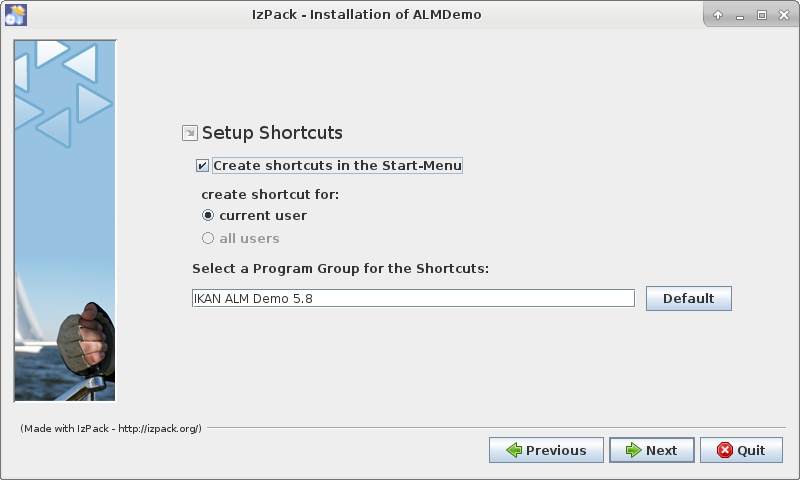
Setup After Installation
Installing the IKAN ALM License
Together with this Installation Guide and the alm_demo_5-8.jar install file, you should have received a license file named alm_license.lic.
This demo license will expire after 30 days (Step 2: License Agreement). Contact support if you did not receive the license file, or if you want to extend the license period.
Start the IKAN ALM Demo Server:
-
Via the Menu:
Applications > IKAN ALM Demo 5.8 > Start IKAN ALM Demo server
-
Or via the shell file:
Via the startDemo.sh script in the ALM_HOME directory.
Open the IKAN ALM web application via a web browser:
Provide the following URL: http://MACHINE_NAME:ALM_APPSERVER_PORT/alm (e.g., http://ikan009:9080/alm)
If this is your first installation, no license will be installed and you will be prompted to provide one.

Enter or browse to the file location of the alm_license.lic file you received and click Submit.
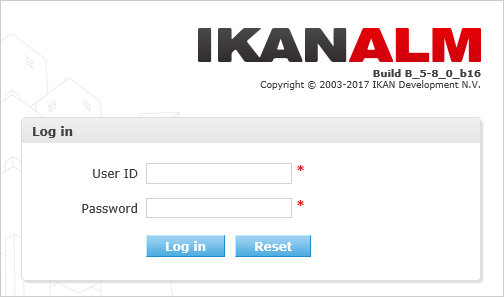
The Log in screen will appear when the license is installed. Log on with User ID global and Password global.
Using the IKAN ALM 5.8 Demo Application
Starting and Stopping the IKAN ALM Server
The IKAN ALM Demo Server must be running in order to work with IKAN ALM.
Start the IKAN ALM Demo Server:
-
Via the Menu
Applications > IKAN ALM Demo 5.8 > Start IKAN ALM Demo server
-
Or via the shell file:
Via the startDemo.sh script in the ALM_HOME directory.
Stop the IKAN ALM Demo Server:
-
Via the Menu
Applications > IKAN ALM Demo 5.8 > Stop IKAN ALM Demo server
-
Or via the shell file:
Via the stopDemo.sh script in the ALM_HOME directory.
Opening the IKAN ALM Web Application
-
Start an internet browser
-
Provide the following URL: http://MACHINE_NAME: ALM_APPSERVER_PORT/alm
|
MACHINE_NAME may be replaced by the machine name or IP address, e.g., 127.0.0.1, localhost, ikan001, or …) of the system where you installed the IKAN ALM demo ALM_APPSERVER_PORT: as configured in Step 5: Configuration Settings (default port: 9080). For example, an IKAN ALM start URL could be http://ikan009:9080/alm. |
An internet browser window will appear, displaying the IKAN ALM Log in screen.
Logging on to the IKAN ALM Web Application
You are ready to start working with the IKAN ALM web interface.
You may add this link to your internet browser’s Favorites.
Log on to IKAN ALM with one of the following predefined User IDs and passwords:
| User ID | Password. | Access Rights |
|---|---|---|
user |
user |
User |
project |
project |
Project Administration |
global |
global |
Global Administration |
We suggest that you start with User ID global (Password: global), since this User has complete access to all components in the IKAN ALM Demo.
Provide the User ID and Password, and select Log in. The IKAN ALM home page will be displayed and you can start working in IKAN ALM.
IKAN ALM Demo Projects
The IKAN ALM Demo Installation includes two completely configured demo projects with a versioning system (Subversion), scripting tools, scripts and sources. The global administration and project administration are fully set up and the projects are ready for build and deploy activities.
Customers Project
The Customers project is a small web application, written in Java, for managing a trivial customers database. Its lifecycle contains three stages: the CONTBUILD, TEST and PRODUCTION levels.
-
The CONTBUILD level will automatically build the sources when changed, ensuring Continuous Integration.
-
The TEST level will upload generated test data into a test database and deploy the application to the IKAN ALM web server (Apache Tomcat) under a test context.
-
The PRODUCTION level will deploy the application to the IKAN ALM web server (Apache Tomcat) under a production context.
Scripts are executed with Apache Ant.
For a detailed description of this project, refer to the chapter Sample Java Project (Projects).
Monocalendar Project
The Monocalendar project is a stand-alone calendar application written in C Sharp. Its lifecycle in the Head Project Stream also contains three levels:
-
CONTBUILD for Continuous Integration
-
TEST for the rebuild and creation of an NSIS installer
-
PRODUCTION for installing/uninstalling the application.
|
The scripts are executed with NAnt and Microsoft .NET Framework 2.0 or higher is needed for compilation. As this may not be installed on a Linux OS, we will not describe this project here. Install the IKAN ALM Windows demo if you want to run the Monocalendar project. |
Documentation
The IKAN ALM User Guide is available in the following formats:
-
in PDF format under ALM_HOME/doc/ALMUserGuide.pdf
-
in HTML format, in the ALM web application:
Select Help on the main menu. A new internet browser window will pop up, displaying the “Table of Contents” of the “IKAN ALM Help”.
-
as context-sensitive help on each ALM user interface screen.
Click the
 icon next to the selected menu indication to access it.
Sample Java Project (Projects)
The Customers project is a small web application, written in Java, for managing a trivial customers database. Its lifecycle contains three stages (Levels):
-
CONTBUILD Level
This Level will automatically build the sources when changed, ensuring Continuous Integration
-
TEST Level
This Level will upload generated test data into a test database and deploy the application to the IKAN ALM web server (Apache Tomcat) under a test context.
-
PRODUCTION Level
This Level will deploy the application to the IKAN ALM web server (Apache Tomcat) under a production context.
The scripts used by this Project are executed with Apache Ant.
The following sections describe the different steps:
Connecting With the Subversion Repository
During the Demo installation a Subversion repository will be created, which contains the sources and scripts of the Customers project. In order to connect to this repository, you need a running Subversion server, as described in this section. In order to start working with the Customers project, you need to make sure that IKAN ALM can connect to the Subversion repository.
Make sure that the IKAN ALM Server is running and log in as User global (Password: global).
Select ![]() Global
Administration > Version Control Repositories > Overview and specify Subversion in the Type field of the Search Version Control Repositories panel.
Global
Administration > Version Control Repositories > Overview and specify Subversion in the Type field of the Search Version Control Repositories panel.
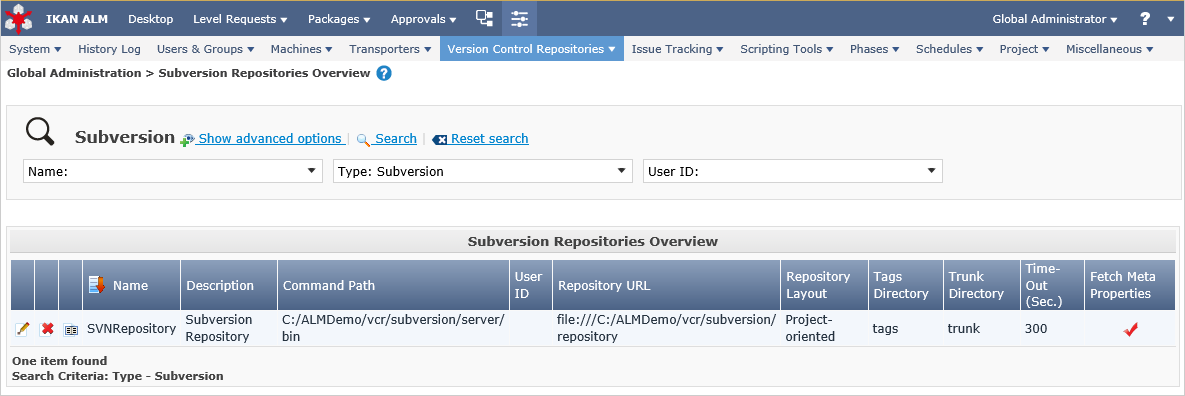
The Subversion Repository definition was created during the installation, and an attempt was made to detect a locally installed Subversion server. Most settings are OK to connect with the Subversion Repository created in the ALM_HOME/vcr/subversion/repository, but its Command Path might need to be adapted in case it could not be detected during installation. By default, the repository does not need a User ID or Password.
Click the Edit ![]() icon.
icon.
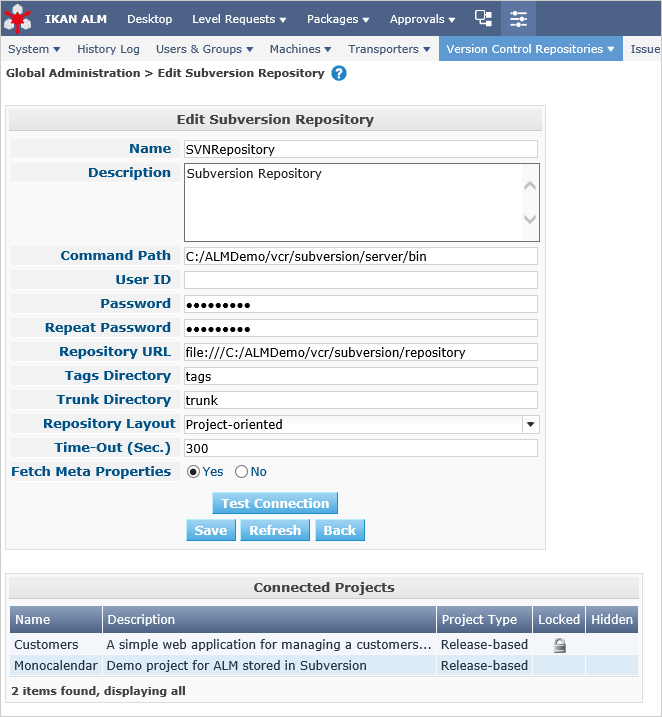
Change the Command Path to the location where the Subversion Client command (svn) resides (e.g., /usr/bin). Note that only the directory path must be specified, do not include the command itself.
Click the Test Connection button in order to verify the Subversion definition. An Info message will indicate if the definition is correct. If not, an error message will indicate what went wrong.
Do not forget to click the Save button in order to confirm your changes.
Managing Your Desktop
The Desktop allows you to observe the actions (Builds, Deploys) in a project. If you log on for the first time, your Desktop will be empty.
In this section, we will create a desktop item for the Customers project.
On the Desktop screen, click the Add to Desktop button.
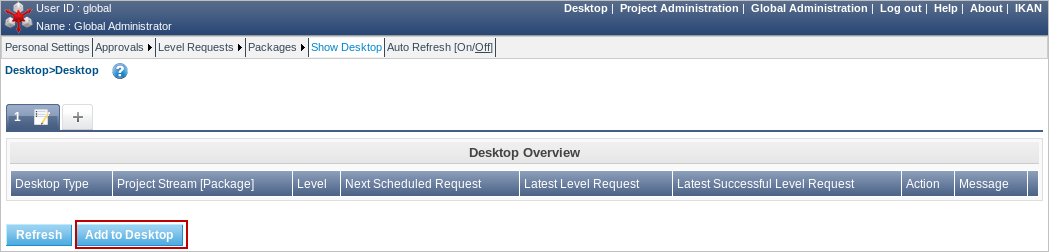
The Add to Desktop window pops up.
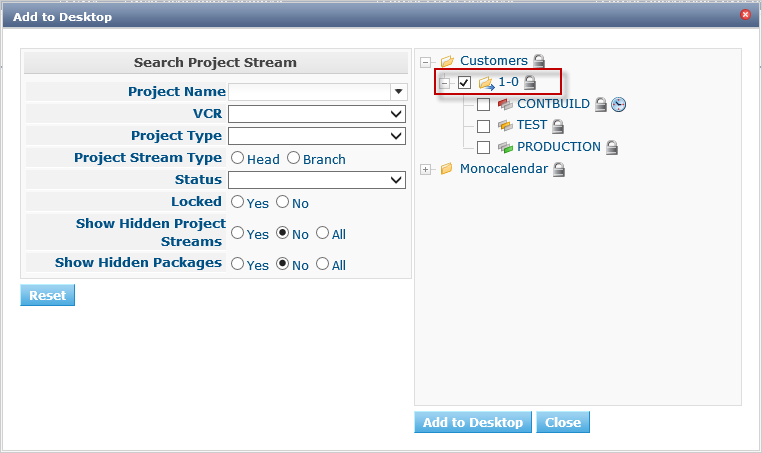
A Project may have different lifecycles. In IKAN ALM, those lifecycles are organized in Project Streams. In order to follow up all the activity in a Project Stream, you must create a Project Stream Desktop Type.
Select the "1-0" Project Stream of the Customers Project, then click the Add to Desktop button.
A confirmation message will appear if the item is successfully added to the Desktop. Press the Close button to close the Add to Desktop window.
|
You can also select individual Levels in the tree and add them to your Desktop. |
On the Desktop Overview, expand the Project Stream Levels by clicking the ![]() icon in front of the Customers 1-0 Project Stream Desktop item.
The following Levels are now displayed:
icon in front of the Customers 1-0 Project Stream Desktop item.
The following Levels are now displayed:
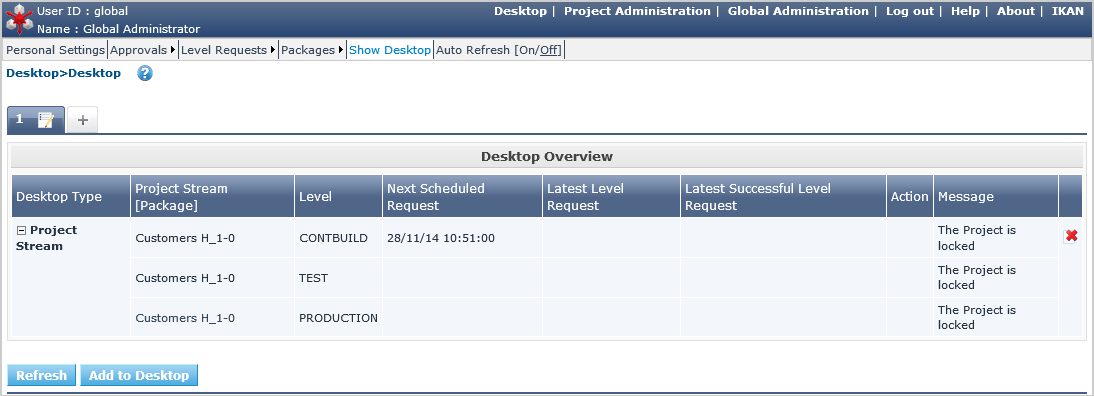
As you can see, there is not much activity going on in the Customers project yet, since the project is locked. In the next step, we will unlock the project.
Unlocking a Project
In order to build the Customers Project, it must be unlocked together with the corresponding Levels in the Project Administration section. This action can only be performed by a User having Project Administration rights, like the “global” or “project” User ID (See Logging on to the IKAN ALM Web Application).
Select ![]() Project
Administration on the main menu to start the unlock procedure.
Project
Administration on the main menu to start the unlock procedure.
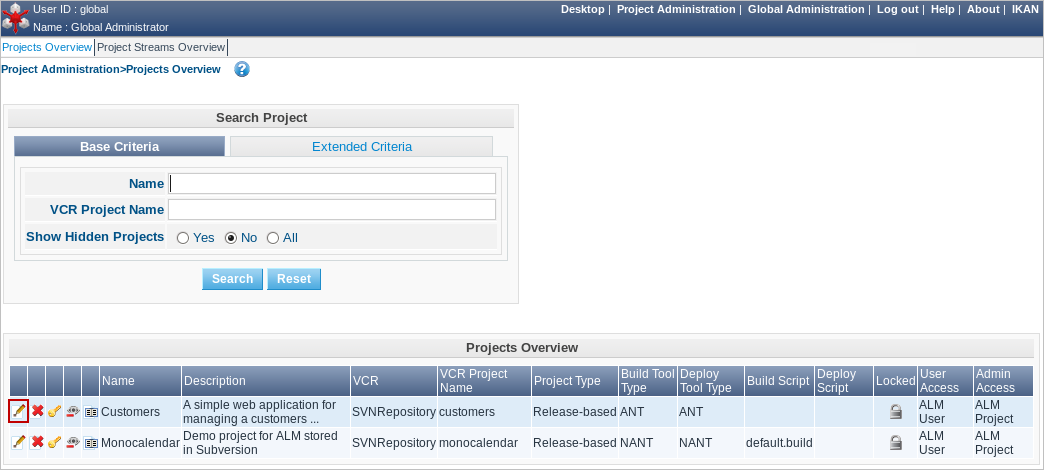
Click the Edit ![]() icon in front of the Customers Project.
icon in front of the Customers Project.
|
There is also an Unlock |
The resulting Project Info screen appears in the Customers Project Administration context. We are not going to change the Project Settings, but you could verify the existence of the Project in the Subversion repository by clicking the Check Project Name in the VCR button.
Select Audit Project on the submenu in order to check the consistency of the Project.

Before showing the Audit Project screen, several checks will be done to verify the setup of the Project.
You can click the ![]() button to get context-sensitive help on this function.
For more information, refer to the chapter Auditing
Projects in the IKAN ALM User Guide for more information.
button to get context-sensitive help on this function.
For more information, refer to the chapter Auditing
Projects in the IKAN ALM User Guide for more information.
If the project is consistent (branches, levels, environments, phases and parameters are valid), an Unlock link will appear in the Actions panel. Click this link to unlock the Project and its Levels.
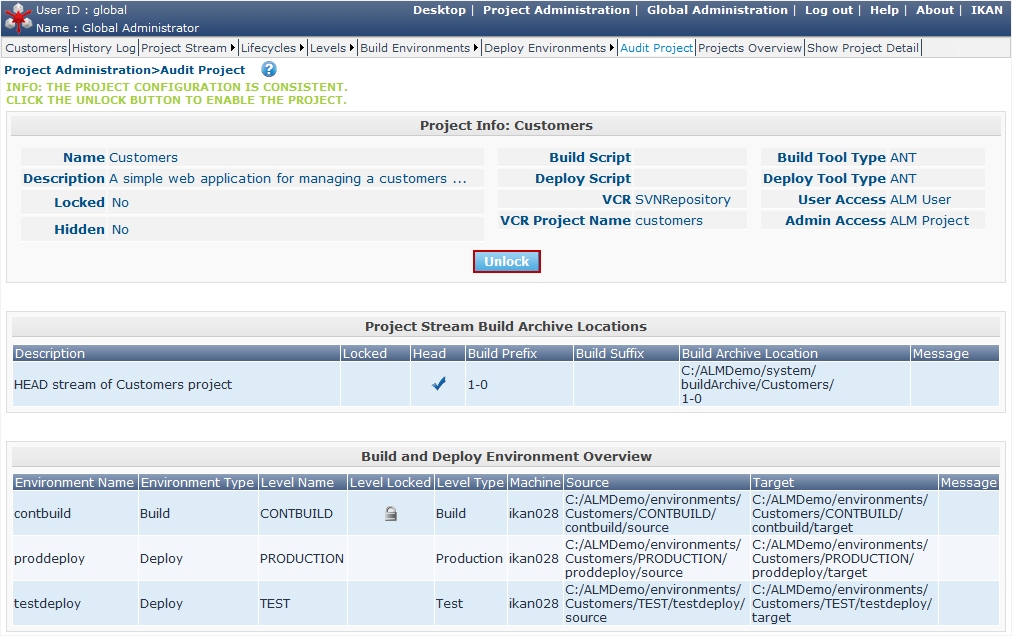
As a result, the Locked icons for the Levels will disappear.
The Project is not locked anymore.
Select the Project Administration ![]() icon on the main menu to verify that the Lock button for the Project also disappeared.
icon on the main menu to verify that the Lock button for the Project also disappeared.
As soon as the Project and its Levels are unlocked, there will automatically be some action in the Project. Check the next section to understand what is happening.
Building/Delivering in the Lifecycle of a Project
Automatic Build on the Build Level
Once the Project is unlocked, it will be built automatically.
Since a Continuous Build schedule is linked to the Project’s Build Level (CONTBUILD), the IKAN ALM scheduler will check at startup (and from then on every minute) whether there are changes in the trunk of the Subversion repository connected to the Project.
If changes have been made, or if there has never been a Build before (like in this case), a Build Level Request will be created.
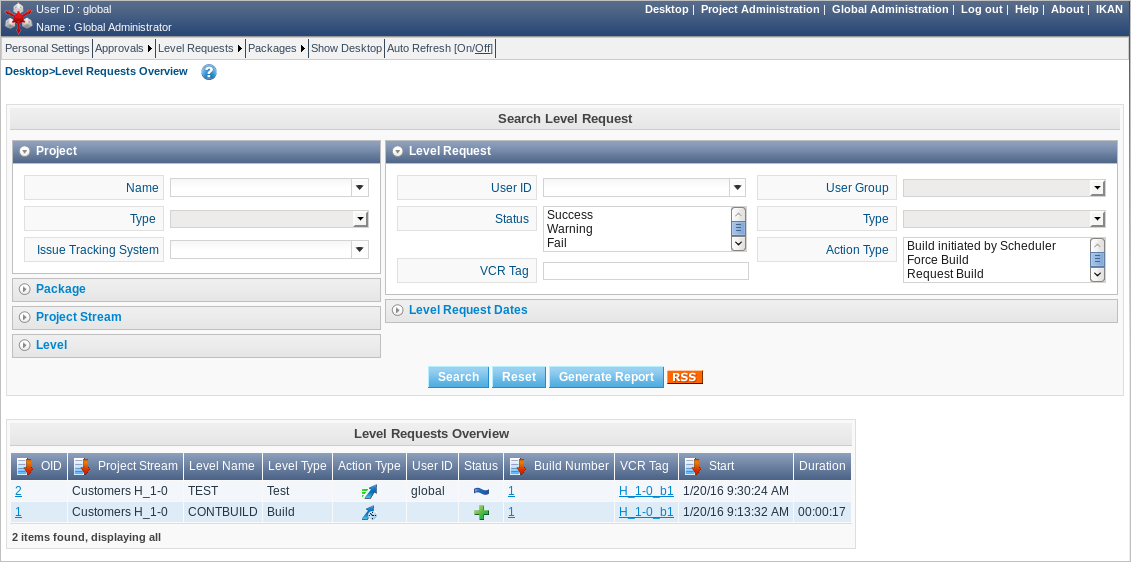
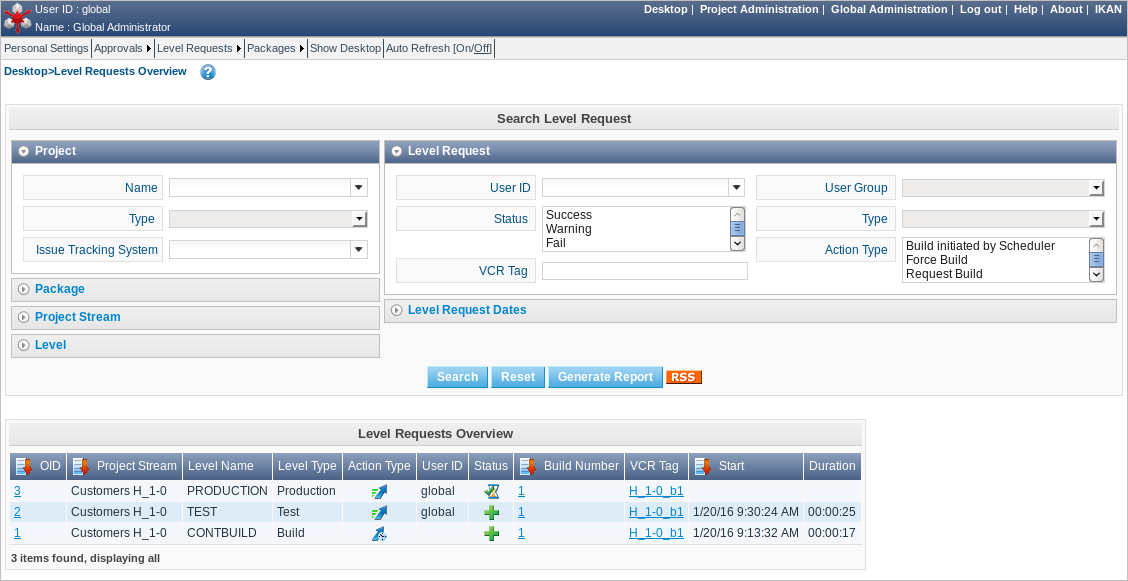
To verify the result of this Build Level Request select Level Requests > Overview Level Requests on the main menu.
The following overview will be displayed:
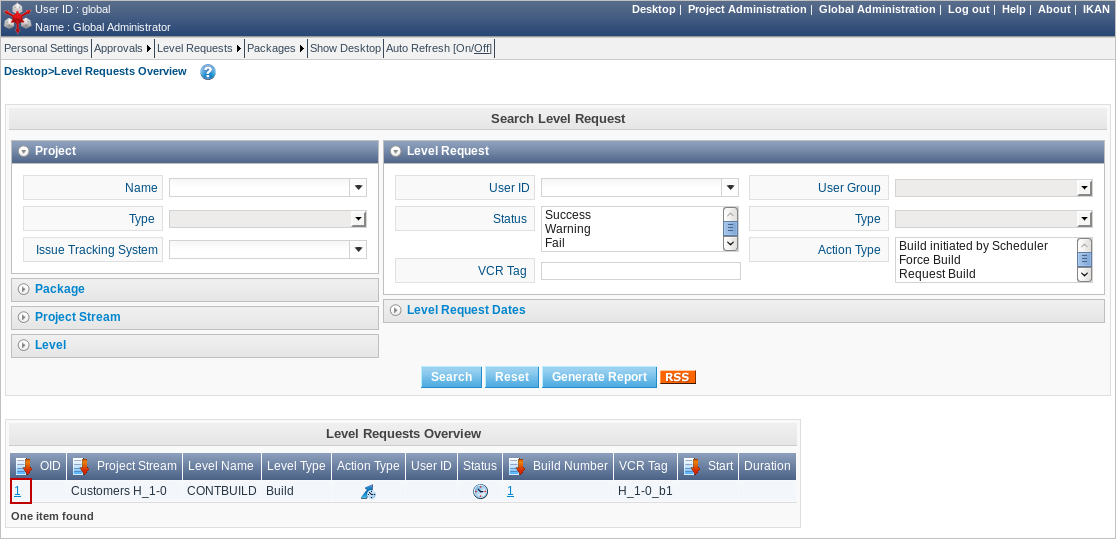
Select the OID (1) of the Level Request to display the Level Request Detail page on which you can verify what happened during the Build Level Request.
In IKAN ALM, the steps of the build process are called Phases. To see what happened during the Level Request, select the Phase Logs tab:
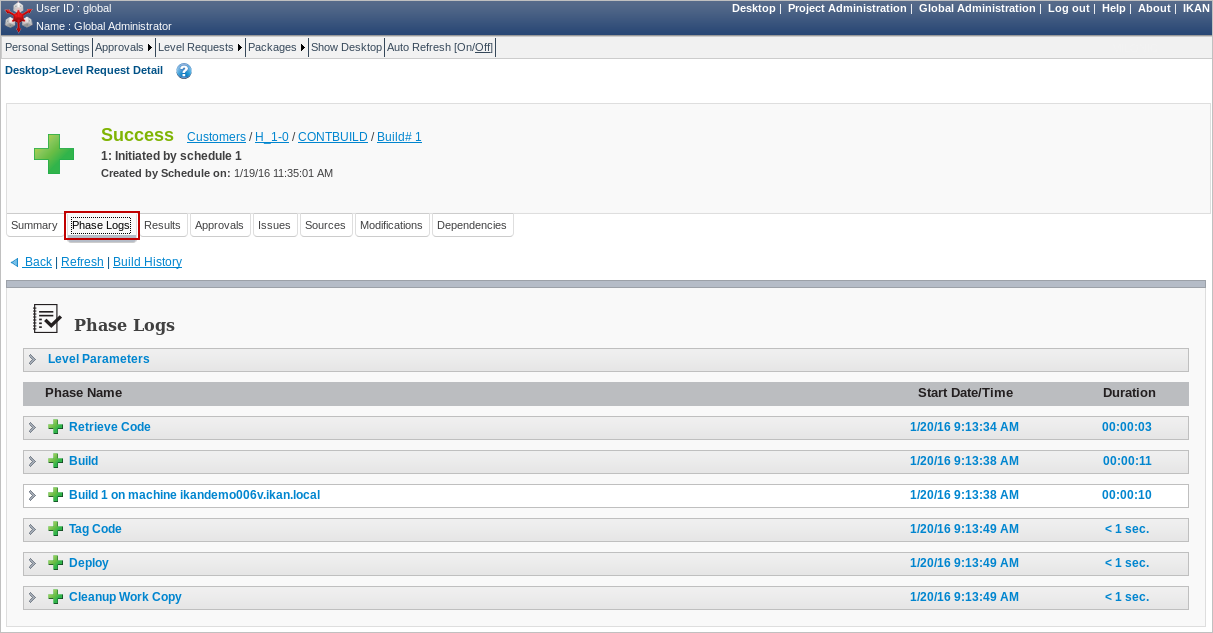
This page displays the logs of the Level Phases, the Build and Deploy actions and their Build and Deploy Phases executed during the handling of a Level Request. It also provides more detailed information regarding the used Parameters. Since the CONTBUILD Level has one Build Environment, there will be one Build Action with Build Phases, and no Deploy Actions. Try clicking on the names of the phases: this will expand the phase, displaying its details.
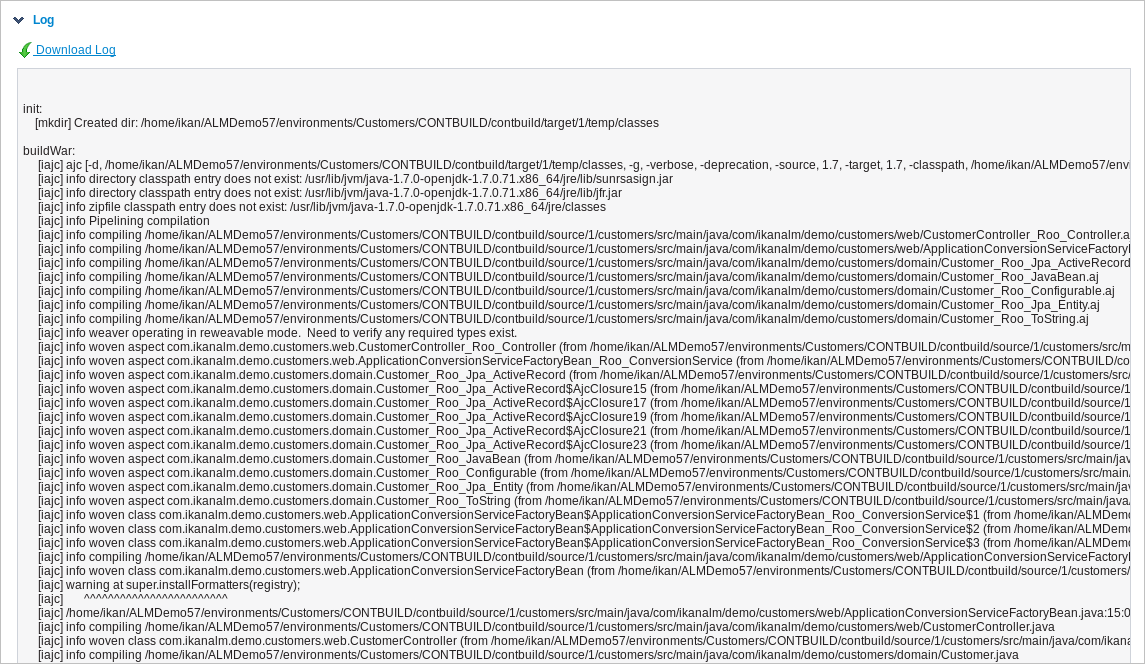
The log of the Execute Script Phase is the most interesting one. It should show a successful compilation process, the creation of a .war file, and some supporting tasks. To display it, expand the Build action (called Build 1 on Machine XXX). This shows the Build phases that were executed during the Build action. Next, expand the Execute Script phase. This will reveal the execution log, where you will find the output of the Ant build script that was executed.
Delivering the Build to the TEST Level
At this point there is a successful Build available on the first level of the Head Project Stream. We will now deliver it to the next Levels (TEST and PRODUCTION) in the lifecycle.
Select Desktop on the main menu.
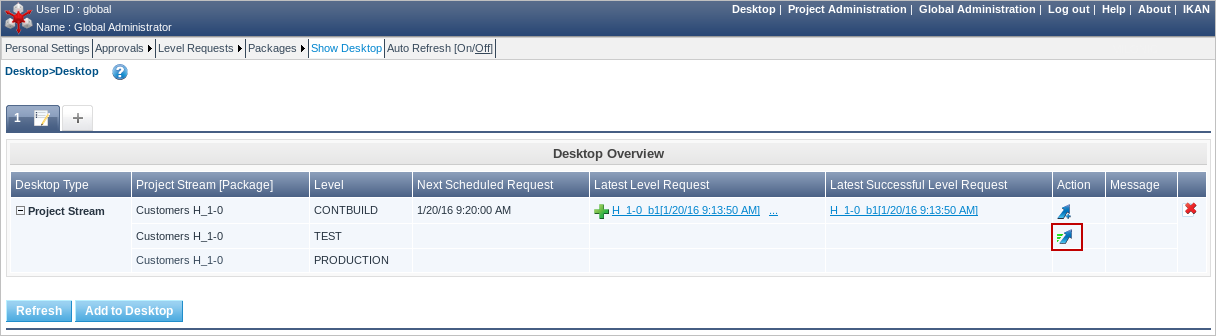
Click the Deliver ![]() icon at the right of the Customers 1-0 TEST Level.
icon at the right of the Customers 1-0 TEST Level.
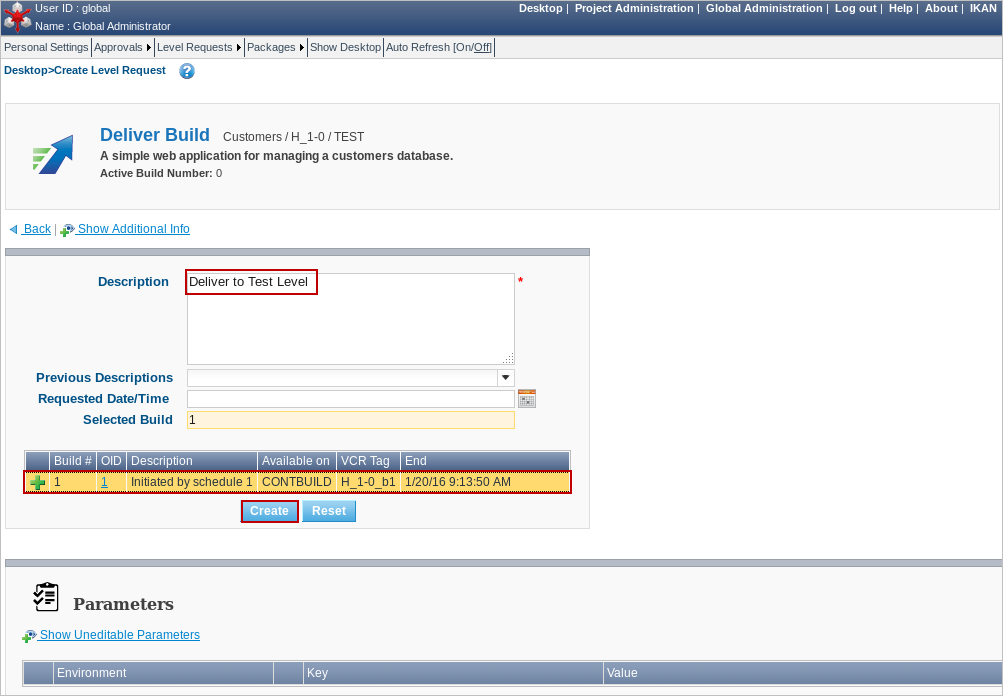
On the Create Level Request screen, provide a description and select the Build (1) by clicking the appropriate Build row.
|
If you leave the Requested Date/Time field blank, the Deliver Level Request will be executed immediately. |
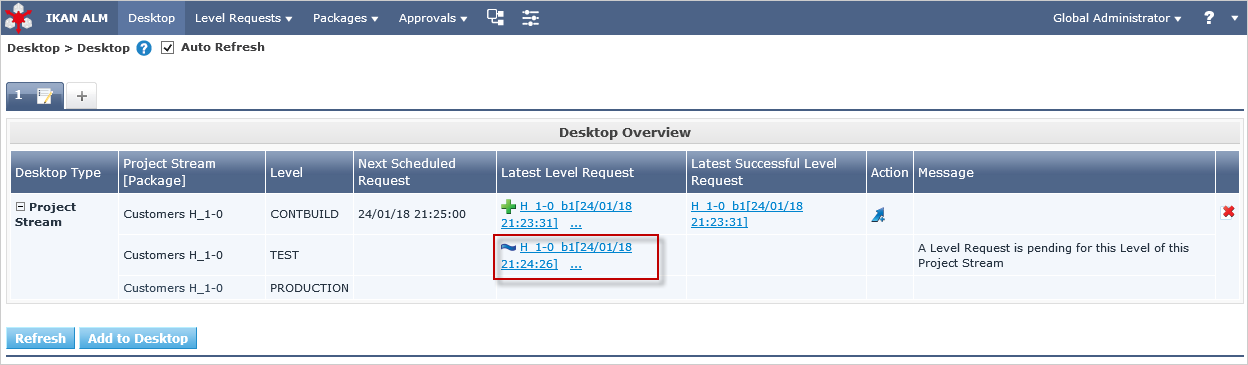
Click the Create button. You will be forwarded to the Desktop. A Deliver Build Level Request is created for the Test Level of your project.
The status of the Level Request is set to Waiting Date/Time (![]() ) until it will be handled by the IKAN ALM Server.
Then the status changes to Run (
) until it will be handled by the IKAN ALM Server.
Then the status changes to Run (![]() ).
).
On the Desktop Overview, click the Latest Level Request link for the TEST Level.
The Level Request Detail screen will be displayed.
Click the Refresh link or activate the Auto Refresh function on the submenu.
Finally, the Level Request should end with the status Success (![]() ).
).
What is the result of this Deliver to Test?
The Test Level of the Customers project contains a Deploy action. During the Deploy step, the Customers web application was deployed to the Tomcat server that also runs the ALM Demo. The application was deployed under a test context (“/customers_test”). Before the application was deployed, a database (a HSQLDB, also running in Tomcat) was uploaded with test data.
To see the deployed application, open a web browser and enter the following URL: http://MACHINE_NAME:ALM_APPSERVER_PORT/customers_test (for example: http://ikan009:9080/customers_test).
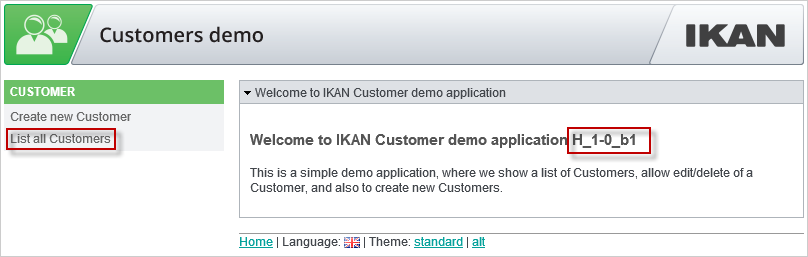
|
The general color of the application is green. This is to indicate that this is the test version of the application. The general color of the production version will be red. Also notice that the version of the sources (the VCR tag) that were used to build this version of the application, is shown in the welcome panel. In this example, the VCR tag is H_1-0_b1. |
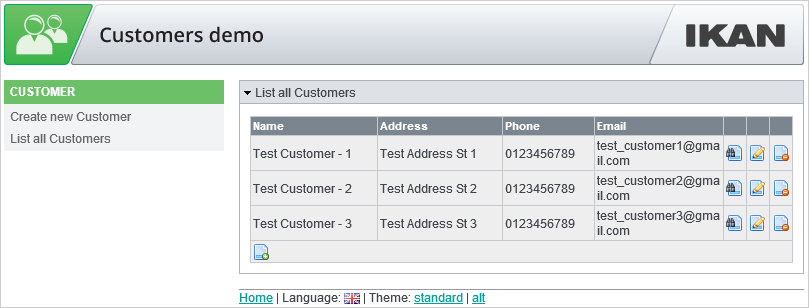
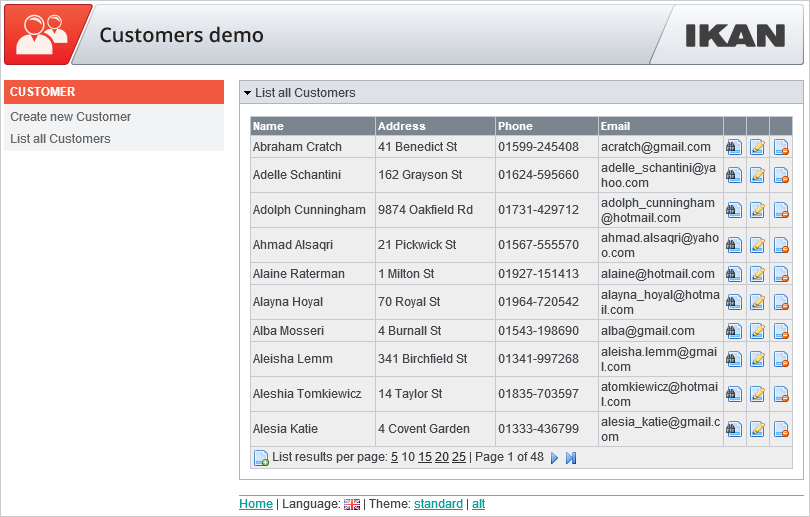
Click on the List all Customers link to display the list of all Customers defined in the test database.
Delivering the Build to the PRODUCTION Level
To see what happens next in the lifecycle, we will deliver to the Production level. We could do this in a similar way as for the Test level via the Desktop. An alternative way is to select Level Requests > Create Level Request on the menu.
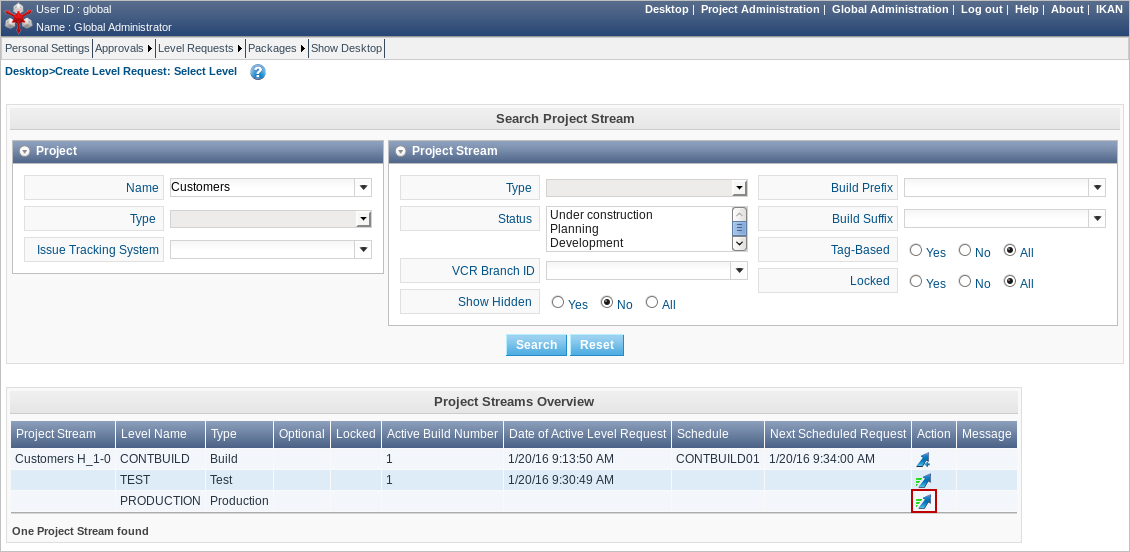
Click the Deliver ![]() icon at the right of the Customers H_1-0 PRODUCTION Level.
icon at the right of the Customers H_1-0 PRODUCTION Level.
As you did when creating the Level Request for the TEST level, provide a Description, and select the Build Number 1. Leaving the Requested Date/Time field blank means that the Deliver Level Request will be executed immediately.
Click the Create button.
You will be forwarded to the Level Requests Detail screen.
A new Level Request will be created, with status Awaiting
Pre-Approval (![]() ). Since a Pre-Approval is linked to the PRODUCTION level, a notification mail will be sent to all members of the ALM User User Group.
). Since a Pre-Approval is linked to the PRODUCTION level, a notification mail will be sent to all members of the ALM User User Group.
The newly created Level Request will stay in the Awaiting Pre-Approval status until the approval is granted.
Since the global user is a member of the ALM User User Group, select Approvals
> Outstanding Approvals on the main menu, then click the Approve ![]() link.
link.
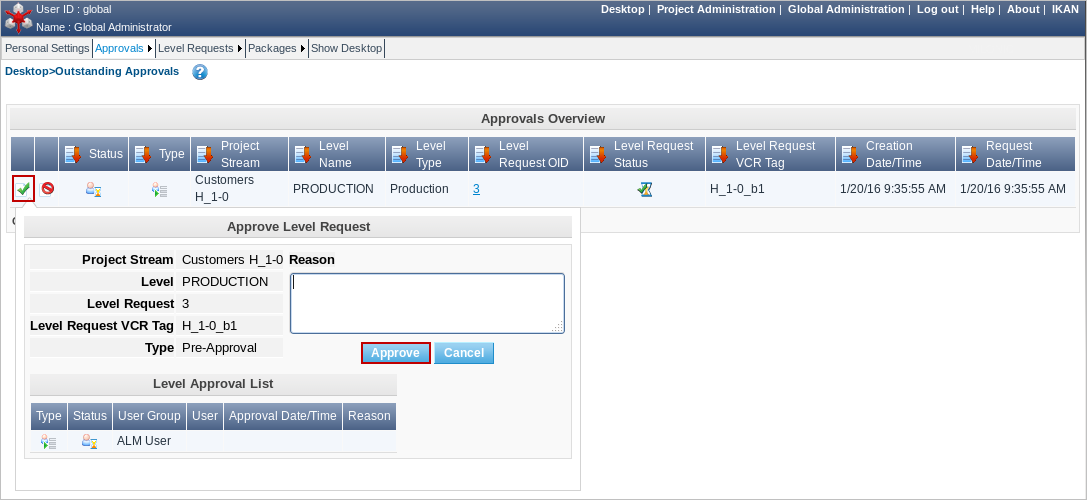
Enter any approval text (optional) and click the Approve button.
The Level Request will now be handled by the IKAN ALM Server.
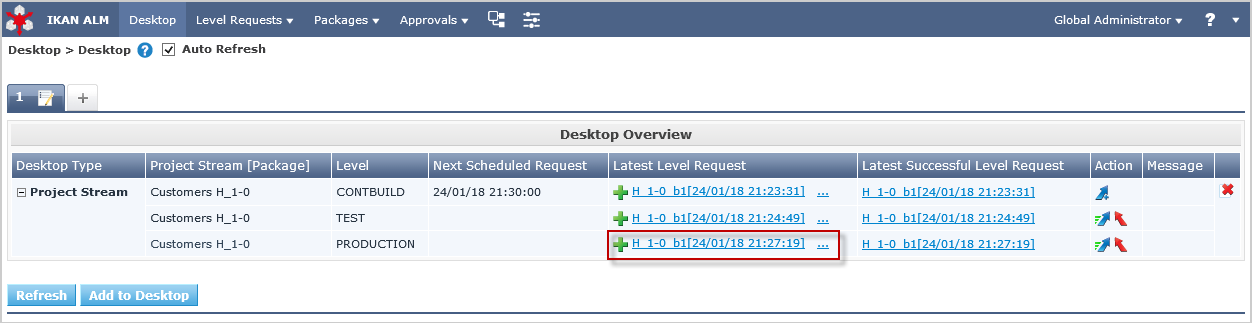
Return to the Desktop Overview by selecting Desktop on the main menu.
The status of the Latest Level Request for the Production Level is now set to Run (![]() ). Click the Refresh link or activate Auto
Refresh on the submenu.
Finally, the Level Request should end with the status Success (
). Click the Refresh link or activate Auto
Refresh on the submenu.
Finally, the Level Request should end with the status Success (![]() ).
).
You may click also click the Latest Level Request link on the Desktop Overview to follow up the execution of the different phases.
What is the result of this Deliver to Production?
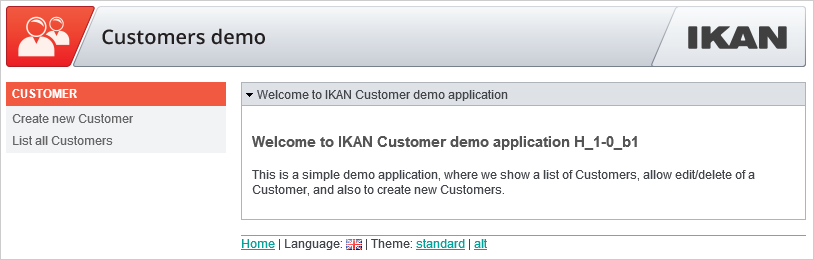
|
To see the deployed application on Production, open a web browser and enter the following URL: The general color of the application is red. This is to indicate that this is the production version of the application. Also notice that the version of the sources (the VCR tag) that were used to build this version of the application, is shown in the welcome panel. Here, the VCR tag is H_1-0_b1. |
Click on the List all Customers link to display the list of all Customers defined in the production database.
Triggering a Scheduler Build via a Source Commit
It is possible to check out the source code of the demo projects and to commit changes.
Install a Subversion client, for example Tortoise SVN, and check out the source code.
The repository URL is file:///ALM_HOME/vcr/subversion/repository/customers/trunk for the Customers project.
Modify a source file and commit it. The Scheduler will pick up the changes and will start building the Project.
Additional Information on Custom Phases
Instead of using one large Ant script that performs all tasks, the deployment of the Customers application uses several small scripts that each perform a specific task. The tasks that were reusable have been encapsulated as IKAN ALM Custom Phases.
More specifically, the deploy to the Test level does three things:
-
Adapt the .war file (set the database connection parameters in certain config files)
-
Populate a database with test data
-
Deploy the application to Tomcat
The first task was not general enough to be reused, but for the other two tasks Custom Phases were made: the “Update DB” and the “Tomcat Deploy” phases.
To view the definitions of these phases, go to ![]() Global
Administration > Phases > Overview.
Global
Administration > Phases > Overview.
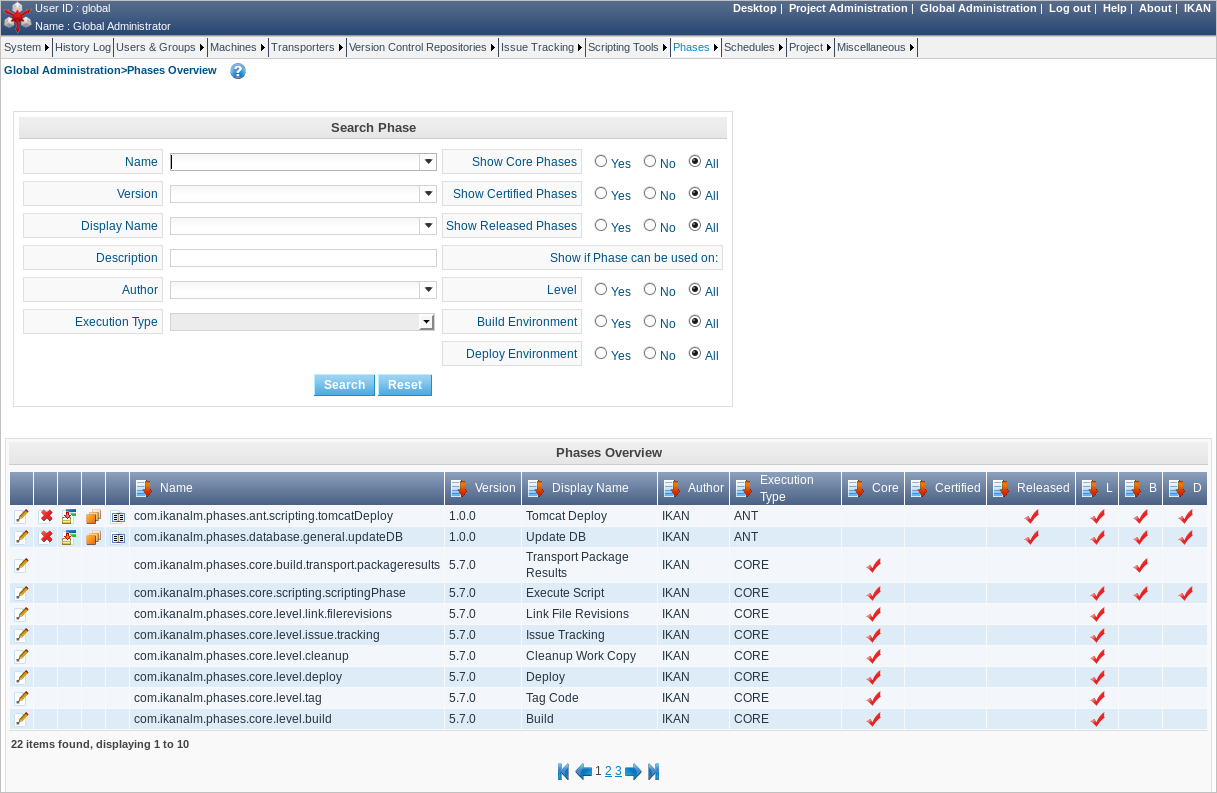
Click the _Edit _![]() icon before the com.ikanalm.phases.ant.scripting.tomcatDeploy Phase.
icon before the com.ikanalm.phases.ant.scripting.tomcatDeploy Phase.
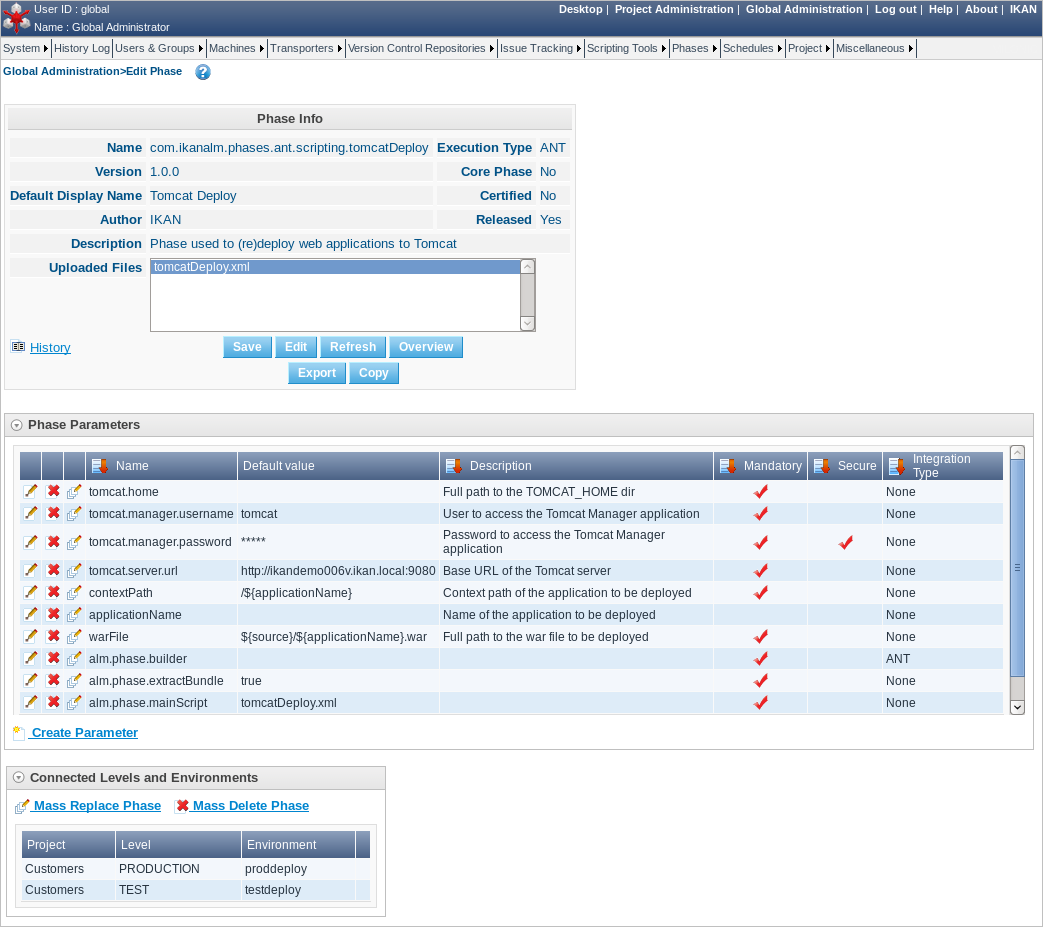
This page displays general information about the Phase, the Phase Parameters that can be set to configure the execution of the Phase, and where the Phase is currently being used (the Connected Levels and Environments panel).
One of the parameters that can be set is “tomcat.server.url”. It sets the base URL of the Tomcat server where an application needs to be deployed. When a Phase is added to an Environment (a Level, Build or Deploy Environment), those parameters can be given a different value for each Environment. That means that the same Phase can be reused in a lot of different Environments, each time performing a different task, which offers a lot of flexibility.
As you can see on the Connected Levels and Environments panel, our Tomcat Deploy phase is currently being used in 2 different places:
-
In the testdeploy Deploy Environment of the Test Level, where it deploys the Customers application to the test context
-
In the proddeploy Deploy Environment of the Production Level, where it deploys the Customers application to the production context
For an example of a more advanced usage of Parameters, look at the “contextPath” Phase Parameter.
Its default value is set to /${applicationName}, and it has this value set in both the testdeploy and proddeploy Environments (you can see them by clicking the Edit _![]() icon in front of the _contextPath Parameter). Still, the Customers application is deployed to 2 different contexts, namely “customers_test” and “customers”.
icon in front of the _contextPath Parameter). Still, the Customers application is deployed to 2 different contexts, namely “customers_test” and “customers”.
How does this work?
The answer lies in a Deploy Parameter (named “applicationName”) which is defined on both Deploy Environments.
Go to ![]() Project
Administration, and edit the Customers Project.
Next, in the menu, select Deploy Environments > Deploy Parameters:
Project
Administration, and edit the Customers Project.
Next, in the menu, select Deploy Environments > Deploy Parameters:
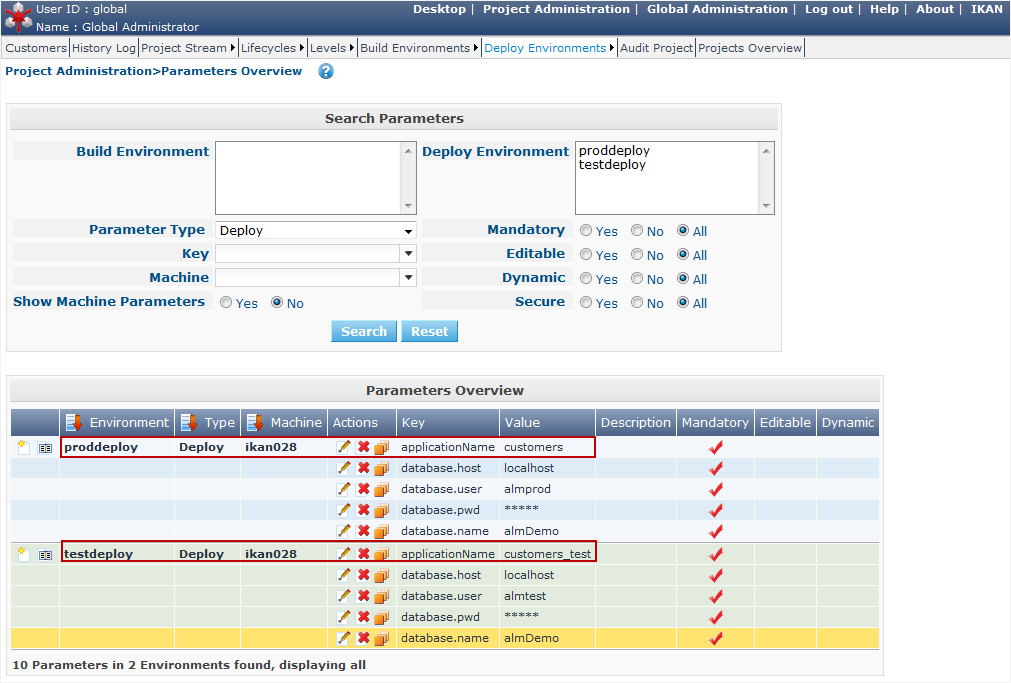
As you can see, for the testdeploy environment, the value of the “applicationName” parameter is “customers_test”, while for the proddeploy environment, the specified value is “customers”. When the Tomcat Deploy Phase is being executed, the property ${applicationName} will be replaced with the value of the Deploy Parameter, which yields the desired behavior.
For more information on Custom Phases and on how you can create them yourself, please refer to the IKAN ALM User Guide (chapter Global Administration, Phases and appendix Phases: General Information), and to the document Using and Developing Custom Phases.
Uninstalling the IKAN ALM Demo Application
To uninstall the IKAN ALM Demo application, follow these steps:
-
Stop the IKAN ALM Demo server, if running.
-
Run the uninstaller via:
Applications > IKAN ALM Demo 5.8 > Uninstall IKAN ALM Demo
OR
Open a terminal window and execute:
java –jar "ALM_HOME/Uninstaller/uninstaller.jar -
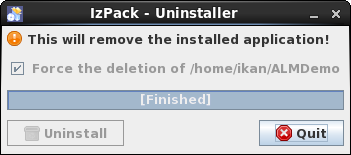
Select the checkbox Force the deletion of … to remove all files related to the demo installation. If not, the files changed since the installation will be kept.
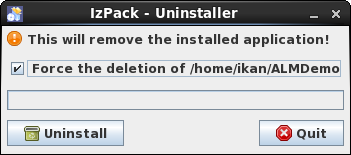
-
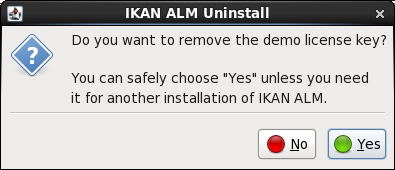
During the uninstallation, the following pop-up window is shown asking whether to uninstall the license key.
Wait until the uninstallation has finished, then press Quit to end the uninstaller:
Appendix A: Appendix: JAAS configuration
For authentication and authorization of users, IKAN ALM uses the Java Authentication and Authorization Service (JAAS) (see http://www.oracle.com/technetwork/java/javase/tech/index-jsp-136007.html).
The IKAN ALM demo installation automatically preconfigures JAAS, so this appendix is only for troubleshooting, or if you want to adapt authentication.
JAAS authentication is performed in a pluggable way. This permits applications to remain independent from underlying authentication technologies. New or updated authentication technologies can be plugged into IKAN ALM without requiring modifications to the application itself.
IKAN ALM Demo JAAS configuration
The IKAN ALM Demo installation has its own jaas.config file located in ALM_HOME/system/security.
By default, the passwd.config file is used as a flat security file.
|
IKAN ALM must be restarted if you add/change a record in the security file and make those changes visible. |
JAAS implementation: Flat File Security
The IKAN ALM Demo Application uses this simple JAAS implementation whereby User Groups and Users are configured in a flat file. In the JAAS configuration file this is specified as follows (where e.g. ALM_HOME="home/ikan/ALMDemo"):
/** ALM Login **/ALM{com.tagish.auth.FileLogin pwdFile="/home/ikan/ALMDemo/system/security/passwd.config";};|
The passwords in the passwd.config file must be stored in MD5 encryption. |
Flat File Security: Contents
The contents of the passwd.config file when using flat file security is fairly easy and self-explanatory:
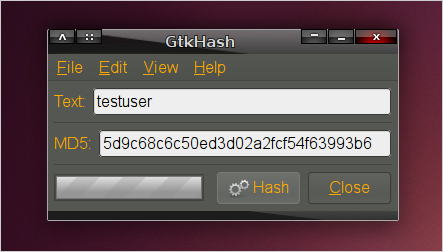
userid:encrypted password:groupname:groupname:groupnameuser:ee11cbb19052e40b07aac0ca060c23ee:ALM Userproject:46f86faa6bbf9ac94a7e459509a20ed0:ALM User:ALM Projectglobal:9c70933aff6b2a6d08c687a6cbb6b765:ALM User:ALM AdministratorThe encrypted password in MD5 encryption format can be generated with a utility like HashCalc (http://www.slavasoft.com/hashcalc/overview.htm) on Windows or GtkHash on Linux.
Adding a user with User ID “testuser” and password “testuser” who belongs to the ALM User and ALM Project User Groups:
-
Add following entry to the passwd.config file:
testuser:5d9c68c6c50ed3d02a2fcf54f63993b6:ALM User:ALM Project -
Stop and restart Apache Tomcat
-
Login to IKAN ALM using User ID “testuser” and Password “testuser”.
Appendix B: Troubleshooting
IKAN ALM Demo Installer is Already Running
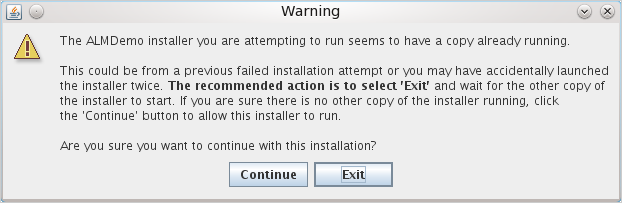
This error may occur when a Demo Installation was interrupted. When you try to run the installation again, the Warning above may pop up. The reason is a lock file in the temp directory:
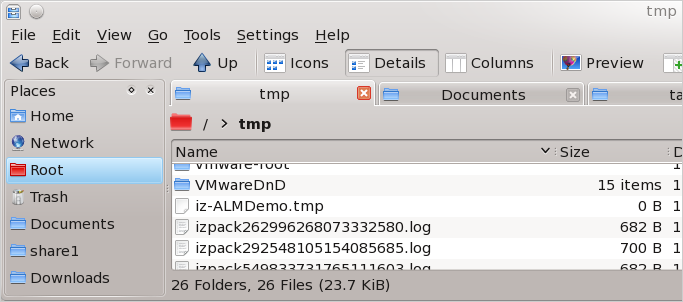
Search for a file named iz-ALMDemo.tmp and remove it.
Incorrect alm_license.lic file
This error may occur when installing the license.
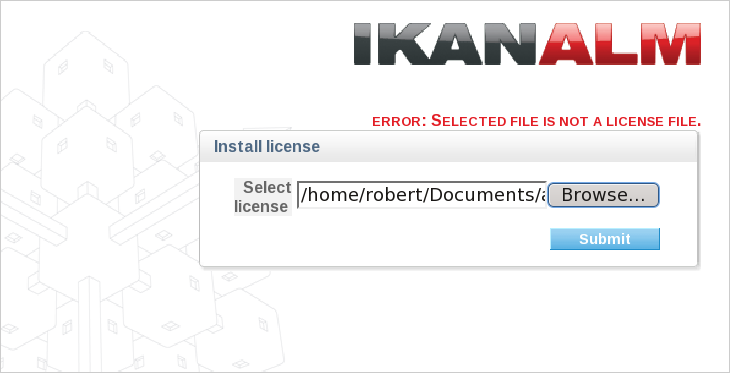
Make sure that the license file was not modified.
Make sure that the license file was correctly transported to the installation machine (e.g., File size should be > 500 B).


