How To Guide Console Installation of an IKAN ALM Agent
Purpose
When build or deploy actions are planned on a local or remote environment which requires interaction with the target system, an IKAN ALM Agent must be installed on that machine. This technical document explains how to do a console (or non-GUI) installation of an IKAN ALM Agent, and how to set up the Global and Project Administration so that the local/remote system will be picked up in the target project’s Lifecycle(s).
|
The term “remote environment” refers to a system different from the IKAN ALM Server system. A local build will happen on the IKAN ALM Server machine itself. |
As a consequence, this document can be used for different purposes, so check if the following situation applies to you:
-
You have installed the IKAN ALM Demo (which installs both the Server and the Agent daemon on a Tomcat webserver/Karaf OSGi container) and you want to run builds and/or deployments on a different machine than the one on which you installed the IKAN ALM Demo.
Note that for a demo installation we run both the Agent and the Server inside the Java VM of the same OSGi container, which is not the recommended configuration of a production system, as a heavy, memory-intensive build can cause your OSGi container to stop functioning due to OutOfMemory errors.
-
You have installed or you are installing the IKAN ALM Server and want to install (together with the Server installation or as a separate installation) an IKAN ALM agent on the same machine, so that you can run local builds (even deployments in some cases) on the Server machine. This is the advised way of running local builds.
-
You have installed the IKAN ALM Server and you want to install an IKAN ALM Agent on a different, remote machine, so that you can run distributed builds, or deploy and control remote machines.
Prerequisites
Hardware Requirements
-
RAM: minimum 250 MB (megabytes), recommended 0,5 GB (gigabytes) or more.
Note that these are just indicative values. A Build or Deployment Server might have more demanding memory requirements depending on the number of builds or deploys that run concurrently. For a more mathematical approach, we refer to the article Capacity Planning For Software Build Management Servers on the CM Crossroads site: http://www.cmcrossroads.com/cm-journal-articles/6671-capacity-planning-for-software-build-management-servers.
-
Disk Storage Space: minimum 1 GB (gigabytes).
There is no hard and fast rule for disk storage space. The footprint of a bare installed IKAN ALM Agent is under 40 MB (megabytes). The actual amount an Agent will require depends on the number and the size of the projects managed with this agent, and the size of the resources needed to run a build or deployment. More projects and larger build results mean more required disk space.
Java Virtual Machine version1.7 or 1.8
All IKAN ALM components need at least a Java Development Kit (JDK) or a Server Java Runtime (Server JRE).
IKAN ALM has been tested to run with both Oracle Java and OpenJDK. The Java SE Server Runtime Environment (Server JRE) or Software Development Kit (SDK) can be freely obtained from Oracle’s website. Both 32-bit and 64-bit versions are supported. The latest version of Java SE can be downloaded from http://www.oracle.com/technetwork/java/javase/downloads/index.html
HTTP or HTTPS Connection with IKAN ALM Server
The communication between the Server and the Agent daemons is done over XML-RPC. This means that IKAN ALM enables distributed computing (remote procedure calls) using HTTP or HTTPS as the transport protocol and XML for the encoding (for more information, refer to (www.xmlrpc.com). In order to enable XML-RPC interaction, the target machine for the new Agent must have a correct TCP/IP connection to the Server machine.
Scripting Tool
In order to execute a build or deploy script on the remote machine, the correct scripting tool must be installed on the target Agent system. IKAN ALM supports Ant, Gradle, NAnt and Maven2 as scripting tools. Other scripts (Perl, make, …) can be easily called via these supported scripting tools.
Contact IKAN ALM support (support@ikanalm.com) if more information is needed. Check the different websites (http://ant.apache.org, http://gradle.org, http://maven.apache.org and http://nant.sourceforge.net) for downloading and installing the appropriate scripting tool.
|
The installation of the Agent can be launched without any scripting tool installed on the target machine. It is no problem to install and configure the scripting tool after the Agent is up and running. |
IKAN ALM Agent Installation
IKAN ALM comes with an Ant-based installer. To install it, you will need to configure the install properties of the install script. In the following sections, we will explain the necessary steps to install an IKAN ALM Agent.
Configuring and Running the Ant Installer
The IKAN ALM installation scripts are delivered as an IKAN_ALM_5.8_console_win.zip or IKAN_ALM_5.8_console_linux.tar.gz file. Expand this file somewhere on the target system. The expanded folder which contains the IKAN ALM installer files (Ant scripts) will be denoted as INSTALL_DIR.
The included Ant-installer will install the IKAN ALM Agent components in the specified destination folders.
Configuring the install.properties File
Configure the different properties which will be used by the installation scripts by editing the INSTALL_DIR/install.properties file.
|
Do NOT use backward slashes ('\') in path properties, otherwise the installation may fail. Use forward slashes ('/') instead! |
General Settings
The console installer is able to install all IKAN ALM components (IKAN ALM Server, IKAN ALM, IKAN ALM Command line interface) in one process. Since only the IKAN ALM Agent daemon must be installed on the target machine, adapt the general settings as follows:
To only install the Agent, set the property alm.agent.install=true and set alm.server.install and alm.commandline.install to false :
# General Settings : Specify which components
of IKAN ALM to install
# ---------------------------------------------------------------------------
# Flag to specify whether to install IKAN ALM Server or not:
install : true
# no install : false
alm.server.install=false
# Flag to specify whether to install the IKAN ALM Agent or
not : install : true
# no install : false
alm.agent.install=true
# Flag to specify whether to install the IKAN ALM Commandline
or not : install : true
# no install : false
alm.commandline.install=false
Another general property enables to set up secured communication over HTTPS between the IKAN ALM components. Do not change this property to true unless the IKAN ALM server has been set up for secure communication too. See the HowToALM 5.8_secure documentation for setting up secure communication between different IKAN ALM components.
# Flag to specify whether the communication
between the IKAN ALM components must
# be secured. Note that if one IKAN ALM component is installed
secured, all components
# must be installed secured.
alm.xmlrpc.secure=false
Agent Properties
Adapt the different properties needed to successfully install the IKAN ALM Agent.
| Property | Explanation |
|---|---|
alm.agent.installLocation |
This is the location where the Agent will be installed, e.g., Further on in this guide we will refer to this location as ALM_HOME. |
alm.agent.javaHome |
The location of the Java Virtual Machine used to launch the Agent. This may be a Java JDK or Server JRE, version 1.7.x or 1.8.x (see Prerequisites). For example: Note: On Unix or Linux systems, specify the path of the real Java installation (and not to a symlink), as the installation will verify the existence of specific jars under the provided path. |
alm.agent.agentPort |
The port the Agent will be listening on. The default value is `"20020`". If you change this value, you will also have to change the `"Agent Port`" property of the Machine representing this Agent in the IKAN ALM GUI. |
alm.agent.serverHost |
The hostname (or IP address) of the IKAN ALM Server machine. The Agent will try to connect to the Server by using this name or IP address and using the protocol HTTP or HTTPS. The default value is “localhost”. |
alm.agent.serverPort |
The port the IKAN ALM Server is listening on. The Agent will try to connect to the Server on this port. The default value is “20021”. The setting can be verified in the IKAN ALM Global administration: . Go to Global Administration > System Settings + Panel Local Environment: the value of “IKAN ALM Server” represents the IKAN ALM Server Machine . Go to Global Administration > Machines > Overview + Check the “Server Port” property of the IKAN ALM Server Machine. |
alm.agent.hostname |
Optional. Leave this empty unless you want to override the automatically detected hostname of the Agent. For example, to use a fully qualified domain name like |
alm.agent.hostaddress |
Optional. Leave this empty unless you want to override the automatically detected IP address of the Agent. For example, to use an IP Address which differs from the internal IP address for communicating with the IKAN ALM server. It is important that the IP address entered here matches the IP address of the Agent Machine (in the IKAN ALM GUI). |
The following are the port numbers specific to the Karaf container hosting the IKAN ALM Agent daemon. Normally, there is no need to change those port numbers unless you have port conflicts. For more information, refer to the Karaf Container 4.0 documentation: https://karaf.apache.org/manual/latest/#_instances/.
| Property | Explanation |
|---|---|
alm.agent.karaf.rmiRegistryPort |
The Karaf RMI registry port. The default value is “1099”. |
alm.agent.karaf.rmiServerPort |
The Karaf RMI server port. The default value is “44444”. |
alm.agent.karaf.sshPort |
The Karaf SSH port. The default value is “8101”. |
alm.agent.logfilepath |
Relative path to the Karaf log of the IKAN ALM Agent log. This setting is used by the IKAN ALM Server when displaying the Machine Log of an Agent on the Machine Detailed Status screen. |
The following is an example of an Agent installation configuration:
# ---------------------------------------------------------------------------
# IKAN ALM Agent Settings, when alm.agent.install=true :
# ---------------------------------------------------------------------------
# Destination folder of the IKAN ALM Agent files :
# Recommended : use the IKAN ALM Server installLocation
alm.agent.installLocation=C:/alm
# Java Runtime to run the IKAN ALM Agent with (may be JRE
or JDK):
alm.agent.javaHome=d:/java/jdk1.8
# IKAN ALM Agent Runtime parameters :
# agentPort : port Agent should be listening on (default=20020)
# serverPort : port Server is listening on (default=20021)
# serverHost : host Server is running on (default=localhost)
# hostname: optional, leave empty unless you want to override
the system hostname
#  retrieved as InetAddress.getHostName(), e.g. to use a fully
qualified domain name like
#  almAgent.your.domain for communication with the IKAN ALM
server
# hostaddress: optional, leave empty unless you want to override
the system hostaddress
#  retrieved as InetAddress.getHostAddress(), e.g. to use
a IP Address which differs from
#  the internal IP Address for communication with the IKAN
ALM server
alm.agent.agentPort=20020
alm.agent.serverHost=localhost
alm.agent.serverPort=20021
alm.agent.hostname=
alm.agent.hostaddress=
# Karaf ports, no need to change unless you have port conflicts
alm.agent.karaf.rmiRegistryPort=1099
alm.agent.karaf.rmiServerPort=44444
alm.agent.karaf.sshPort=8101
# relative path to the Karaf log of the IKAN ALM Agent
alm.agent.logfilepath=log/alm_agent.log
Verify the ALM Agent Settings before running the installer.
Tip: do not remove the install.properties file after installation, you can reuse it for future installations of IKAN ALM.
Running the Ant Installer
Normally, the install script detects the system default JAVA_HOME and uses that to launch the installation.
If the detection fails, you will need to edit INSTALL_DIR\install.cmd (Windows) or INSTALL_DIR/install.sh (Unix/Linux) and set JAVA_HOME to the installation directory of a Java Runtime, e.g., SET JAVA_HOME=D:\java\jdk1.8
Or on a Unix/Linux machine: JAVA_HOME="/opt/jdk1.8
Before proceeding with the installation, do a final check of the installation parameters:
-
Check once again the installation locations.
-
Make sure that the user running the installation has write access to the correct locations.
-
When UAC is enabled (Windows Vista and later), the command prompt must be started with Administrative privileges (the title of the prompt must start with "Administrator:"). If the command prompt does not have administrative privileges, the installation may run successfully, but the IKAN ALM Agent Daemon will not be registered as a Windows service.
Run INSTALL_DIR/install.cmd (Windows) or INSTALL_DIR/install.sh (Unix/Linux), preferably from a MSDOS prompt or a shell so that the progress of the different tasks can be followed.
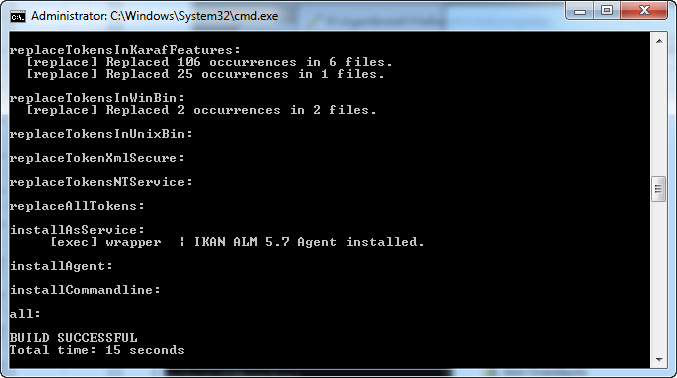
When the installation succeeds, the “BUILD SUCCESSFUL” message appears.
Starting the IKAN ALM Agent
Linux/Unix
Launch the shell script that has been installed under: ALM_HOME/daemons/agent/startAgent.sh.
Use ALM_HOME/daemons/agent/stopAgent.sh to stop the IKAN ALM Agent daemon.
Windows Command
Launch the command file that has been installed under: ALM_HOME/daemons/agent/startAgent.cmd.
Windows Service
By default, the Agent is registered as a Windows service, and will be started automatically at system start-up.
Alternatively, you can control the service via Start > Settings > Control Panel >Administrative Tools > Services.
The name of the Agent service is “IKAN ALM 5.8 Agent”.
Logging
All the IKAN ALM Agent events are logged into a log file whose location is specified in the following log4j configuration property file: ALM_HOME /daemons/agent/karaf/etc/org.ops4j.pax.logging.cfg.
The Log4j file appender normally sets the default location of the log to: “${karaf.base}/log/karaf.log” which means: ALM_HOME /daemons/agent/karaf/log/karaf.log
Please note, that the Agent configuration file, located at: ALM_HOME /daemons/agent/karaf/etc/agent.cfg also has a property pointing the Agent log file alm.agent.logfilepath=log/alm_agent.log
This setting is used by the IKAN ALM Server when displaying the Machine Log of an Agent in the Machine Detailed Status screen. Note that this setting must correspond with the actual location of the Agent’s log file specified in the org.ops4j.pax.logging.cfg file.
When the IKAN ALM Agent runs as a Windows service, an additional service log file called 'wrapper.log' is created. The log file location, size and other logging settings are specified in the service configuration file: ALM_HOME /daemons/agent/karaf/etc/karaf-wrapper.conf
Uninstalling IKAN ALM
To uninstall the IKAN ALM agent completely from your system, do the following:
-
Normally, the uninstall script detects the system default JAVA_HOME and uses that to launch the uninstall.
If the detection fails, you will need to edit INSTALL_DIR\uninstall.cmd (Windows) or INSTALL_DIR/uninstall.sh (Unix/Linux) and set JAVA_HOME to the installation directory of a Java Runtime.
For example:
SET JAVA_HOME=D:\java\jdk1.8Or on a Unix/Linux machine:
JAVA_HOME="/opt/jdk1.8" -
Next, configure INSTALL_DIR/uninstall.properties.
Set alm.agent.uninstall=true. Since you are only uninstalling the Agent, make sure that alm.server.uninstall and alm.commandline.uninstall are both set to false.
Set alm.agent.installLocation to the install location set in INSTALL_DIR/install.properties.
-
Finally, run the uninstaller.
Execute INSTALL_DIR/uninstall.cmd (Windows) or INSTALL_DIR/uninstall.sh (Linux/Unix).
-
When UAC is enabled (Windows Vista and later), the command prompt must be started with Administrative privileges (the title of the prompt must start with "Administrator:").
If the command prompt does not have administrative privileges, the uninstall may run successfully, but the IKAN ALM Agent Daemon will not be unregistered as a Windows service.
Upgrading IKAN ALM
The general approach to upgrading IKAN ALM is straightforward: first back up the current installation and the database, then reinstall the application and upgrade the database to a higher version.
If the upgrade process fails, you can restore the backup, and continue running the previous version of IKAN ALM (and contact support).
You must first upgrade the IKAN ALM Server and database (depending on the type of the server installation you did (graphical or console-based)). Information on how to do this can be found in the documents IKAN ALM 5.8 Installation guide.pdf or HowToALM 5.8_Tomcat_Install.pdf.
|
For safety reasons, it is highly recommended to back up the entire ALM_HOME directory. Experience has shown that, occasionally, one needs to restore a configuration like a security setting or the configuration of the log files. |
-
Stop the IKAN ALM Agent and make the backup.
This is necessary to make sure you have the latest version of everything.
-
Uninstall the remote IKAN ALM Agent.
Configure and run the uninstaller on the IKAN ALM Agent machine.
Information on how to do this can be found in the section Uninstalling IKAN ALM.
Tip: Keep a copy of the INSTALL_DIR/install.properties file after you uninstalled. You can reuse the values inside the file when you need to configure the installer for the new version. Do not copy the old install.properties over the new though! Some properties may have been renamed, removed or added.
-
Configure and run the installer of the newer version of the ALM Agent.
Refer to the section Configuring and Running the Ant Installer.