Packages
A Package allows moving one or more individual files selected manually from a VCR Stream (Head or Branch) through the IKAN ALM Lifecycle. One or multiple Packages may be created in each Project Stream of a Package-based Project. This is different from the original way of working in the Project Streams of Release-based projects, where a configurable automated process defines which file revisions are retrieved from the head (trunk) or branch of the versioning system and moved in the Lifecycle.
From a logical point of view, Packages are partial views or views at a certain point in time on a Project Stream. The (logical) content of a Package may evolve in between two Builds and may be reused several times, over a period of time, throughout the Lifecycle of the Project Stream it belongs to.
Packages are attached to one single Project Stream and can contain one up to all files of the Project Stream from the moment a revision is available in the VCR. On top of that, several Packages of a Project Stream can contain the same file, preferably with a different revision. However, there is no automated control on concurrent development on a file used by Packages belonging to the same Project Stream.
During the whole Lifecycle, each Package has its own Build number and evolves independently of the other Packages
From a physical point of view, it comes down to putting together a set of files to be extracted from the VCR during the execution of the Build Level Request as to present them to the Build and Tag Phases, and to finally execute the Deploy of this set of files. For Release-based Projects, the rules for extracting files from the VCR are specified in the Project Stream definition by selecting the type of Build, and IKAN ALM will automatically take care of the selection of the objects. For Package-based Projects on the other hand, the selection of files to be extracted from the VCR is done manually by the Users of the Project in the form of a Package. Refer to the section Creating a Package for more information.
From a technical point of view, Projects are defined and separated to use either Packages or Releases, and can never be mixed.
Refer to the following procedures for more information:
Creating a Package
-
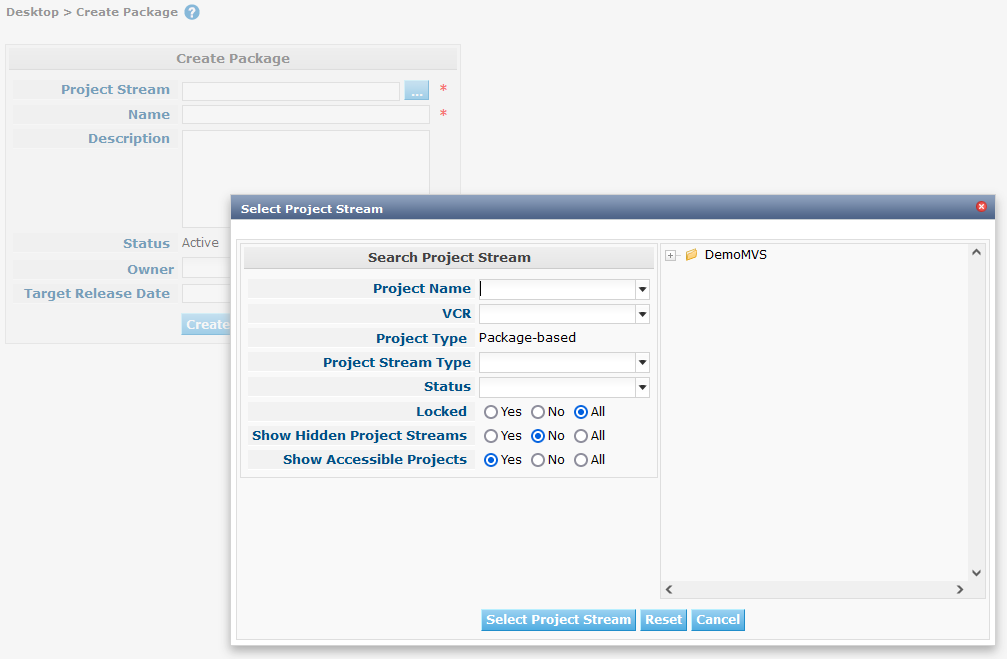
Select Packages > Create Package on the Main Menu.
The Select Project Stream window is displayed.
-
Define search criteria on the Search Project Stream panel.
If you do not immediately find the Project Stream in which you want to create the Package, you can use the search panel on the left.
The following search criteria are available:
Search Criteria Meaning Project Name
From the drop-down list, select the name of the Project for which you want to display the Project Streams.
VCR
Select the VCR name.
Project Type
This field is set to Package-based.
Project Stream Type
Select the type of Project Stream: Head or Branch.
Status
Specify the status of the Project Stream:
-
Under construction
-
Planning
-
Development
-
Testing
-
Stable
-
General available
-
Frozen
-
Closed
Locked
Indicate whether or not you want to display locked Project Streams.
By default, both locked and unlocked Project Streams are displayed.
Show Hidden Project Streams
Indicate whether or not you want to display hidden Project Streams.
By default, hidden Project Streams are not shown.
Show Accessible Projects
Indicate whether or not you only want to display the Projects you have User Access to.
By default, only the Projects you have User Access to are shown.
The list of elements displayed in the tree at the right will be limited to the Project Streams matching these search criteria.
Click the Reset button to clear the Search fields.
-
-
Select the required Project Stream
Expand the tree for the corresponding Project using the
 icon to display its Project Streams.
Select the required Project Stream and click Select Project Stream.
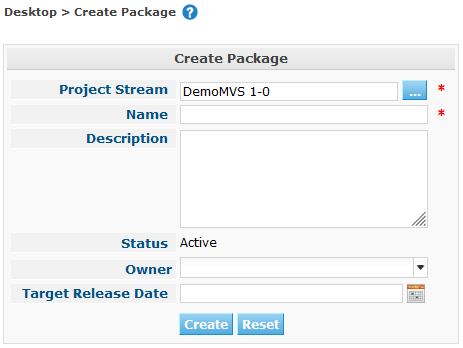
The Create Package screen is displayed. The selected Project Stream name is automatically filled in. In case you want to select a different Project Stream, select the
 at the right to return to the Select Project Stream window.
 -
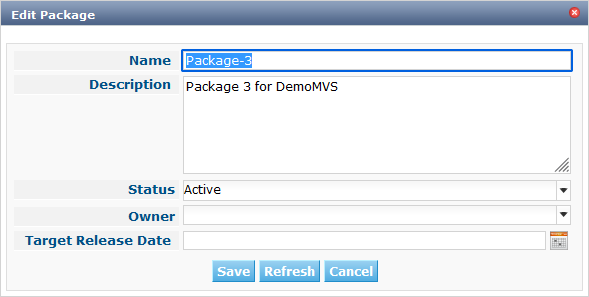
Enter the name and, optionally, a description, owner and target release date for the new Package, and click Create to confirm the creation of the Package.
The Create Package window is displayed.
The Edit Contents tab page of the Package Details screen will be displayed.
A newly created package is empty. For more information on adding File Revisions to the newly created Package, refer to the section Package Details.
The Package Overview Screen
-
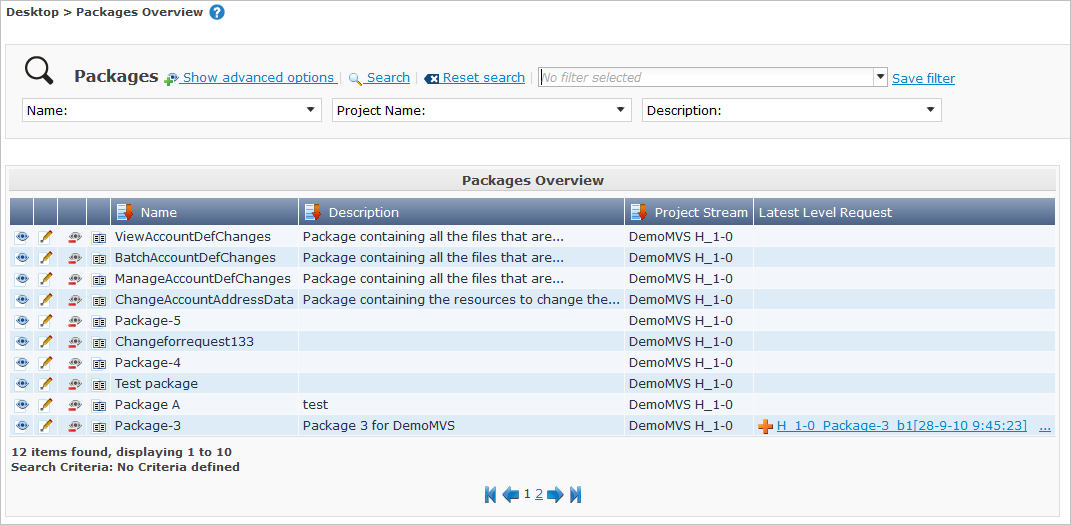
Select Packages > Overview Packages on the Main Menu.
The Packages Overview window is displayed.
-
Use the search criteria on the Search panel to only display the Packages you are looking for.

The following options are available:
-
Show advanced options: to display all available search criteria.
-
Search: in principle it is not necessary to click the Search option. The results on the overview will be automatically synchronized in function of the selected criteria.
-
Reset search: to clear all search criteria and display the full list of items.
-
Select an existing filter from the drop-down list.
-
Save filter: to save the current search criteria for future use.
For more information on the usage of search panels and filters, refer to the sections Search Panels and Defining Search Filters.
-
-
Depending on your access rights, the following links may be available on the Packages Overview panel:

View
This option is available to IKAN ALM Users with Project User Access Rights. It allows viewing the selected Package definition and its connected file revisions.

Edit
This option is available to IKAN ALM Users with Project User Access Rights. It allows editing the Package definition and/or its connected file revisions. Editing a Package
 /
/ 
Hide / Show
This option is available to IKAN ALM Users with Project User Access Rights. It allows hiding the selected Package.

History
This option is available to all IKAN ALM Users. It allows to display the History of all create, update and delete operations performed on a Package.
Columns marked with the
 icon can be sorted alphabetically (ascending or descending).
Viewing Package Settings
-
Select Packages > Overview Packages on the Main Menu.
-
Click the
View link on the Packages Overview panel.The Summary tab page of the Package Details screen is displayed.
-
Verify the settings.
The Package Details screen contains 4 tab pages:
Summary
Displays the basic information concerning the Package
View Contents
Displays the contents of the Package
Edit Contents
Allows modifying the Package’s contents
Lifecycle Actions
Displays the actions executed on the Lifecycle.
Allows to launch Level Requests for the selected Package.
For more detailed information on the different tab pages, refer to the section Package Details.
Editing a Package
-
Select Packages > Overview Packages on the Main Menu.
-
Click the
Edit link on the Packages Overview panel.The Edit Contents tab page of the Package Details screen is displayed.
On this tab page, you can modify the File Revisions contained in the Package.
For a more detailed explanation on how to do that, refer to the section Edit Contents
Other available buttons:
-
Refresh: to refresh the information on the information panels
-
Back: to return to the Package Overview screen
-
-
Click Save to confirm your changes.
Other available buttons:
-
Clear: to deselect all File Revisions. If in search mode, all matched files (and directories) will be unchecked.
Note that clicking the Clear button while holding down the CTRL key will select all files in the current tree.
-
Refresh: to refresh the information on the information panels
-
Hiding/Showing a Package
Specifying that a Package is “hidden”, causes it not to be displayed by default on Overview panels. For example, its Level Requests will be filtered out by default on the Level Requests Overview.
This can be very useful to hide older Packages on the overviews, without losing the historical information associated with those Packages.
-
Select Packages > Overview Packages on the Main Menu.
-
Click the
Hide link in front of the Package you want to hide.The icon in front of the Package changes to
.Hidden Packages will not appear on the Overview screens for Level Requests, Approvals, Build and Deploys, nor on the Create Level Request: Select Package screen when creating a Level Request for Package-based Projects.
-
To “unhide” a hidden Package, click the
Show link.The icon will be changed appropriately.
A search criterion is available on the Search Package panel to specify whether or not you want to display hidden Packages.
Viewing the Package History
-
Select Packages > Overview Packages on the Main Menu.
-
Click the
History link on the Package Overview panel to display the Package History View.For more detailed information concerning this History View, refer to the section History and Event Logging.
Click Overview to return to the Packages Overview screen.
Package Details
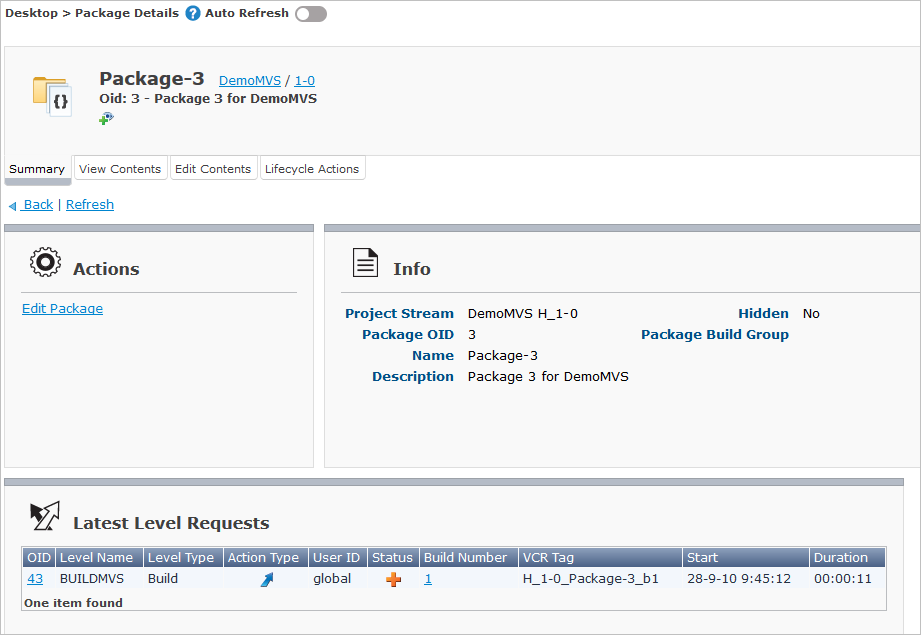
The Package Details screen contains the detailed information concerning the selected Package.
The screen is structured as follows:
-
Status Header
The header displays the name, OID and description of the selected Package, and whether it is a hidden package or not, as well as links to the Project and Project Stream it is used on.
-
Tab Pages with detailed information
Underneath the status indication, several tabs are available, each of them displaying additional information concerning the Level Request. By default the Summary tab page is displayed.
Refer to one of the following sections for more information.
-
Back and Refresh links
-
Use the Back link to return to the previous screen.
-
Use the Refresh link to update the displayed information. This link reloads the currently selected tab page, as well as the header information.
-
-
Auto Refresh option
The Auto Refresh option is only of use on the Summary and Lifecycle Actions tab pages.
For more information on the Auto Refresh settings, refer to the section Auto Refresh.
Summary
The information concerning the Package and the possible actions are spread over different panels.
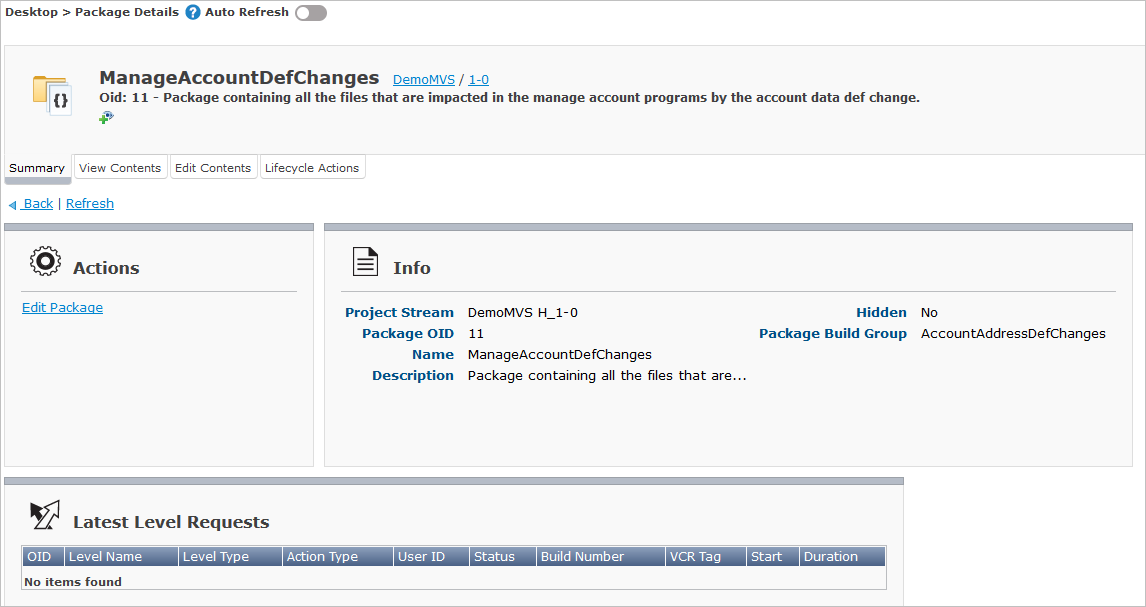
Actions Panel
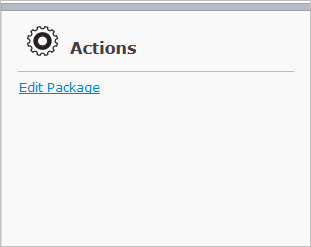
The Actions panel contains the Edit Package link. This link will open a pop-up window allowing you to modify the Name, the Description, the Status, the Owner and the Target Release Date of the Package.
Info Panel
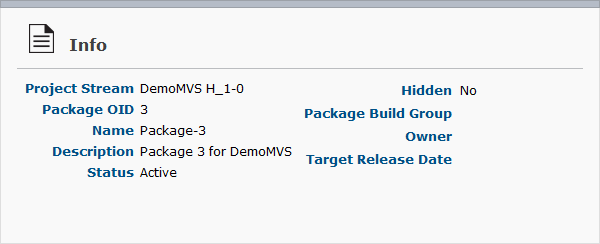
This panel displays the information found in the Header as well as some additional information.
| Field | Meaning |
|---|---|
Project Stream |
This field contains the identification of the Project Stream. This name is composed of:
Example: |
Package OID |
This field contains the internal OID of the Package. |
Name |
This field contains the name of the Package. |
Description |
This field contains the description of the Package. |
Status |
This field contains the status of the Package. Possible statuses are Active, Frozen and Archived.
|
Hidden |
This field indicates whether or not the Package is hidden. By default newly created Packages are not hidden. For more information on hiding Packages, refer to Hiding/Showing a Package. |
Package Build Group |
If applicable, this field contains the Package Build Group the Package is linked to. For more information, refer to the section Package Build Groups. |
Owner |
This field contains the owner of the Package. |
Target Release Date |
This field contains the target release date of the Package. |

View Contents
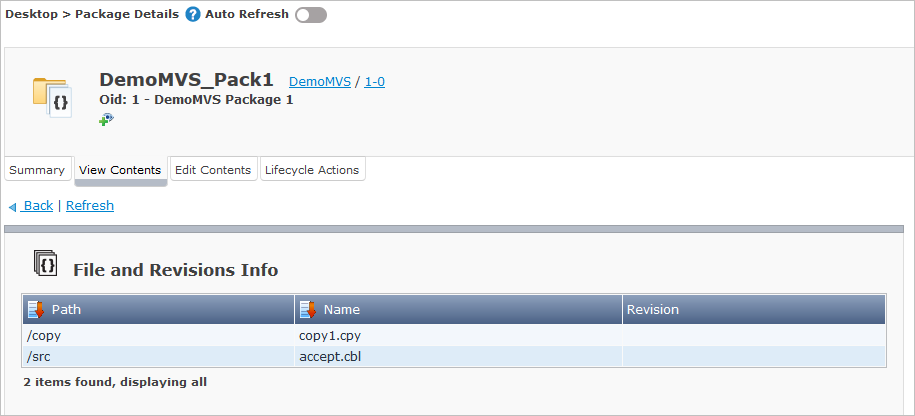
The View Contents panel lists all File Revisions currently connected to the Package.
The following fields are available:
| Field | Meaning |
|---|---|
Path |
The path to the directory containing the file. |
Name |
The name of the Revision File contained in the Package. |
Revision |
The revision number in the VCR of the selected file. This field may be empty, indicating that the latest File Revision is retrieved at the moment the Package is built. |
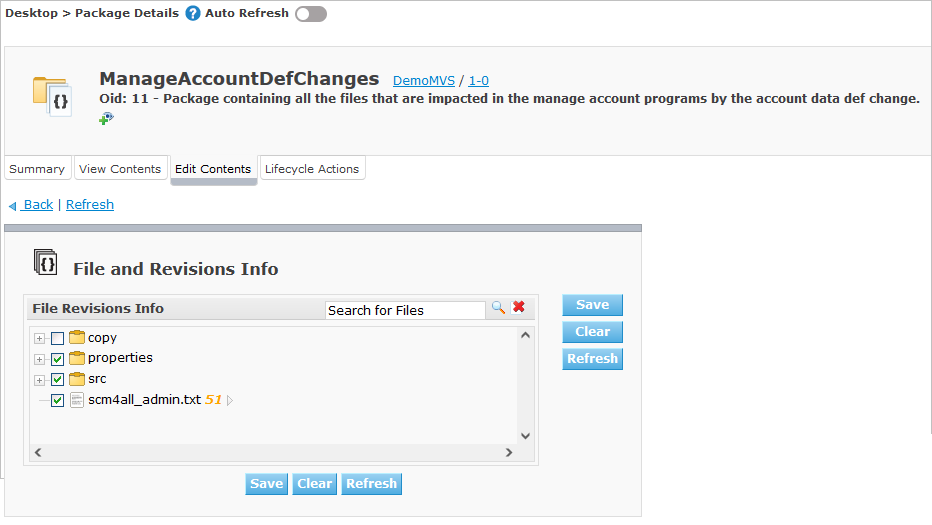
Edit Contents
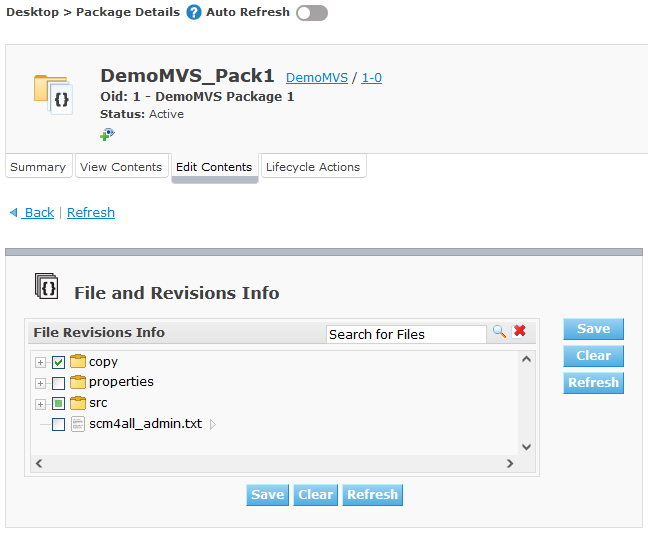
On this panel, you can modify the contents of the selected Package.
|
The information on the File Revisions Info panel is directly retrieved from the VCR. Use the Refresh button to display the latest state. Using the Clear button will deselect all items in the Package. Clicking the Clear button while pressing the CTRL key will select all items in the Package. |
-
Use the Search field for selecting specific File Revisions.
You can use the Search field for selecting specific File Revisions. Wildcards like '*' and '?' may be used in any position. Sample search values:
foo.*, or?oo.txtor combinedf??.*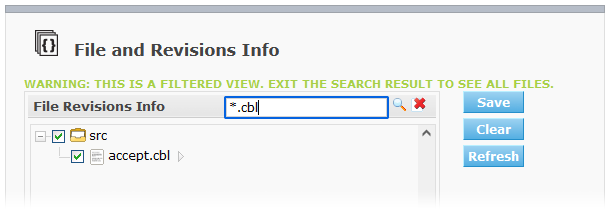
To exit the search mode and redisplay all files and folders in the tree, click the
 Exit
Search icon.
Exit
Search icon. -
Select the File Revisions you want to add to the Package and click Save.
The following actions are possible:
-
Adding a File or Folder to the Package
To select a File or Folder, expand the tree by clicking the
icon to display all contained folders and files.
Select the folder(s) or file(s) you want to add to the Package.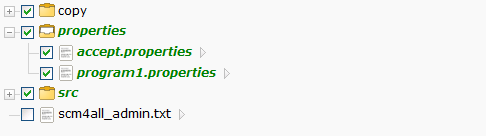
-
Adding a specific Revision of a selected File to the Package
To select a specific Revision for a File, click the
 at the right of a selected File name.
The Select Revision pop-up window is displayed.
Select the required revision from the drop-down list and click Select.
The revision number will be displayed next to the selected File.
at the right of a selected File name.
The Select Revision pop-up window is displayed.
Select the required revision from the drop-down list and click Select.
The revision number will be displayed next to the selected File.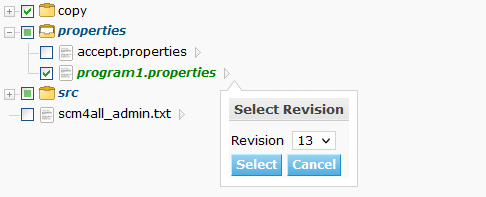
If you do not select a specific revision of a file, the latest revision will be used at the moment the Package is built.
-
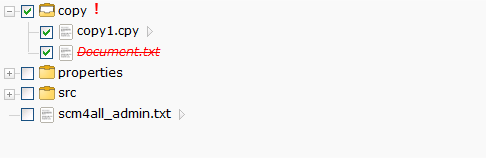
Deleting a File or Folder from the Package
To delete a File or Folder from the Package, deselect it in the tree. The name will be displayed in red.
To deselect all Files in the Package, you can use the Clear button.

Files that have been deleted from the VCR, but are still linked to the Package, are displayed in red and with a strike-through font. The folders that contain those files are displayed with a a red exclamation mark after the folder’s name. In this case, it is advised to also delete the removed files from the Package.
-
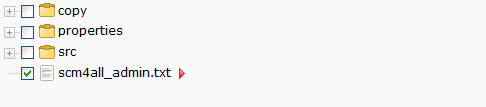
Changing from a specific Revision to the latest Revision of a File in the Package
To change from a specific Revision to the latest Revision of a File, click the
at the right revision number.
The Select Revision pop-up window is displayed.
Deselect the revision by selecting the empty value on top of the drop-down list and click Select.
The revision number will disappear and the file will be marked with a red  .
.
-
Modifying a Revision of a File from the Package
To modify to another specific Revision of a File, click the
at the right revision number.
The Select Revision pop-up window is displayed.
Select the required revision from the drop-down list and click Select.
The new revision number will be displayed next to the selected File.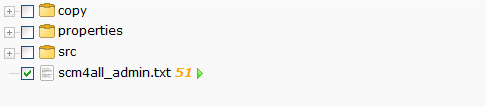
-
Lifecycle Actions
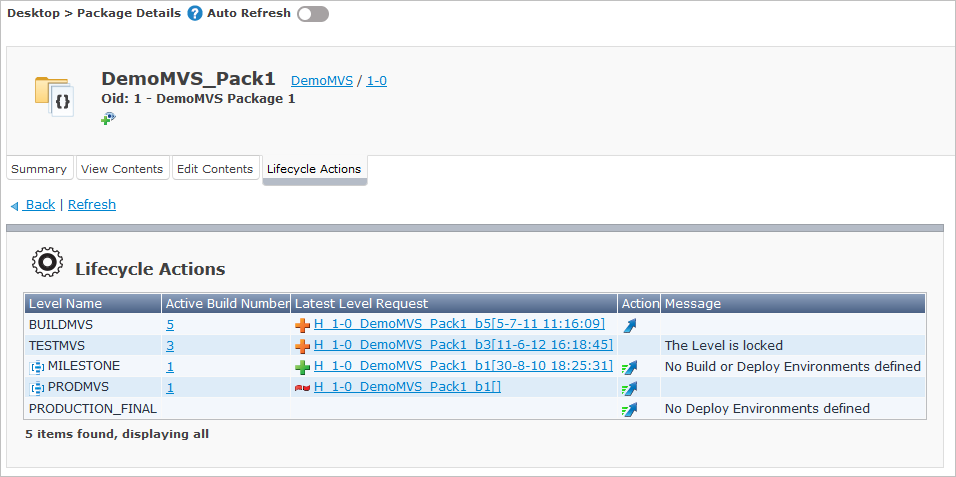
This panel displays the latest Level Request for each of the Levels defined in the Lifecycle.
Using the action icons, you can also start a Level Request for one of the Levels. Clicking such an action icon, will take you to the Create Level Request screen.
For more information on creating Level Requests, refer to the section Creating Level Requests.