Lifecycles
Each Project Stream has a Lifecycle connected to it. This Lifecycle defines the logical steps of the ALM processes. Such a logical step is called a Level in IKAN ALM. The Lifecycles Submenu lets you define Lifecycles and set up the sequence of Levels for each Lifecycle.
During the creation process of a Project, the Head Project Stream is created automatically, as well as the BASE Lifecycle connected to that Head Project Stream.
Three different Level types can be connected to a Lifecycle: Build, Test or Production Levels. At least one Build Level must have been assigned to a Lifecycle before Level Requests can be created in a Project Stream connected to that Lifecycle. The number of Test and Production Levels in a Lifecycle is unlimited.
Levels may be reused in other Lifecycles. For example, an "Urgency Fix" or "Patch" Lifecycle can contain the same Build and Production Levels as the normal Lifecycle, but the Test Levels in between may be skipped.
|
The BASE Lifecycle cannot be reused in other (Branch) Project Streams, so a new Lifecycle must be created before creating a Branch Project Stream. |
The Lifecycles submenu option lets you start the following procedures:
The Lifecycles Overview screen lets you verify and change the information concerning Lifecycles and their related Levels. The following actions are possible:
-
Modifying Lifecycle definitions
-
Modifying the contents of a Lifecycle
-
Modifying Levels connected to the Lifecycle
|
Levels (Build, Test and Production) can also be created via the Levels submenu option. the advantage of creating them at this stage, via the Edit Lifecycle screen, is that the Level will automatically be connected to the Lifecycle. |
Creating a Lifecycle
-
In the Project Administration context, select Lifecycles > Create.
The Create Lifecycle panel is displayed at the top of the Create Lifecycle screen:

The following fields are available. Fields marked with an asterisk are mandatory.
Field Meaning Name
In this field, enter the name of the new Lifecycle.
Description
In this field, enter a description for the new Lifecycle.
Base
This read-only field is always set to No, because the BASE Lifecycle is automatically created during project creation. It is not possible to create additional BASE Lifecycles.
-
Fill out the fields as required and click Create.
You can also click Reset to empty the fields and restore the initial values.
The new Lifecycle is added to the list of Lifecycles for the selected Project.
-
Additional Information
Underneath the Create Lifecycle panel, you will find an overview of the existing Lifecycles.
For more information on this panel, refer to Lifecycles Overview Screen.
-
Click the Create button to create the Lifecycle.
The Edit Lifecyle screen is displayed.
For more information, refer to the section Editing a Lifecycle.
Lifecycles Overview Screen
The Lifecycles Overview screen lets you verify and change the information concerning Lifecycles and their related Levels. The following actions are possible:
-
Modifying Lifecycle definitions
The Lifecycles Overview Screen
-
In the Project Administration context, select Lifecycles > Overview.
The following screen is displayed:

-
Define the required search criteria on the search panel.
The list of items on the overview will be automatically updated based on the selected criteria.
You can also:
-
click the Search link to refresh the list based on the current search criteria,
-
click the Reset search link to clear the search fields.
-
-
On the Lifecycles Overview panel, verify the Lifecycle Information fields.
For a description of the fields, refer to the section Creating a Lifecycle.
-
Depending on your access rights, the following links may be available on the Lifecycles Overview panel:

Edit
This option is available to IKAN ALM Users with Project Administrator Access Rights. It allows editing the Lifecycle definition.

Delete
This option is available to IKAN ALM Users with Project Administrator Access Rights. It allows deleting a Lifecycle definition, except for the BASE Lifecycle that is connected to the Head Project Stream.

History
This option is available to all IKAN ALM Users. It allows to display the History of all create, update and delete operations performed on a Lifecycle.
-
Verify the information on the Defined Levels panel.
For more information, refer to the section Editing a Lifecycle.
Editing a Lifecycle
-
Switch to the Lifecycles Overview screen.
-
Click the
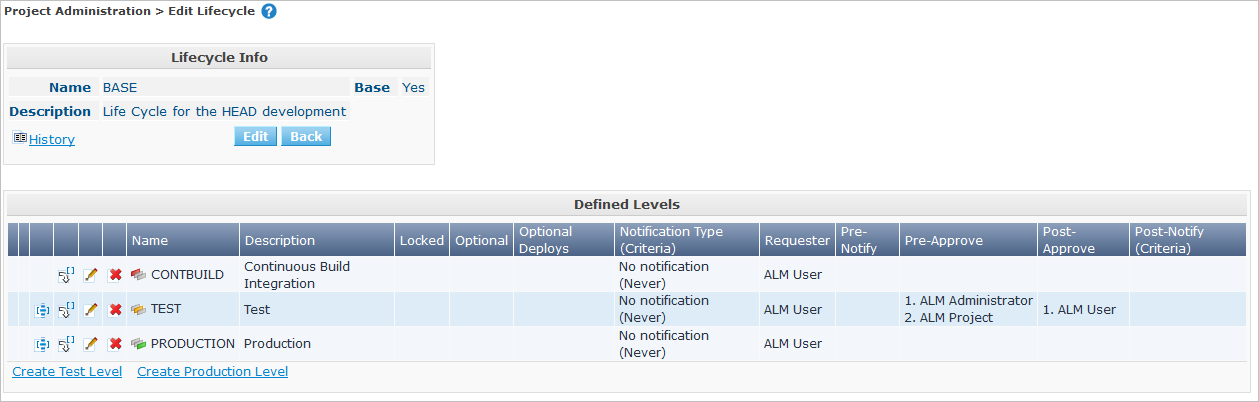
Edit link in front of the Lifecycle you want to edit.The Edit Lifecycle screen is displayed:
-
Click the Edit button.
-
Change the fields as required.
For a detailed description of the fields, refer to Creating a Lifecycle.
-
Click Save to save your changes.
You can also click:
-
Refresh to retrieve the settings from the database.
-
Back to return to the previous screen without saving the changes.
-
On the Edit Lifecycle screen you can also edit the Levels, make them optional, activate the Optional Deploys option and add additional Levels using the Create Level links, and modify their order. For more information, refer to the section Levels.
-
-
Underneath the Lifecycle Info panel, an overview of the defined Levels, as well as the necessary links to create Test and Production Levels are available.
For more information, refer to the sections:
Defined Levels Panel
On the Defined Levels panel, the following information is available for each of the defined Levels:
| Field | Meaning |
|---|---|
Name |
This field contains the user-defined name of the defined Level. It typically refers to the Level’s type or function. |
Description |
This field contains a user-defined description of the Level. |
Type |
This field indicates the Level Type. The following Level Types are available:
|
Locked |
This field indicates whether or not this Level is locked. If a Level is locked, this field contains the locked icon ( If a Level is not locked, this field remains empty. |
Optional |
This field indicates whether or not this Level is optional. If a Level is optional, this field contains a red check mark ( |
Optional Deploys |
This field indicates whether or not the Optional Deploys option is enabled on this Level. If the Optional Deploys option is enabled, this field contains a red check mark ( |
Notification Type (Criteria) |
This field indicates the Notification Type associated to the Level (Mail or No Notification), followed, between brackets, by the Notification Criterion (Always, Fail, Successful or Never). |
Requester |
This field indicates the name of the Requester User Group. Members of this User Group have the right to create Level Requests for that Level. |
Pre-Notify |
This field indicates the name of the Pre-Notification User Group. Members of this User Group will be notified when a Level Request is created for this Level, this means before its execution. |
Pre-Approve |
This field lists the Pre-Approval User Groups that have been set for this Level, along with a sequence number. All Pre-Approvals must be granted before a Level Request for this Level is started. A Pre-Approval can be granted or rejected by any member of the indicated User Group. |
Post-Approve |
This field lists the Post-Approval User Groups that have been set for this Level, along with a sequence number. Post-Approvals can be granted or rejected after a Level Request for this Level has ended. If all approvals are granted, the status of the Level Request will be set to Success or Warning, otherwise the Level Request will get the status Rejected. A Post-Approval can be granted or rejected by any member of the indicated User Group. |
Post-Notify |
This field indicates the name of the Post-Notification User Group, followed, between brackets, by the Post-Notification Criterion. Members of this group will be notified when a Level Request has ended, depending on the Levels Post-Notification Criteria. |
|
The Pre-Notify, Pre-Approve, Post-Approve and Post-Notify fields do not apply for Build Levels. |
Creating Additional Levels
Underneath the Defined Levels panel, the following links may be available:
-
Create Build Level
This option is only available if no Build Level has been defined yet. The first Level defined for a Lifecycle must be a Build Level. Once the Build Level has been created, this option is no longer available, because a Lifecycle must contain exactly one Build Level.
For a description of the fields, refer to the section Creating a Build Level.
-
Create Test Level and Create Production Level
These options become available, once the mandatory Build Level for the Lifecycle has been defined.
For a description of the fields, refer to the section Creating a Test or Production Level.
Inserting an Existing Level
|
Levels can only be inserted one by one. |
-
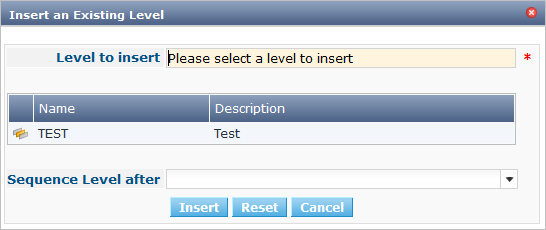
Click the Insert an Existing Level link on the Defined Levels panel.
One of the following screens is displayed:
-
From the table, select the Level to be inserted.
This link is visible as long as there are levels available which are not yet inserted in this lifecycle. If no Level has been assigned to the Lifecycle yet, you can only insert a BUILD Level.
-
Determine the position in the Level Sequence by selecting the preceding Level from the Sequence Level after drop-down list.
If you do not specify the position, the Level will be added after the last Level of the same type.
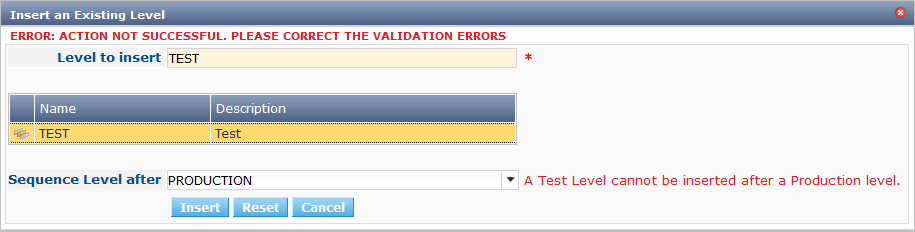
If you try to insert a Level at an unauthorized position, a warning will be displayed.
Be careful when inserting Test or Production Levels with Deploy Environments that have already been assigned to other Lifecycles. When Builds are delivered to the Deploy Environment, you risk to accidentally overwrite files in the Target directory of those Deploy Environments.
-
Click the Insert button.
You can also click:
-
Reset to clear the fields.
-
Cancel to return to the previous screen without saving the changes.
-
-
The Level will be inserted and displayed on the Defined Levels panel.
-
Unlock the Level using the Audit Project function.
For more information on auditing a Project, refer to Auditing Projects.
Changing the order of the Levels
On the Defined Levels panel, use the ![]() Up and
Up and ![]() Down links in front of the Level to change the position of the selected Level in the sequence of defined Levels.
Down links in front of the Level to change the position of the selected Level in the sequence of defined Levels.
|
These links are not available for Levels that cannot be moved up or down. Test Levels may not be placed after Production Levels. |
Making a Level optional or required
Making a Level Optional means that it can be skipped in the Lifecycle.
For example: consider a Lifecycle that defines four Levels: Build, Test, Training and Production. Making the Training Level optional, means that Builds can be delivered from the Test Level straight to Production, without ever needing to be delivered to the Training Level.
-
On the Defined Levels panel, click the
 Make Level Optional link in front of the Level to make it optional.
The following message is displayed:

Note: The Level that was made Optional, and all following Levels in the Lifecycle will be locked.
-
Unlock the Level using the Audit Project function.
For more information on auditing a Project, refer to Auditing Projects.
Note: The icon in front of the Level has changed to
 .
You can use this Set Required link to make the Level required again.
.
You can use this Set Required link to make the Level required again.
Enabling or Disabling Optional Deploys
If you enable the Optional Deploys functionality on a Level, you will be able to skip Deploys to specific Deploy Environments at the moment you create a Level Request (The Action Type may be (Re)Deliver Build or Rollback Build). See also Creating Level Requests.
This can be useful, for example, if you execute a Level Request with multiple Deploys and one of the (non-blocking) Deploys fails. With this option, it will be possible to execute the Level Request while skipping the failing Deploy and still continue to the next step in the Lifecycle.
|
In case Deploys are skipped, the status of the Level Request will be set to warning (even if it executed successfully). See also Phase Logs. |
-
Switch to the Lifecycles Overview screen.
-
Click the
Edit link in front of the required Lifecycle. -
On the Defined Levels panel, click the
 Enable Optional Deploys link in front of the Level.
 -
Unlock the Level using the Audit Project function.
For more information on auditing a Project, refer to Auditing Projects.
The icon in front of the Level has changed to
 .
You can use this Disable Optional Deploys link to make all Deploys of the Level Request required again.
.
You can use this Disable Optional Deploys link to make all Deploys of the Level Request required again.
Deleting a Lifecycle
-
Switch to the Lifecycles Overview screen.
-
Click the
Delete link in front of the Lifecycle you want to delete.This link is not available for the BASE Lifecycle, because the BASE Lifecycle cannot be deleted.
The following screen is displayed:
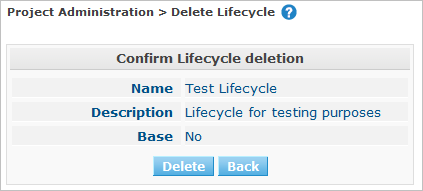
-
Click Delete to confirm the deletion.
You can also click Back, if you want to return to the previous screen without deleting the Lifecycle.
-
If you try to delete a Lifecycle that is connected to a Project Stream, the following screen is displayed:

Remove the Lifecycle from the Project Stream before deleting it. Editing Project Stream Settings
Viewing the Lifecycle History
-
Switch to the Lifecycles Overview screen.
-
Click the
History link in front of the Lifecycle to display its History View.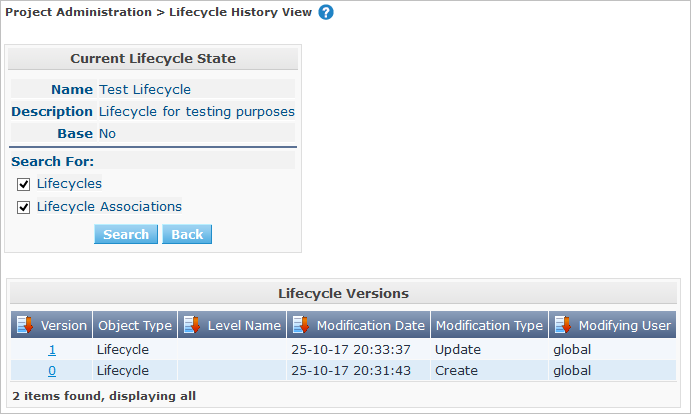
For more detailed information concerning this History View, refer to the section History and Event Logging.
Click Back to return to the previous screen.
Editing a Level
-
Switch to the Lifecycles Overview screen.
-
Click the
Edit link in front of the required Lifecycle. -
On the Defined Levels panel, click the
Edit link for the required Level.The Edit Level screen is displayed:
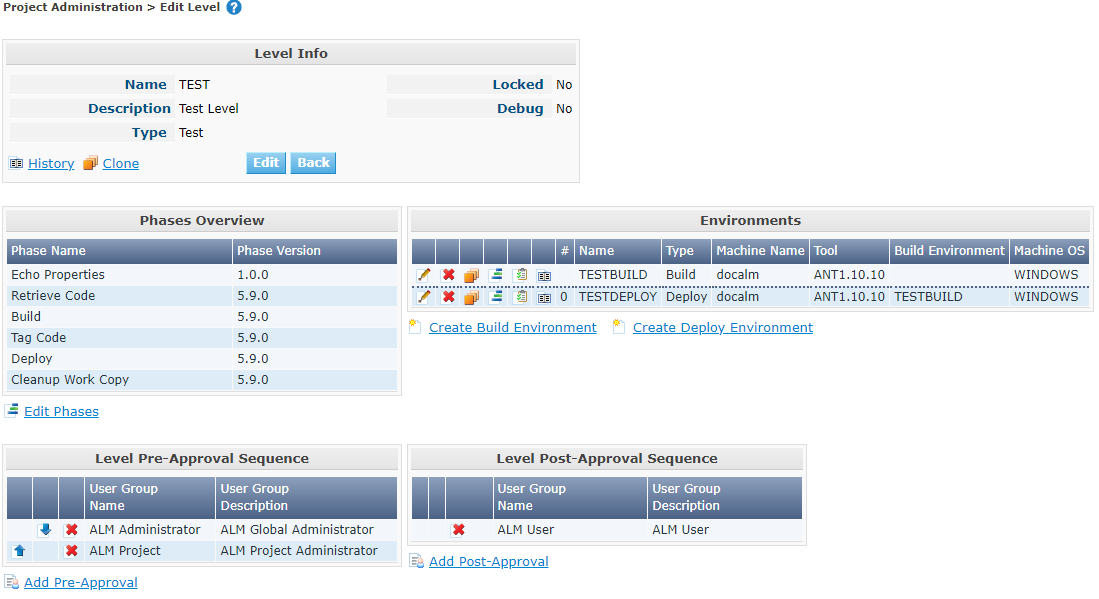
-
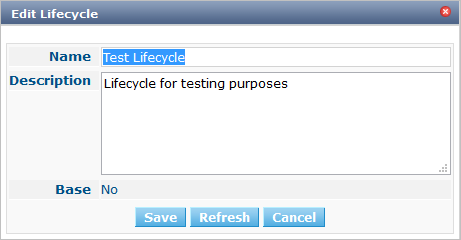
Click the Edit button on the Level Info panel and edit the fields as required.
The following pop-up window will be displayed:
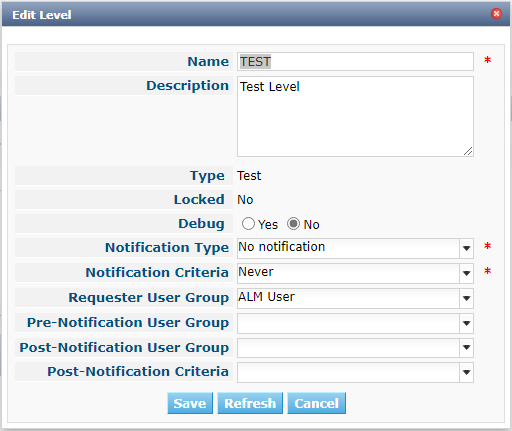
-
Edit the fields on the Edit Level panel.
For a description of the fields, refer to the sections Creating a Build Level and Creating a Test or Production Level.
-
Click Save to save your changes.
You can also click Refresh to retrieve the settings from the database or Cancel to return to the previous screen without saving your changes.
-
Underneath the Level Info panel, an overview of the defined Phases, Environments and, optionally, Pre- and Post-Approvals is displayed, as well as the necessary links to edit Phases, to create Build and Deploy Environments and, optionally, to edit the Deploy Sequence and the Approvals.
For more information, refer to the sections:
Removing a Level
|
Removing a Level from the Lifecycle does not remove them from the Project. The Level remains available for insertion in any Lifecycle. To delete a Level, refer to Deleting a Level. |
-
Switch to the Lifecycles Overview screen.
-
Click the
Edit link in front of the required Lifecycle. -
Click the
Remove link in front of the Level you want to remove. -
Click Yes to confirm the removal.
The Level is removed from the Lifecycle, but is not deleted. You can re-insert the Level at any time.
To permanently delete a Level, refer to the section Deleting a Level.