User Interface Overview
Refer to the following sections for detailed information about:
Navigating Through IKAN ALM
Main Menu
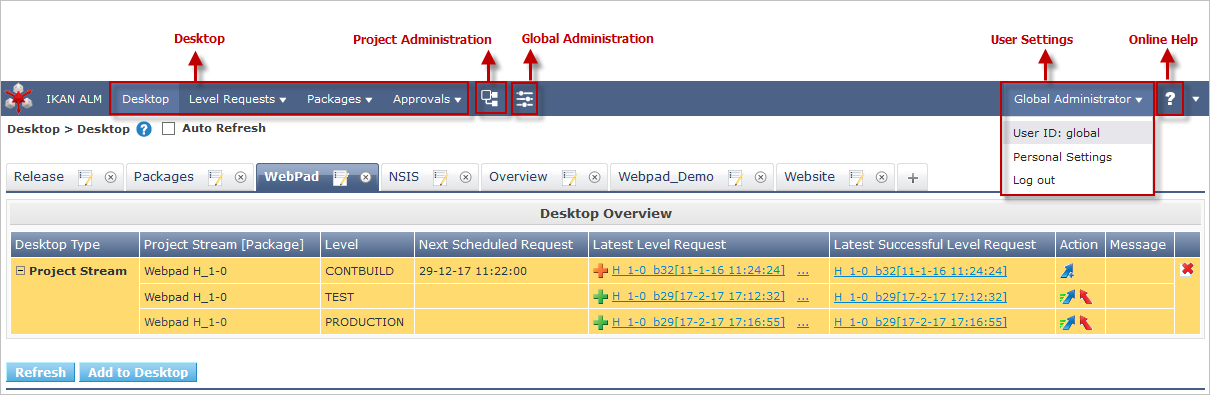
The IKAN ALM user interface contains 3 main sections: the Desktop, the Project Administration section and the Global Administration section. Those sections can be accessed from the Main Menu, the blue toolbar on top of the screen. At the right, it contains the User Settings of the current user as well as the context-sensitive help pages.
Submenus
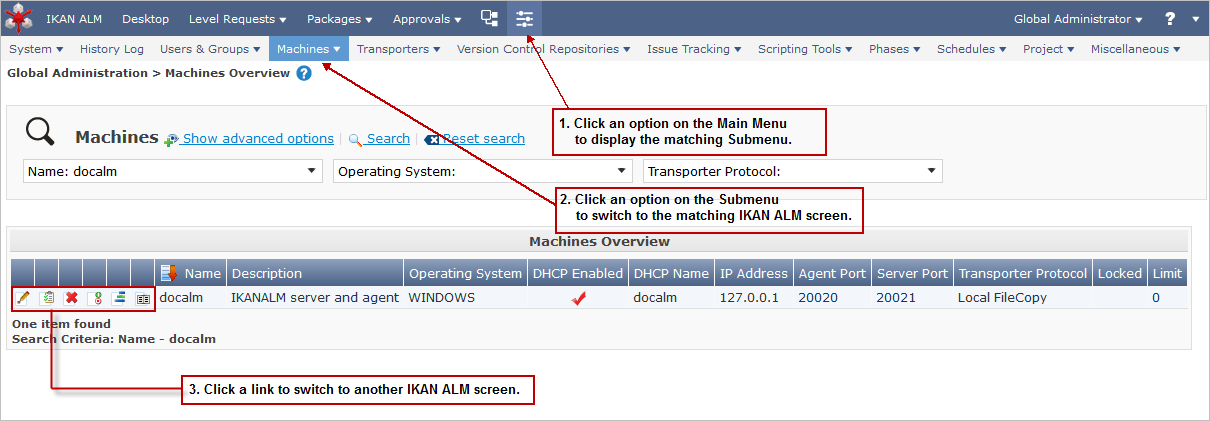
When you select the Global or Project Administration option from the Main Menu, the dependent Submenu is displayed in the gray banner below the Main Menu.
Submenu options followed by a small triangle contain a drop-down menu with extra selection options.
Links appear on or below the Overview panels of the IKAN ALM screens. When you select them, another IKAN ALM screen is displayed.
The IKAN ALM Screen
An IKAN ALM screen contains the following main items.

Selected Menu Indication
The Selected Menu Indication below the Submenu shows how the user switched to the displayed IKAN ALM Screen. The following format is used: Main Menu Option > Submenu Option

Search Panels
Search panels allow specifying search criteria, which restrict the list of items displayed in the Overview panel. While defining those search criteria in comboboxes and text fields, you may use the standard * and ? wild card characters. The asterisk can represent 0, 1 or more characters. The question mark can represent exactly 1 character.
By default, only the most common search criteria are displayed on the search panel. You can display all available search criteria by clicking the Show advanced options link.
Using the Reset search link you can clear all search criteria and display the full list of items on the Overview.
On some of the more complex search panels, you can save the search criteria as a filter, to be able to reuse them afterwards. If a filter already exists, you can select it from the drop-down menu. For more info on using filters, refer to the section Defining Search Filters.
Create Panels
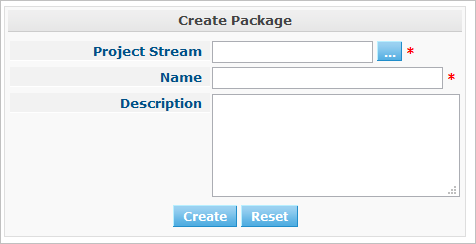
Create panels allow defining new IKAN ALM Objects. Mandatory fields are marked with a red asterisk.
Clicking the Create button will create the object. The Reset button will, depending on the object you are creating, clear the fields and/or restore the initial values.
Overview Panels
Overview panels are displayed below the Search or Create panel. If no search criteria have been defined, the overview lists all IKAN ALM Objects of the selected type. If search criteria have been defined, only IKAN ALM Objects matching those search criteria are displayed.
|
All applied search criteria will be indicated in the footer of the results list. |
The Overview panel may list one or more links to the left of the listed IKAN ALM Objects. The options offered depend on the displayed IKAN ALM Objects and on the User’s Access Rights.
If you have User Access Rights, the following links are available:
| Option | Description |
|---|---|
|
When you select the View option, a View panel will be displayed below the Selected Menu Indication. You will not be able to edit any values. |
|
This option is available on the Overview screens in Global Administration and Project Administration. It is also available in some detailed Global and Project Administration interfaces, e.g on the System Settings screen, or the Edit Project screen. All operations on objects and components related to those sections are logged in the IKAN ALM database. The History link allows you to display their history of events. |
|
This option is available on the Machine Overview screen. Use this link to display the activity status of the Machine and the last lines of output of the Agent Daemon process running on this Machine. |
If you have Project Administrator or Global Administrator Access Rights, the following additional options may be available:
| Option | Description |
|---|---|
|
When you select the Edit option, an Edit panel will be displayed below the Selected Menu Indication. You will be able to edit the required values and save the changes. |
|
When you select the Delete option, a Delete Confirmation panel will be displayed below the Selected Menu Indication. You will be able to confirm or cancel the deletion. |
|
This option is specific for the Project panel and the Project Streams Overview panel. |
|
These options are specific for the Projects Overview and the Project Streams Overview panels. They allow you to hide specific Projects or Project Streams on the search results Overview. |
|
These options are specific for the Lifecycles Overview screen. They allow you to make Levels optional. |
|
This option is specific for the Issue Tracking Systems Overview screen. It allows to modify the value of the property to ensure a correct usage of the Issue Tracking System. |
|
This option is specific for the Users Overview screen. It allows disconnecting Users before their session has timed out. |
|
Columns marked with the |
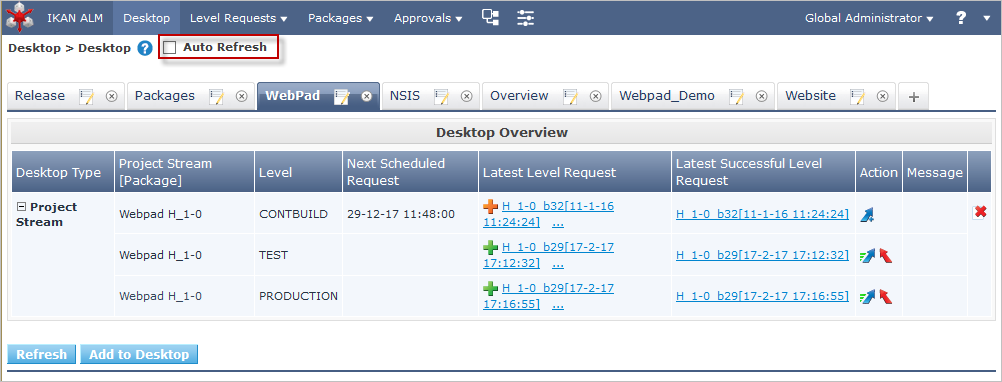
Auto Refresh
If your IKAN ALM Global Manager has defined an Automatic Refresh Rate on the Miscellaneous panel in the System Settings, the Auto Refresh option will be available on the Desktop, and on the Level Requests and Builds and Deploys overviews.
If the Auto Refresh option is activated, the screen will be refreshed following the interval specified by the Auto Refresh Rate specified in the System Settings.
Select the option to toggle its status.