IKAN ALM Installation Guide
Purpose
This document explains how to install IKAN ALM using a graphical installer. If you want to install IKAN ALM using the console installer, please refer to the document HowToALM 5.8_Tomcat_Install.
IKAN ALM consists of 3 major components:
-
IKAN ALM Server
-
IKAN ALM Agent
-
IKAN ALM Commandline
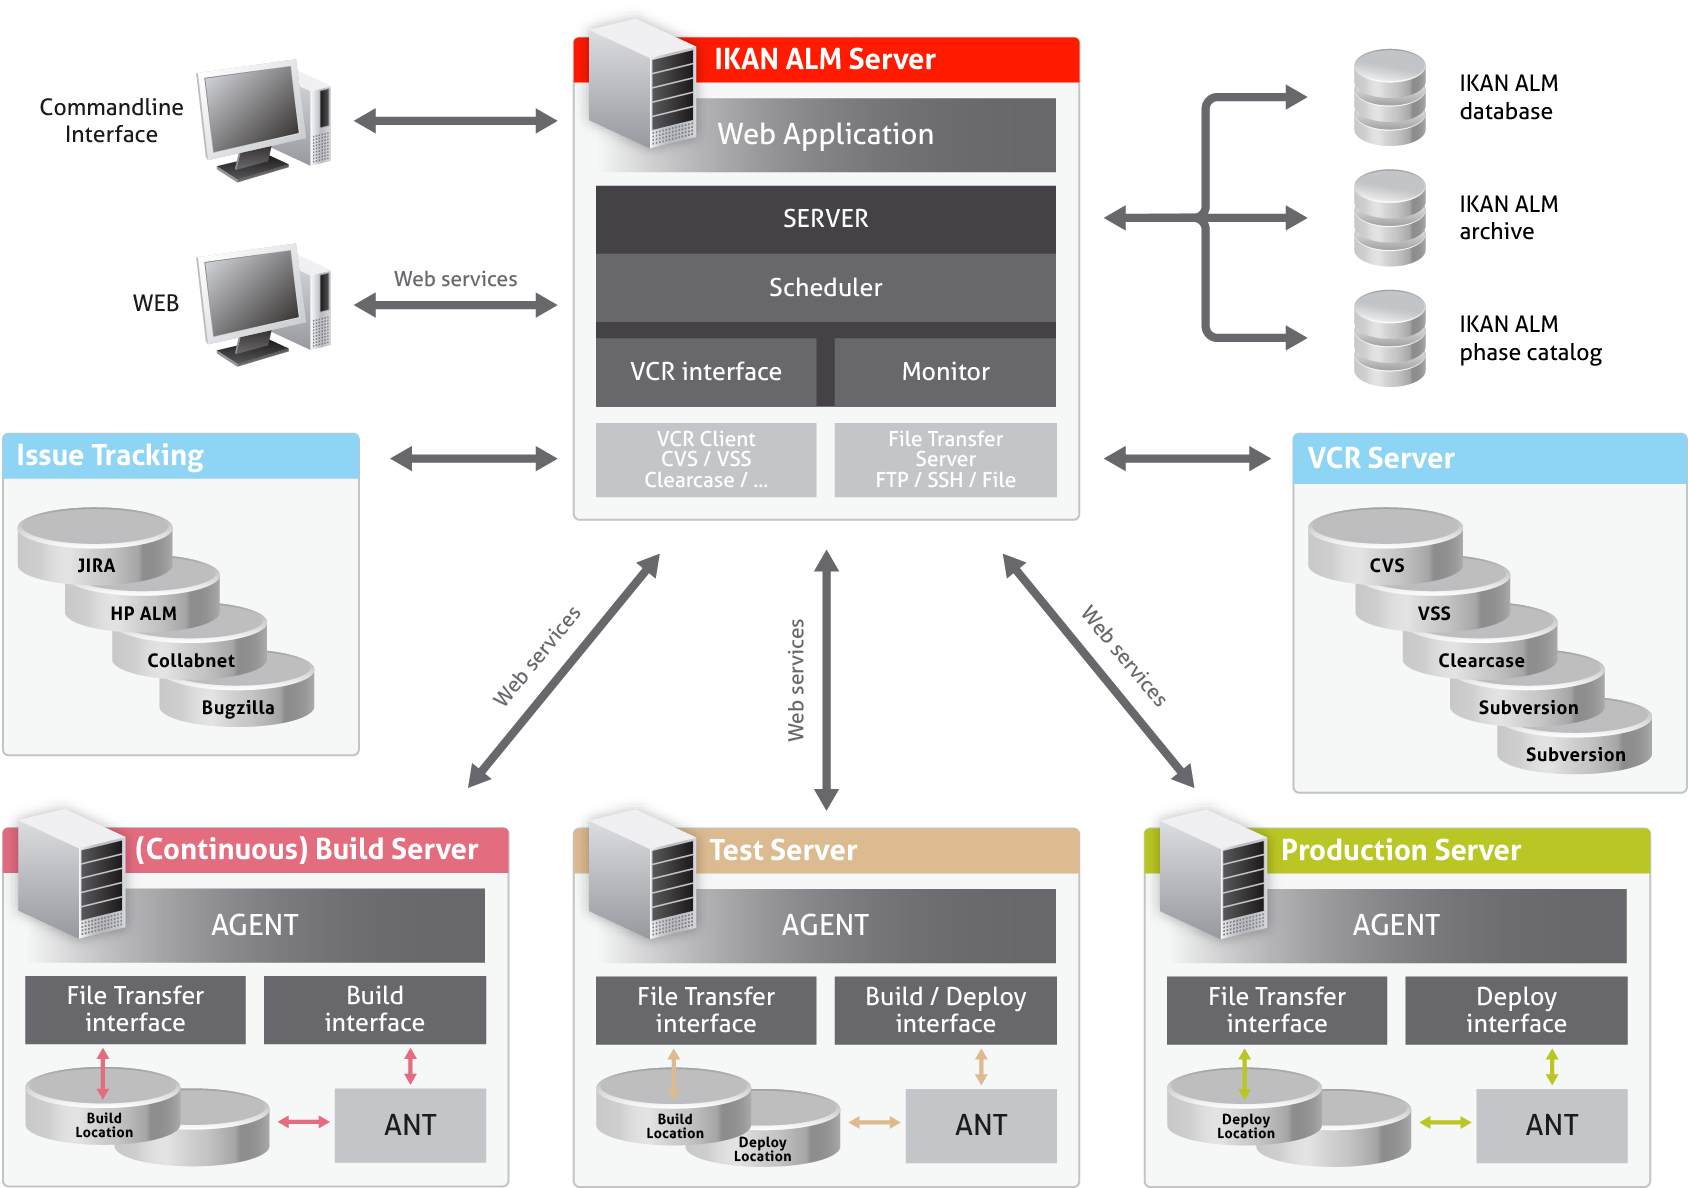
An IKAN ALM installation needs exactly 1 Server and at least 1 Agent to function correctly.
The IKAN ALM Server consists of 3 different components:
-
the IKAN ALM Web Application
-
the IKAN ALM Server daemon
-
the IKAN ALM Server environment
The IKAN ALM Web Application is an interface to the IKAN ALM administration, and must be deployed on a Java EE Web container.
The IKAN ALM Server daemon itself consists of 2 sub-components, a Scheduler and a Monitor. The IKAN ALM Scheduler is responsible for observing the VCR (Version Control Repository) and creating a Build request when changes (modified sources) in the VCR are detected. The IKAN ALM Monitor will manage the different build and deploy actions that are executed by the IKAN ALM Agent(s).
Both the IKAN ALM Server and the IKAN ALM Agent run as OSGi bundles in Apache Karaf containers, benefiting from the advantages of a modular architecture. The IKAN ALM Server daemon will be installed in the IKAN ALM Server Environment, and may be launched by scripts, or started as a Windows service or Unix/Linux daemon.
The IKAN ALM Server Environment contains the following important files and folders:
-
Build Archive Location: the location where the Build results will be stored,
-
Work Copy Location: the location where the sources that are checked out from the repository are stored before they are transported to the Agents,
-
Phase Catalog Location: the location where the Phases that have been imported will be stored, ready to be retrieved by remote Agents when needed,
-
Scripts Location: the location to be used for storing centralized build and deploy scripts,
-
Configuration with the (external) security system. For more information, refer to the Appendix JAAS configuration,
-
Documentation in PDF format.
A machine that needs to execute IKAN ALM Builds and Deploys must have the IKAN ALM Agent installed.
The IKAN ALM Commandline can be installed separately and can be used as an alternative for the web interface to create Level Requests and Reports via a command prompt.
Example configuration 1: Single machine, everything locally installed:
-
Machine 1: Server, Agent, Commandline
Example configuration 2: Multiple machines, remote Agent and Commandline:
-
Machine 1: Server, Agent
-
Machine 2: Agent, Commandline
Prerequisites
The following section provides an overview of the prerequisites for installing IKAN ALM.
The complete requirements are available online at http://www.ikanalm.com.
Hardware Requirements
| Component | Memory | Disk |
|---|---|---|
IKAN ALM Server |
Min 1GB, recommended 2GB |
Min 10GB, recommended 40GB |
IKAN ALM Agent |
Min 256MB, recommended 512MB |
Min 1GB |
IKAN ALM Commandline |
Min 128MB, recommended 256MB |
Min 40MB |
Note that these are just indicative values. If the IKAN ALM Server will also act as a Build Server, it might have more demanding memory requirements depending on the number of builds that run concurrently. For a more mathematical approach, we refer to the article “Capacity Planning for Software Build Management Servers” on the “CM Crossroads” site: http://www.cmcrossroads.com/article/capacity-planning-software-build-management-servers.
There is no hard and fast rule for disk storage space. The actual amount you will require depends on the number and size of the projects managed with IKAN ALM, and on the size of the build results stored in the build archive. More projects and larger build results mean more required disk space.
Java SE Runtime (JRE) 1.7 or 1.8
All IKAN ALM components need at least a Java Development Kit (JDK) or a Server Java Runtime (Server JRE). IKAN ALM has been tested to run with both Oracle Java and OpenJDK. The Java SE Server Runtime Environment (Server JRE) or Software Development Kit (SDK) can be freely obtained from Oracle’s website. Both 32-bit and 64-bit versions are supported. The latest version of Java SE can be downloaded from http://www.oracle.com/technetwork/java/javase/downloads/index.html.
Application Server
The IKAN ALM Web application requires a Java EE 5 to 7 compliant web container, supporting the Servlet 2.5 to 3.1 and JSP 2.1 to 2.3 specifications.
Apache Tomcat 7 or 8
IKAN ALM has been tested with Apache Tomcat 7.0.55 and later versions. When choosing a version, please check Tomcat’s own prerequisites (e.g. Tomcat 8 requires at least Java SE v 7).
IKAN ALM has been proven to run on Tomcat on different Operating Systems, including recent versions of Windows and Linux, Sun Solaris, HP Unix, MacOS X, zLinux, … If a suitable Java Runtime is available (Java SE Runtime (JRE) 1.7 or 1.8), IKAN ALM may run on other Operating Systems. Consult the detailed Technical Requirements on http://www.ikanalm.com.
Enable Unicode support in Tomcat
When using Unicode symbols in IKAN ALM (for instance, projects containing files with special characters in the name), an extra setting should be applied to the Tomcat’s server.xml configuration file.
Modify the TOMCAT_HOME/conf/server.xml file:
in the http connector, add the attribute URIEncoding="UTF-8":
<Connector port="8080" protocol="HTTP/1.1"
URIEncoding="UTF-8" connectionTimeout="200000" redirectPort="8443"
/>
This fix is based on the article: http://wiki.apache.org/tomcat/FAQ/CharacterEncoding.
Tomcat Memory Settings
It is recommended to set the following memory settings for running IKAN ALM with Java 8 in Tomcat:
-
initial Java heap size (-Xms) : 128m
-
max Java heap size (-Xmx) : 384m
-
max Metaspace size (-XX:MaxMetaspace) : 128m
If you launch Tomcat from the startup scripts, you need to create or edit TOMCAT_HOME/bin/setenv.bat (Windows) or TOMCAT_HOME/bin/setenv.sh (Linux/Unix), and to add, near the top of the file, a line like:
-
for Windows:
SET JAVA_OPTS=-Xms128m -Xmx384m -XX:MaxMetaspaceSize=128m -
for Linux/Unix:
JAVA_OPTS=-Xms128m -Xmx384m -XX:MaxMetaspaceSize=128m
If you run Tomcat as a Windows service, you need to set the memory settings in the file TOMCAT_HOME/bin/service.bat.
Add the following lines near the top of the file:
set JvmMs=128
set JvmMx=384
set JvmArgs=-XX:MaxMetaspaceSize=128m
After these modifications, you need to re-install the service by running "service.bat remove", followed by "service.bat install". You need Administrative privileges to run these commands.
If you use Java 7, replace the setting –XX:MaxMetaspaceSize=128m with -XX:MaxPermSize=128m.
For an explanation, refer to http://javaeesupportpatterns.blogspot.co.uk/2013/02/java-8-from-permgen-to-metaspace.html.
Database
IKAN ALM supports MySQL, MsSQL, Oracle and DB2 database as the back-end. During the installation, it is possible to verify a connection to an existing database, as well as to initialize the existing database with the default data. Beware that when the DB initializing option is selected, the existing data will be overwritten. Before initializing the database, make sure the database/scheme exists.
For MySQL, it is recommended that the database has a character set of UTF8. Here is an example of the MySQL script creating a database from scratch:
CREATE DATABASE alm CHARACTER SET utf8 COLLATE utf8_unicode_ci;
Consult your database documentation for more information on the appropriate UTF8-collation for your system.
Installing IKAN ALM
This section describes the different steps for installing IKAN ALM.
Running the installer
For Windows users
Execute either the 32-bit or the 64-bit installer:
-
alm_install_5-8_x86.exe
To run this installer image, you will need to have a 32-bit Public Java Runtime Environment (Public JRE) installed.
-
alm_install_5-8_x64.exe
To run this installer image, you will need to have a 64-bit Public Java Runtime Environment (Public JRE) installed.
Refer to Troubleshooting when the IKAN ALM installer won’t start.
The graphical IKAN ALM installer will start.
Depending on the flavor of Windows OS used, there can be differences in the installer’s behavior. If UAC is enabled (Windows Vista and later), Windows will ask for a confirmation for the program to make changes to the computer (if your user account is an administrator). If you are trying to install the application from an account other than Administrator, you might get the message "requested operation requires elevation".
For Linux/Unix users
Before installing ALM, make sure that the '$JAVA_HOME/jre/lib/security/java.security' file has write access for the current user, otherwise the installation can fail.
An example of granting the maximum access to the file:
sudo chmod 777 /usr/lib/jvm/java-8-openjdk-amd64/jre/lib/security/java.security
Open a shell, go to the folder containing the IKAN ALM installation files and execute java -jar alm_install_5.8.jar.
Assuming Java is installed and present in the PATH, the graphical IKAN ALM installer will start.
Language Selection, Welcome, Readme and LicensePanels
-
Choose the installation language and click OK.
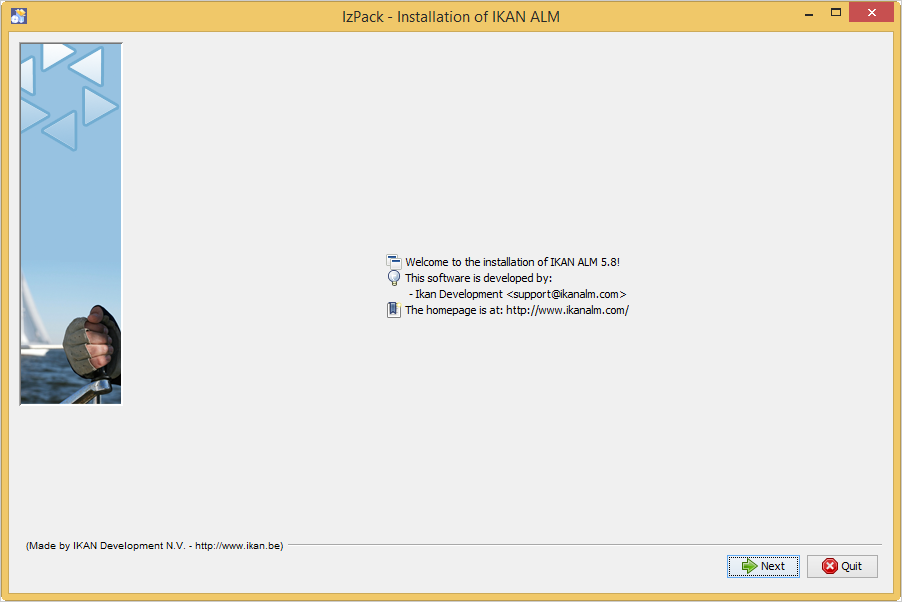
The following welcome screen will be displayed:
-
Click Next to continue.
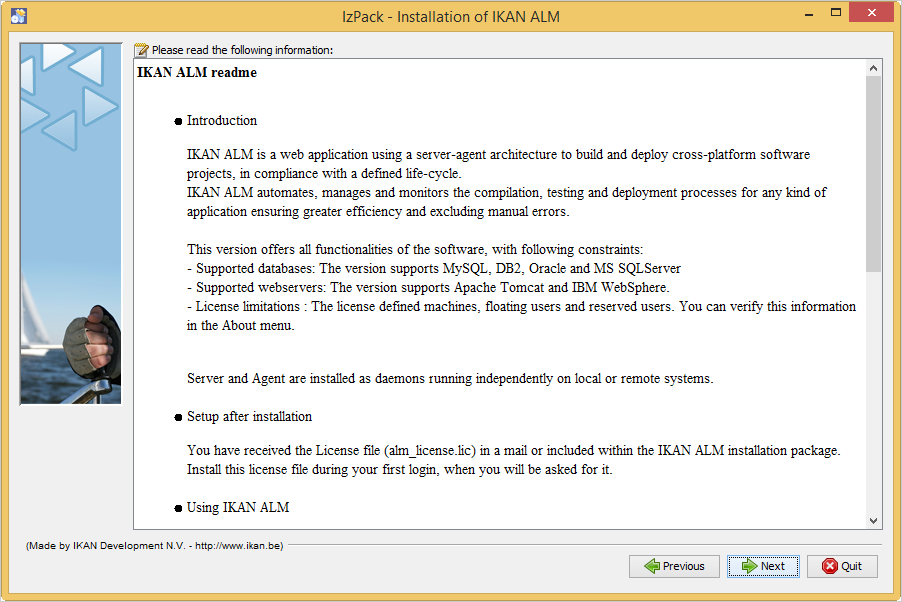
The following screen is displayed:
-
Carefully read the readme information and click Next to continue.
The following screen is displayed:
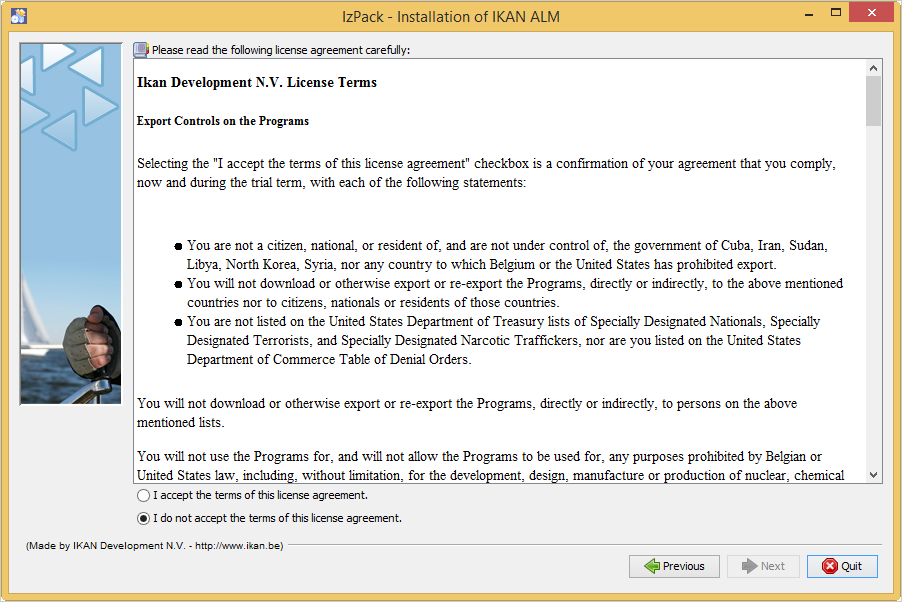
-
Read the license agreement carefully. Select the option “I accept the terms of this license agreement” and click the Next button.
Selecting the Packages to Install
The packages panel is displayed:
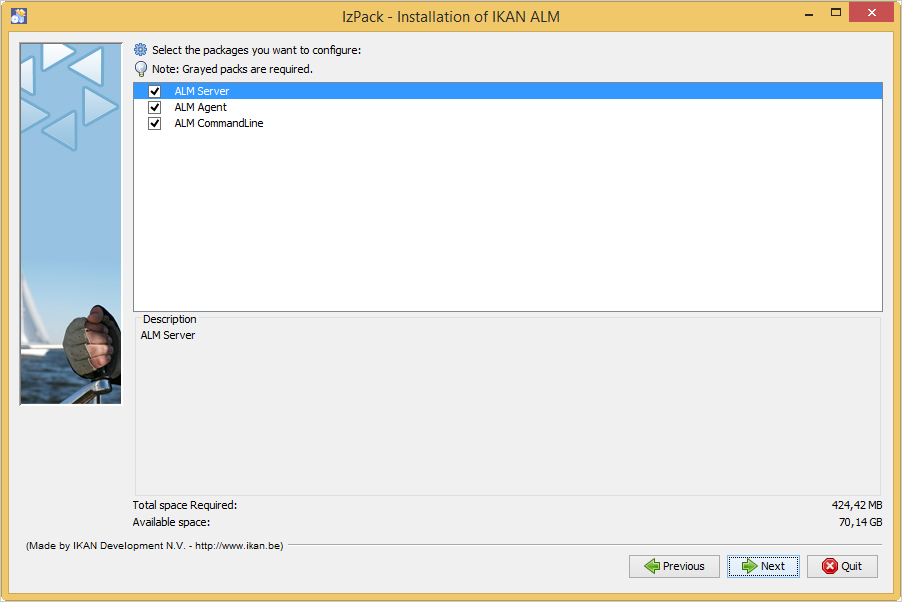
Here you can select which IKAN ALM components you wish to install. By default, all components are selected.
Select the component(s) you wish to install, and then click Next.
Refer to the following sections for more information on the installation options:
Installing the Server
This section explains the installation options of the IKAN ALM Server component.
|
The panels in this section are only displayed if you selected the “ALM Server” package. |
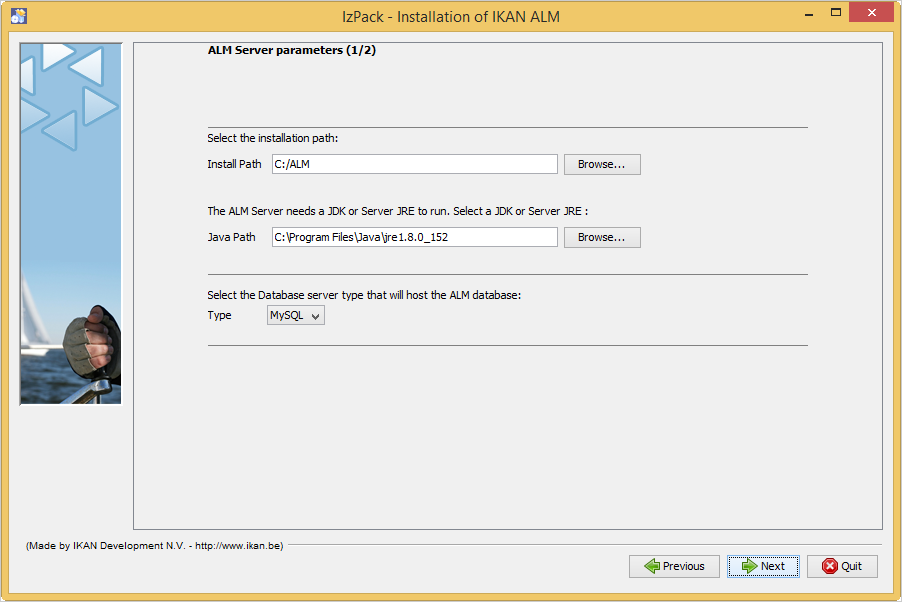
ALM Server parameters (1 of 2)
The following fields are available:
| Field | Description |
|---|---|
Install Path |
Select the location where IKAN ALM should be installed. The default is Further on in this document, this location will be referred to as |
Java Path |
The installation directory of the Java Runtime that will be used to launch the Server. This can point to a Server JRE or JDK. By default, the Java Runtime that started the installer is selected. IKAN ALM needs a Server JRE or JDK 1.7 or 1.8. You can change this location using the Browse button. Files will be copied to the Install Path, and a file will be modified in a subfolder of the Java Path, so make sure that the user who will run the installation has write access to these locations. Make sure that the selected Java Runtime is the same as the one that is used to start Tomcat! |
Database type |
The type of database that will host the IKAN ALM database. The possible choices are:
Specific parameters for the selected database can be provided later in the installation procedure. |
Click Next to go to the second page of ALM Server parameters.
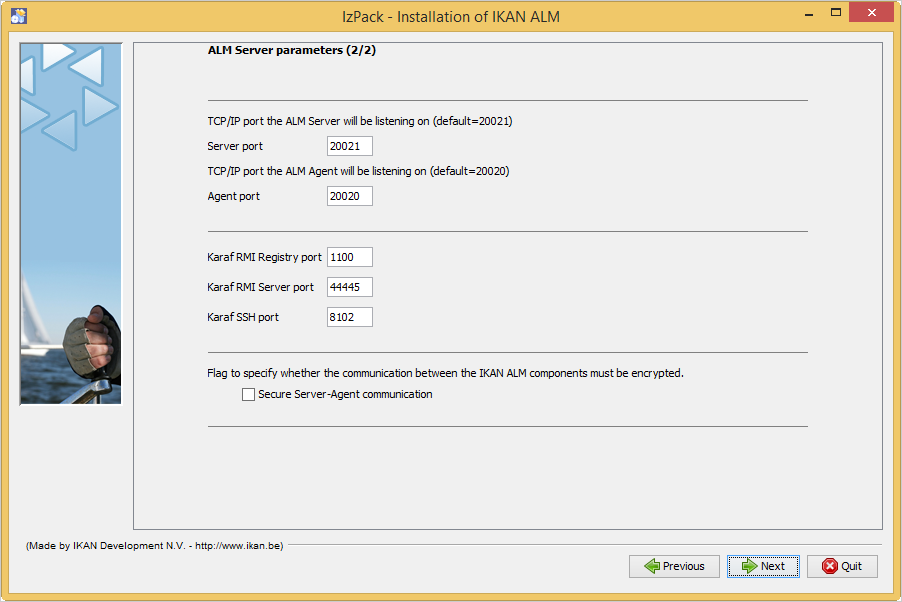
ALM Server parameters (2 of 2)
The following fields are available:
| Field | Description |
|---|---|
Server port |
The port number used for communication between the Server and its Agents. Note that you must use this same port number in subsequent IKAN ALM Agent installations, otherwise the Agent-Server communication may fail. Default: 20021 |
Agent port |
The port number the local IKAN ALM Agent is going to listen on. Default: 20020 |
Karaf RMI Registry port |
The RMI registry port used by the Karaf container the IKAN ALM Server is running in. Default: 1100 |
Karaf RMI Server port |
The RMI server port used by the Karaf container the IKAN ALM Server is running in. Default: 44445 |
Karaf SSH port |
The SSH port used by the Karaf container the IKAN ALM Server is running in. Default: 8102 |
Secure Server-Agent communication |
When enabled, this causes all Server-Agent communication to be encrypted. Default: disabled |
Click Next to go to the application server parameters panel.
Tomcat parameters
Provide the parameters of your Tomcat installation.
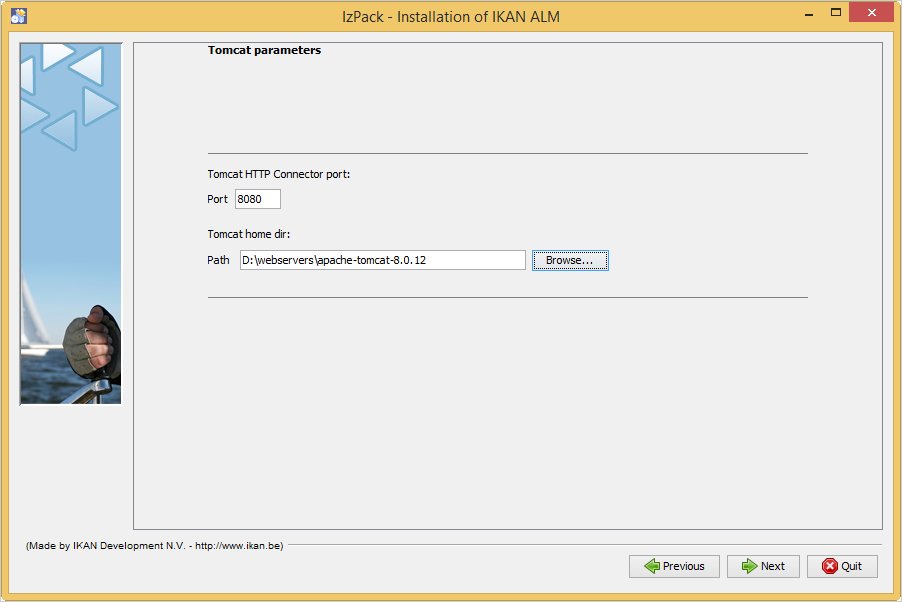
The following fields are available:
| Field | Description |
|---|---|
Port |
The Tomcat HTTP Connector port. Default: 8080 |
Tomcat home dir |
Set this to the home directory of the Tomcat installation that will host the IKAN ALM Web application. |
Click Next to go to the Database parameters panel.
Database connection parameters
Depending on the database that was chosen to host the IKAN ALM database, a panel similar to this one will be displayed:
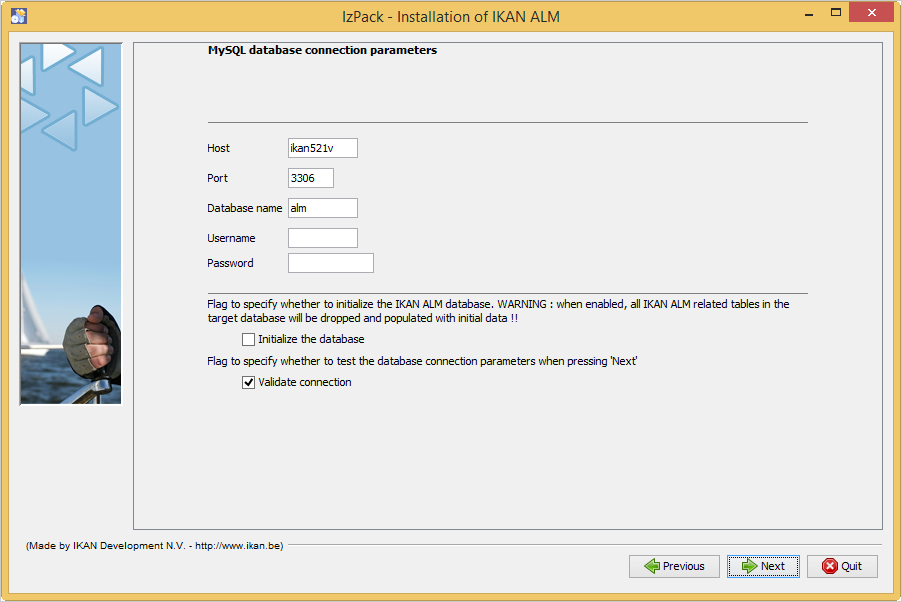
The following fields are available:
| Field | Description |
|---|---|
Host |
The host name of the database server. Default: the host name of the local system |
Port |
The port on which the database server is listening on. Default: the default port of the selected database type |
Database name |
The name of the IKAN ALM database. |
Schema |
The schema name, only available when the database type is DB2. Default: ALM |
Username |
A valid user that can connect to the database and has write access to it. |
Password |
A valid password. |
Initialize the database |
Specifies whether to initialize the IKAN ALM database. WARNING: when enabled, all IKAN ALM related tables in the target database will be dropped and populated with initial data! |
Validate connection |
Specifies whether to test the database connection parameters after pressing the Next button. |
Click Next to continue the installation.
Installing the Agent
When you selected the “ALM Agent” package, the following panel is displayed:
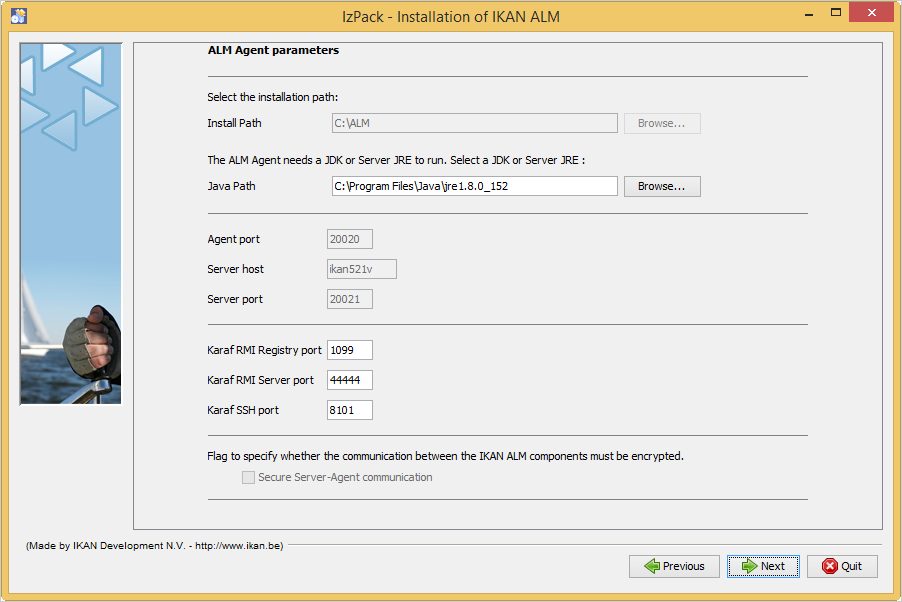
The following fields are available:
| Field | Description |
|---|---|
Install Path |
Select the target location where the IKAN ALM Agent should be installed.
The default is You can change this location using the Browse button. This field is initialized to the Server Install Path and greyed out when you also selected the IKAN ALM Server component. |
Java Path |
The installation directory of the Java Runtime that will be used to launch the Agent. This can point to a Server JRE or JDK. By default, the Java Runtime that started the installer is selected. The IKAN ALM Agent needs a Server JRE or JDK 1.7 or 1.8. You can change this location using the Browse button. |
Agent port |
The port the Agent will be listening on. The default value is `"20020`". I f you change this value, you will also have to change the `"Agent Port`" property of the Machine representing this Agent in the IKAN ALM Global Administration. This field is initialized and greyed out when you also selected the IKAN ALM Server component. |
Server host |
The hostname (or IP address) of the IKAN ALM Server machine. The Agent will try to connect to the Server by using this name or IP address and using the HTTP or HTTPS protocol. By default it is set to the host name of the local system. This field is initialized and greyed out when you also selected the IKAN ALM Server component. |
Server port |
The port the IKAN ALM Server is listening on. The Agent will try to connect to the Server on this port. The default value is “20021”. This field is initialized and greyed out when you also selected the IKAN ALM Server component. |
Karaf RMI Registry port |
The RMI registry port used by the Karaf container the IKAN ALM Agent is running in. Default: 1099 |
Karaf RMI Server port |
The RMI server port used by the Karaf container the IKAN ALM Agent is running in. Default: 44444 |
Karaf SSH port |
The SSH port used by the Karaf container the IKAN ALM Agent is running in. Default: 8101 |
Secure Server-Agent communication |
When enabled, this causes all Server-Agent communication to be encrypted. Default: disabled. This field is initialized and greyed out when you also selected the IKAN ALM Server component. |
Click Next to continue the installation.
Installing the Commandline
When you selected the “ALM CommandLine” package, the following panel is displayed:
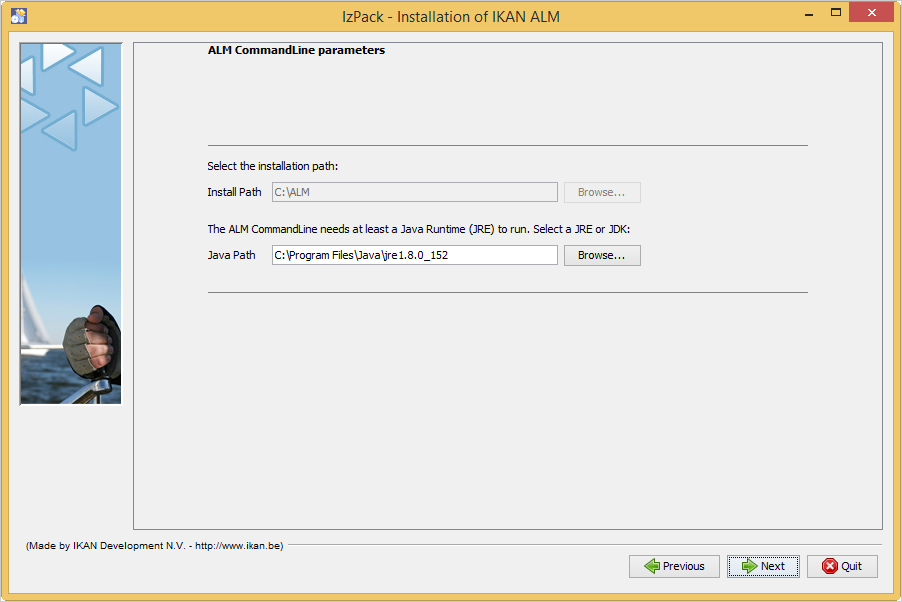
The following fields are available:
| Field | Description |
|---|---|
Install Path |
Select the target location where IKAN ALM should be installed.
The default is |
Java Path |
The installation directory of the Java Runtime that will be used to launch the Commandline. This can point to a Server JRE or JDK. By default, the Java Runtime that started the installer is selected. The IKAN ALM Commandline needs at least a JRE or JDK 1.7. You can change this location using the Browse button. |
Click Next to continue the installation.
Summary and installation
A Summary panel will be displayed:
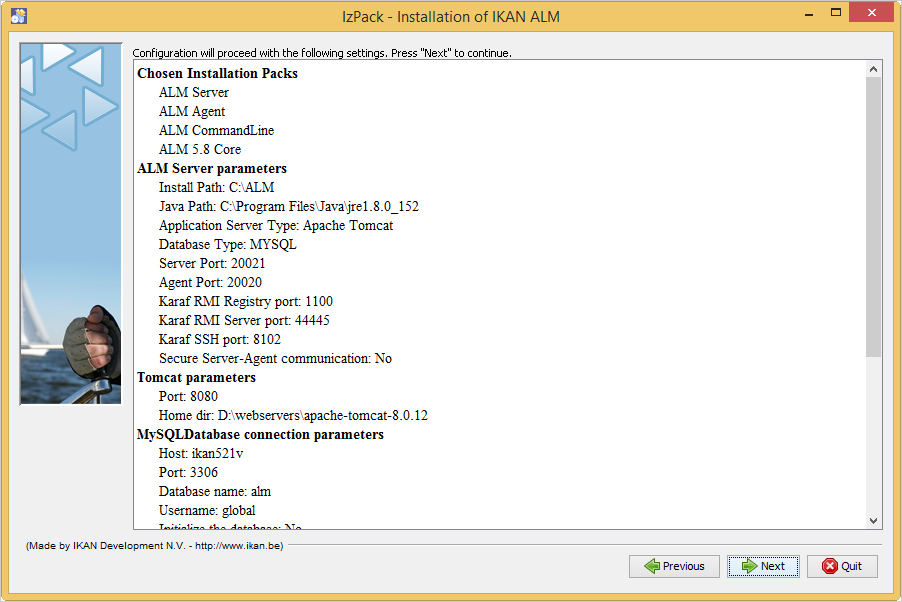
Verify all defined parameters, and click Next to start the installation.
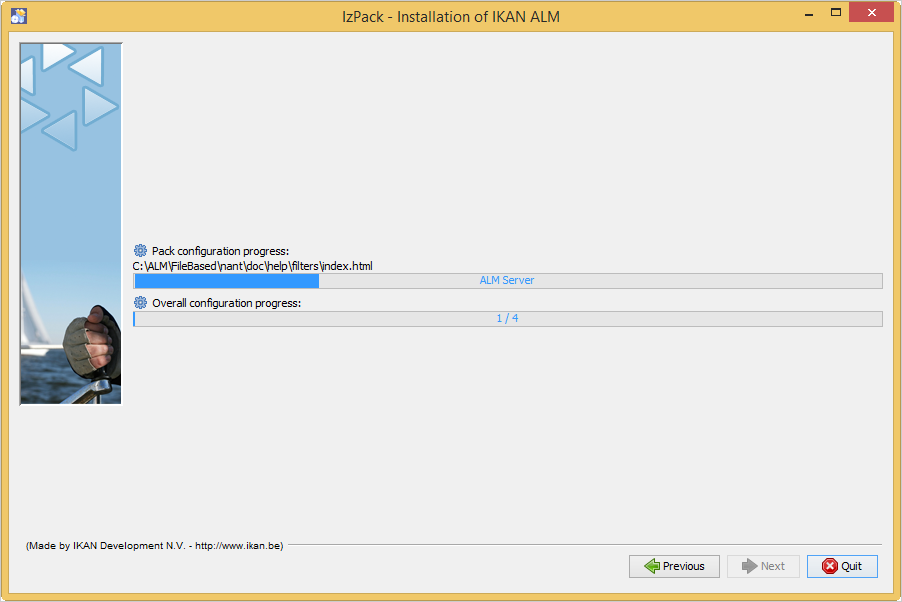
When this step has finished successfully, click Next to perform post-installation actions.
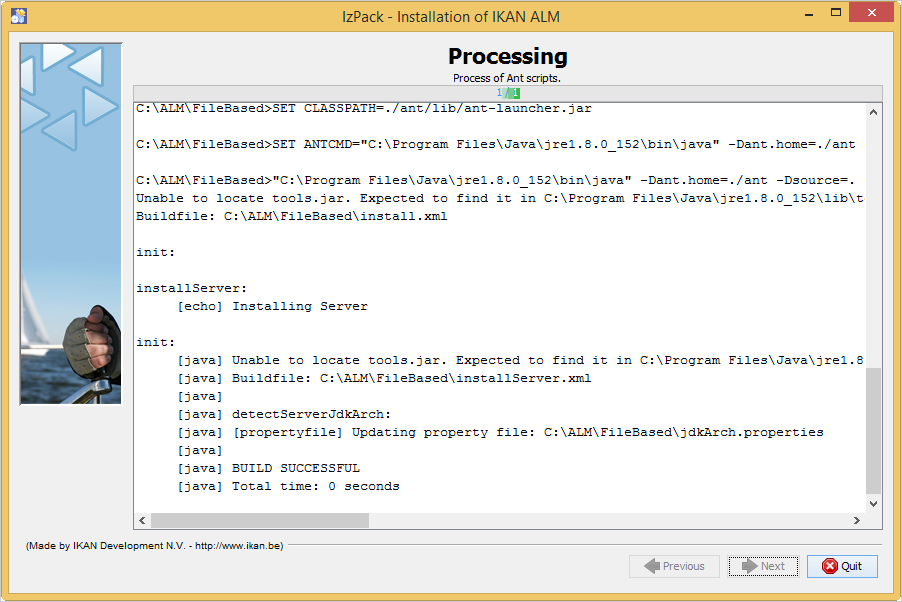
When all actions are completed successfully, the following will be displayed:
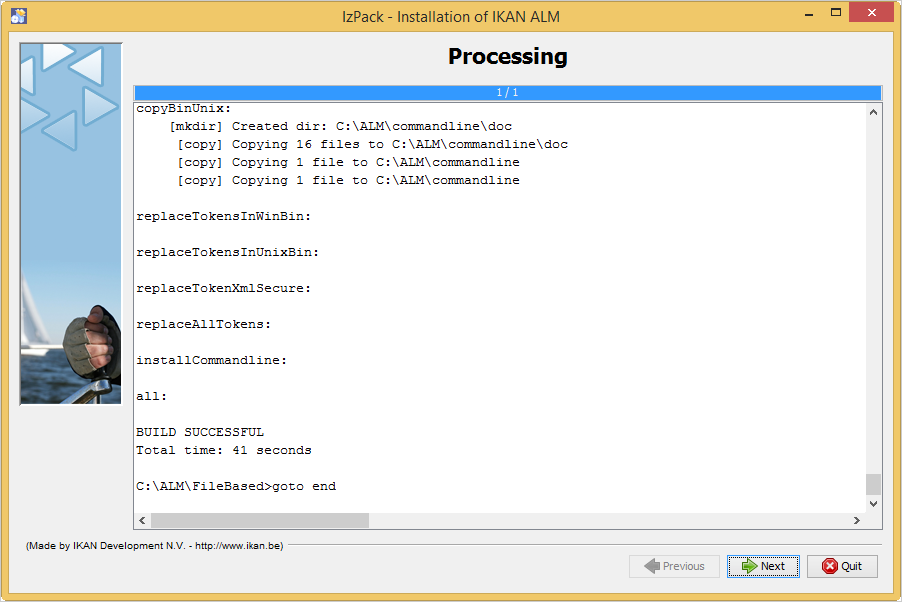
If the message “BUILD SUCCESSFUL” is displayed, the post-installation actions were all successful.
Click Next to check the last panel of the installation, which displays information about the uninstaller.
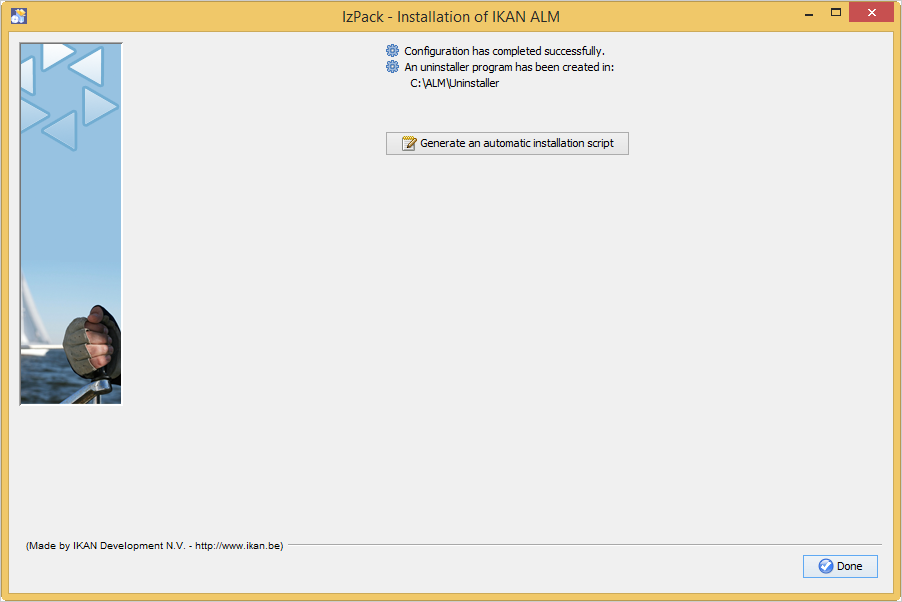
Click Done to end the installation.
During the installation, a log file was created in the folder ALM_HOME/FileBased named “Install_V5.8_*.log” (e.g., Install_V5.8_20130526100925_9002832048355522781.log). The installation summary can also be reviewed in the file ALM_HOME/Uninstaller/InstallSummary.htm.
If this was a new IKAN ALM Server installation (no re-installation or upgrade of an older version), and the ‘Initialize the database’ option was NOT selected during the installation, the next step is to initialize the IKAN ALM database.
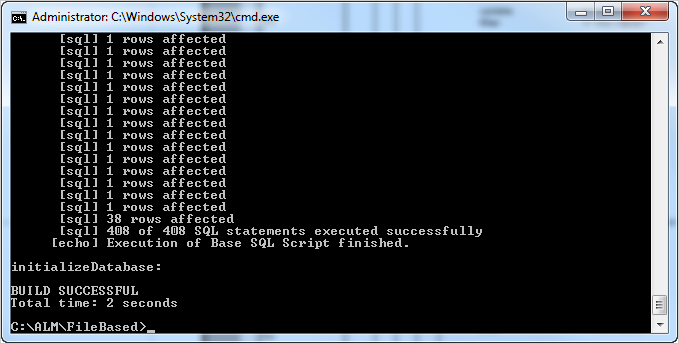
Initializing the IKAN ALM Database
This step must only be executed when you perform a new (first) IKAN ALM Server installation and if the ‘Initialize the database’ option was NOT selected during the installation.
When using DB2 as the IKAN ALM database, some additional configuration is required. For more information, please refer to the section DB2 configuration.
To initialize the database, launch the script ALM_HOME/FileBased/initializeALMDatabase.cmd (Windows) or ALM_HOME/FileBased/initializeALMDatabase.sh (Linux/Unix):
Starting IKAN ALM
This section describes the steps to perform the startup of the different IKAN ALM components.
-
If you want to configure IKAN ALM through its GUI, you must first start the IKAN ALM Web application (Starting the IKAN ALM Web application).
-
If you want to run Builds and Deploys, you must start the IKAN ALM Server and Agent (Starting the IKAN ALM Server and Starting the IKAN ALM Agent).
-
If you want to use the IKAN ALM Commandline interface, see Using the IKAN ALM Commandline
Starting the IKAN ALM Web application
To start the IKAN ALM Web application, you need to start the Apache Tomcat web server that is hosting it.
The IKAN ALM GUI can be reached by browsing to the url http://<host>:<port>/alm.
For example: http://alm_server:8080/alm.
If this is the first installation of IKAN ALM, the License window will be displayed:
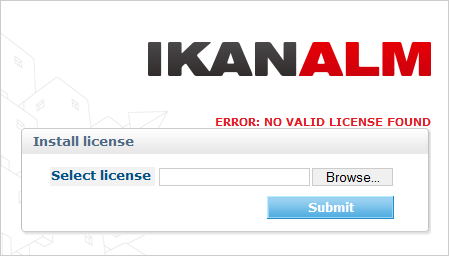
Provide a valid license, and then click Submit.
Next, the Log in page will be displayed:
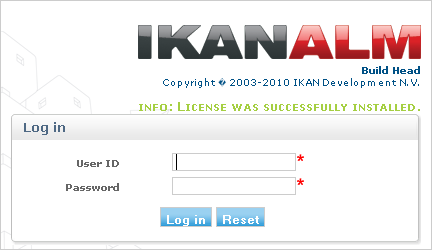
Log in with user id “global”, password “global”.
For more information on the IKAN ALM GUI, refer to the IKAN ALM 5.8 User Guide, which is located at ALM_HOME/doc/ALMUserGuide.pdf.
Starting the IKAN ALM Server
The IKAN ALM Server runs as an OSGi bundle inside a Karaf container. Therefore, to start the IKAN ALM Server, the Karaf container must be started first.
-
On Linux/Unix, from a shell:
Launch the shell script “ALM_HOME/daemons/server/startServer.sh”.
Use “ALM_HOME/daemons/server/stopServer.sh” to stop the IKAN ALM Server.
-
On Windows, as a Windows Service:
By default, the IKAN ALM Server is registered as a Windows service which will be started automatically at system start-up.
Alternatively, you can control the service via Start > Settings > Control Panel >Administrative Tools > Services. The name of the IKAN ALM Server service is “IKAN ALM 5.8 Server”.
-
On Windows, from a Command Prompt:
Launch the command file “ALM_HOME/daemons/server/startServer.cmd”.
Use “ALM_HOME/daemons/server/stopServer.cmd” to stop the IKAN ALM Server.
Starting the IKAN ALM Agent
-
On Linux/Unix, from a shell:
Launch the shell script “ALM_HOME/daemons/agent/startAgent.sh”.
Use “ALM_HOME/daemons/agent/stopAgent.sh” to stop the IKAN ALM Agent daemon.
-
On Windows, as a Windows Service:
By default, the IKAN ALM Agent is registered as a Windows service which will be started automatically at system start-up. Alternatively, you can control the service via Start > Settings > Control Panel > Administrative Tools > Services.
The name of the Agent service is “IKAN ALM 5.8 Agent”.
-
On Windows, from a Command Prompt:
Launch the command file “ALM_HOME/daemons/agent/startAgent.cmd”.
Use “ALM_HOME/daemons/agent/stopAgent.cmd” to stop the IKAN ALM Agent.
Using the IKAN ALM Commandline
If you selected the IKAN ALM CommandLine package, it will be installed in ALM_HOME/commandline.
-
To launch the IKAN ALM Commandline on Linux/Unix:
Open a shell and launch “ALM_HOME/commandline/alm.sh”.
-
To launch the IKAN ALM Commandline on Windows:
Open a Command Prompt and launch “ALM_HOME/commandline/alm.cmd”.
For more detailed information on the IKAN ALM Commandline, refer to the section Command Line Interface in the IKAN ALM User Guide - Release 5.8.
Uninstalling IKAN ALM
To completely uninstall IKAN ALM from your system, do the following:
-
On Linux/Unix:
Open a shell and execute the command “java -jar ALM_HOME/Uninstaller/uninstaller.jar”
-
On Windows XP/2003:
Open Control Panel > Add/Remove Programs, select the entry “IKAN ALM 5.8” and click “Change/Remove”
-
On Windows Vista/Server2008 and above:
Open “Programs and Features”, select the entry “IKAN ALM 5.8” and click “Uninstall/Change”
The uninstaller windows will be displayed:
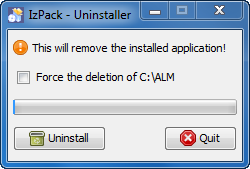
WARNING: if you enable the option “Force the deletion of …” the uninstaller will DELETE the ENTIRE installation directory! This means that if your Build Archive, Deploy scripts or target environments are located in this installation directory, they will be REMOVED.
If you leave this option disabled, the uninstaller will keep some files in the installation directory, like the original location of the Build Archive (ALM_HOME/system/buildArchive).
Click Uninstall to start the removal.
When finished, the following will be displayed:
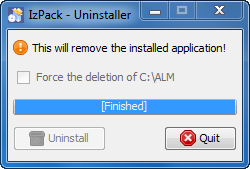
Click Quit to end the uninstaller.
Upgrading IKAN ALM
The general approach to upgrading IKAN ALM is straightforward: first back up the current installation and the database, then reinstall the application and upgrade the database to a higher version.
If the upgrade process fails, you can restore the back-up, and continue running the previous version of IKAN ALM (and contact support).
You should at least back up the following:
-
IKAN ALM database
-
Build Archive Location: configured in System Settings
(default = ALM_HOME/system/buildArchive)
-
Deploy Scripts Location: configured in System Settings
(default = ALM_HOME/system/deployScripts)
-
Phase Catalog: configured in System Settings
(default = ALM_HOME/system/phaseCatalog)
|
For safety reasons, it is highly recommended to back up the entire ALM_HOME directory. Experience has shown that, sometimes, one needs to restore a configuration like a security setting or the configuration of the log files. |
IKAN ALM Upgrade Procedure
-
Stop the IKAN ALM Server/Agent and the IKAN ALM application server (Tomcat) and make the back-up.
This is necessary to make sure you have the latest version of everything.
-
Uninstall the IKAN ALM Server and (if it has been installed) the local ALM Agent.
To do so, run the uninstaller on the IKAN ALM Server machine.
Information on how to do this can be found in the section Uninstalling IKAN ALM or in the guide HowToALM 5.8_Tomcat_Install.pdf (in case the previous version of IKAN ALM was installed with the console installer).
-
Highly recommended: also back up the ALM_HOME folder to keep the configuration.
-
Uninstall the remote agents.
Configure and run the uninstaller on each remote IKAN ALM Agent machine.
Information on how to do this can be found in the section Uninstalling IKAN ALM or in the guide HowToALM 5.8_AgentInstall.pdf.
-
Configure and run the installer of the ALM Server and local ALM Agent.
Refer to the section Installing IKAN ALM or to the document How-ToALM 5.8_Tomcat_Install.pdf.
-
Migrate the IKAN ALM database to the latest version.
To do this, run the Database Migration Tool (described in the next section) from the new ALM Server installation.
-
Finally, run the installer of the remote ALM Agents.
Refer to the guide HowToALM5.8_AgentInstall.pdf.
Database Migration Tool
The Database Migration Tool is a command line tool launched by the migrateALMDatabase script. The tool automatically detects the current database version and, if needed, attempts to migrate it to the latest one.
As pointed out in the previous section, you should back up the IKAN ALM database before starting the DB migration.
To start the migration, you need to run the DB migration tool located in:
ALM_HOME/FileBased/migrateALMDatabase.cmd (on Windows) or
ALM_HOME/FileBased/migrateALMDatabase.sh (on Linux installations).
By default, the DB Migration Tool uses the database connection parameters defined in the ALM_HOME/FileBased/install.properties file.
You can also define a custom path to the install.properties by using the -installProperties switch (see the migrateALMDatabase script file contents).
The default Java executable is used to run the migration tool. In case it cannot be found, you may have to set the JAVA_HOME variable in the migrateALMDatabase script file.
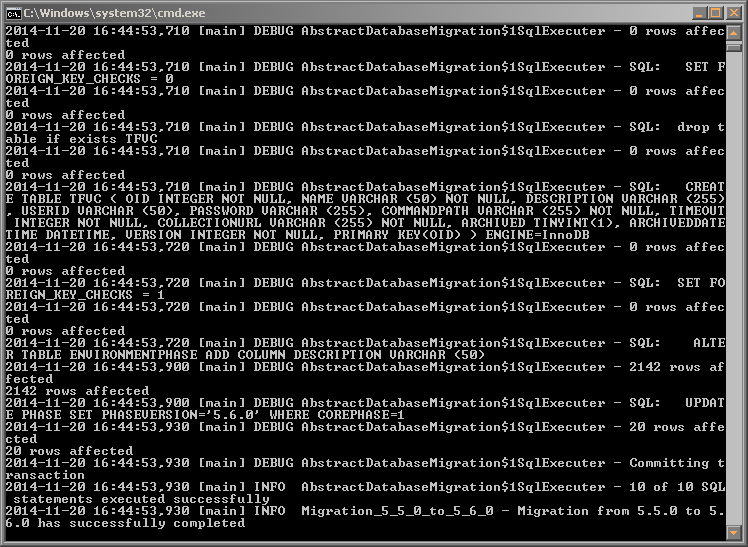
The Database Migration will be done in different steps: when migrating from the older 5.2 version, first the 5.2 to 5.5 migration will be executed, before migrating version 5.5 to the (latest) 5.8 version.
|
Migrating the older IKAN ALM database 5.2 to version 5.5 includes significant changes. Therefore, depending on the size of your database, it may take a while (up to a few hours). |
A migration log is created in the ALM_HOME/FileBased/almDbMigration.log file and will also be displayed in the console window.
Appendix A: Manually Installing and Removing the IKAN ALM Server and Agentas a Windows Service
By default, the IKAN ALM installer registers the IKAN ALM Server and Agent components as Windows services. However, for convenience purposes, the IKAN ALM installation includes scripts to unregister or re-register the IKAN ALM Server and Agent as services.
The procedures are identical for the ALM Agent and Server, so we will only describe them for the ALM Server:
-
To unregister the service, execute "ALM_HOME/daemons/server/karaf/bin/karaf-service.bat remove".
-
To register the service, execute "ALM_HOME/daemons/server/karaf/bin/karaf-service.bat install".
If you want to reconfigure the service, edit the file ALM_HOME/daemons/server/karaf/etc/karaf-wrapper.conf. You can, for example, change the amount of memory the ALM Server can use (in Mb) by changing: wrapper.java.maxmemory = 512.
It is generally not recommended to change any of the other properties in the karaf-wrapper.conf file, as it may cause the ALM Server to stop working.
For more information on the configuration file, refer to http://yajsw.sourceforge.net/YAJSW%20Configuration%20Parameters.html and http://karaf.apache.org/manual/latest/#_integration_in_the_operating_system.
Appendix B: Manually Installing and Removing the IKAN ALM Server and Agentas a Daemon Process on Linux/Unix Systems
The IKAN ALM installer does not automatically install the ALM Server or Agent as a Linux/Unix daemon. These steps must be performed after installation.
Since the ALM Server and Agent use Apache Karaf as their OSGi runtime environment, this basically comes down to using the Apache Karaf Wrapper feature (see the Karaf 4.0 manual: http://karaf.apache.org/manual/latest/#_service_wrapper).
As an example, we will describe this procedure for installing and removing the ALM Server as a service on a CentOS Linux. For the ALM Agent, repeat the procedure, but substitute "server" with "agent".
-
If you are currently running the ALM Server, stop it by executing ALM_HOME/daemons/server/stopServer.sh
-
Launch the ALM Server Karaf by executing ALM_HOME/daemons/server/karaf/bin/karaf_server.sh . This will launch the ALM Server with the Karaf console enabled, which we will need to use the Karaf Wrapper feature.
-
After the startup messages have finished, press <enter> and you will see the Karaf console prompt: "karaf@root>"
-
In the Karaf console, execute "feature:install wrapper". This will install the Karaf Wrapper feature. You can verify that this worked by executing " feature:list | grep wrapper". This should give the output:
wrapper | 4.0.7 | x | Started | standard-4.0.7 | Provide OS integration -
Now we must call "wrapper:install" which will generate the necessary files to install the ALM Server as a Linux service. In the Karaf console, execute 'wrapper:install -s DEMAND_START -n almserver58 -d "IKAN ALM 5.8 Server" -D "IKAN ALM 5.8 Server Daemon"'.
When this command succeeds, it conveniently reports the commands that we need to execute as subsequent steps.
-
Shut down the ALM Server Karaf: in the Karaf console, execute "shutdown -f"
-
Adapt the ALM_HOME/daemons/server/karaf/etc/almserver58-wrapper.conf file that was created, by adding the following options:
-
Just before the KARAF_HOME, in the section of the general wrapper properties, set the path to the Java runtime you selected during the IKAN ALM Server installation (Installing the Server):
set.default.JAVA_HOME=/opt/java/jdk1.8.0
-
change the path to the java executable:
wrapper.java.command=/opt/java/jdk1.8.0/bin/java * In the section of the JVM Parameters, add following parameters:
+ wrapper.java.additional.10=-XX:+UnlockDiagnosticVMOptions
+ wrapper.java.additional.11=-XX:+UnsyncloadClass
-
-
At this point everything is configured so we can install, remove, stop and start the IKAN ALM Server Linux daemon. All of these commands need administrative privileges, so you will need to execute them with "sudo" :
-
To install the service:
-
ln -s /home/ikan/ALM/daemons/server/karaf/bin/almserver58-service /etc/init.d/
-
chkconfig almserver58-service --add
-
-
To start the service when the machine is rebooted:
-
chkconfig almserver58-service on
-
-
To disable starting the service when the machine is rebooted:
-
chkconfig almserver87-service off
-
-
To start the service:
-
service almserver58-service start
-
-
To stop the service:
-
service almserver58-service stop
-
-
To uninstall the service:
-
chkconfig almserver58-service --del
-
rm /etc/init.d/almserver58-service
-
-
Appendix C: JAAS configuration
For the authentication and authorization of users, IKAN ALM uses the Java Authentication and Authorization Service (JAAS) (see http://download.oracle.com/javase/6/docs/technotes/guides/security/jaas/JAASRefGuide.html).
The IKAN ALM Server installation automatically preconfigures JAAS, so this appendix is only for troubleshooting, or if you want to adapt authentication, e.g., for using Windows domain authentication.
JAAS authentication is performed in a pluggable fashion. This permits applications to remain independent from underlying authentication technologies. New or updated authentication technologies can be plugged into IKAN ALM without requiring modifications to the application itself.
IKAN ALM Server JAAS configuration
The IKAN ALM Server installation modifies the java.security file of the Java Runtime that was selected in ALM Server parameters (1 of 2). This file is located in the subfolder jre/lib/security if the Java Runtime is a JDK, or in the subfolder lib/security when a Server JRE was selected.
Note that if you use Tomcat to host the IKAN ALM Web application, it must be started with this selected Java Runtime, or else you will have authentication errors.
The location of the login configuration file is set statically by specifying the URL in the login.config.url.n property (in the “Default login configuration file” paragraph).
For example:
## Default login configuration file##login.config.url.1=file:${user.home}/.java.login.config login.config.url.1=file:/opt/alm/system/security/jaas.configwith “/opt/alm/” the chosen ALM_HOME.
If multiple configuration files are specified (if n >= 2), they will be read and combined into one single configuration:
## Default login configuration file##login.config.url.1=file:${user.home}/.java.login.config login.config.url.1=file:c:/Documents and Settings/Administrator/.java.login.configlogin.config.url.2=file:c:/alm/system/security/jaas.configJVM option or user.home JAAS configuration
If you are using Tomcat, there are two other ways to set up the JAAS configuration:
-
The first uses a system property which is set from the command line: -Djava.security.auth.login.config option.
When running Tomcat from a Linux/Unix shell or from a Windows Command Prompt, set the JAVA_OPTS variable in the file TOMCAT_HOME/bin/Catalina.sh or TOMCAT_HOME/bin/Catalina.bat: JAVA_OPTS=-Djava.security.auth.login.config=/opt/alm/system/security/jaas.config
-
The second option is to use the default configuration file which is loaded from the user’s home directory: file:${user.home}/.java.login.config
JAAS implementation: flat file security
The IKAN ALM Server uses a simple JAAS implementation, where user groups and users are configured in a flat file. In the JAAS configuration file, this is specified as follows (when ALM_HOME=`"/opt/alm`"):
/** * ALM flat file security configuration  * Attention : the passwords in the passwd.config file must
be stored in MD5 encryption format **/**/ALM{  com.tagish.auth.FileLogin required pwdFile=”/opt/alm/system/security/passwd.config";};
Flat file security: contents
The contents of the passwd.config file when using flat file security is fairly easy and self-explanatory:
userid:encrypted password:groupname:groupname:groupnameuser:ee11cbb19052e40b07aac0ca060c23ee:ALM Userproject:46f86faa6bbf9ac94a7e459509a20ed0:ALM User:ALM Projectglobal:9c70933aff6b2a6d08c687a6cbb6b765:ALM User:ALM AdministratorThe encrypted password is in MD5 encryption format. There are numerous free downloadable tools that can generate a MD5 checksum for a given string. There is even a JavaScript implementation that you can use online to calculate checksums at: http://pajhome.org.uk/crypt/md5/index.html
For example, to add a user with User ID “testuser” and password “testuser” who belongs to the “ALM User” and “ALM Project” User Groups, do the following:
-
Add following entry to the passwd.config file:
testuser:5d9c68c6c50ed3d02a2fcf54f63993b6:ALM User:ALM Project -
Stop and restart Apache Tomcat
-
Login to IKAN ALM using User ID “testuser” and Password “testuser”.
Appendix D: DB2 configuration
When using DB2 as the IKAN ALM database, please make sure that the page size of the table space and its associated buffer pool is not less than 8K. Otherwise, when creating a new database in DB2, the default page size is 4K and this can cause SQL errors while running the database initialization script.
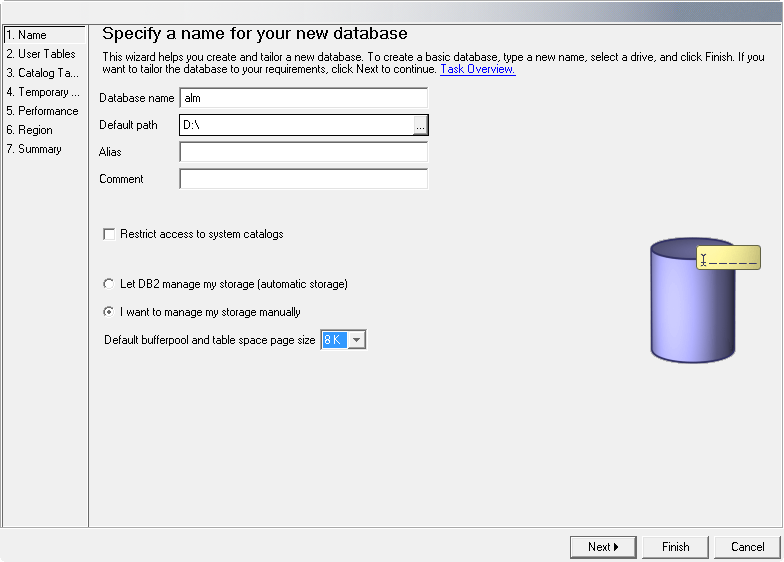
The page size of a table space in DB2 is determined by the associated buffer pool, but you cannot change the page size of a buffer pool. So, if you want to use an existing DB2 database with the page size already set to 4K, a possible workaround would be to create a new buffer pool with a page size of 8K, and next to create a new table space (e.g., USERSPACE2) with a page size of 8K and associate it with the new buffer pool.
Furthermore, you will also need to create a new system temporary tablespace (e.g., TEMPSPACE2) and associate it with a buffer pool that has a page size set to at least 8K.
Appendix E: Troubleshooting
The installer doesn’t start and displays the error:"Java Runtime not found"
When launching the 32-bit or 64-bit IKAN ALM installer on Windows, you may receive the following error, after which the IKAN ALM installer quits:
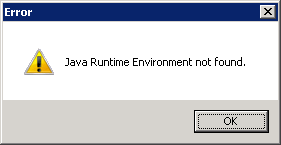
The most likely cause is that there is no suitable Java Runtime Environment (JRE) installed. The 32-bit installer needs a 32-bit JRE installed, while the 64-bit installer needs a 64-bit JRE installed. Furthermore, the JRE should be version 1.7 or 1.8.
The solution is to install a suitable JRE.
If for some reason you do not want to install a JRE, there is a workaround to launch the IKAN ALM installer with only a Java Development Kit (JDK) or a Server JRE installed: set the JAVA_HOME environment variable to point to the JDK or Server JRE folder, either globally on the system, or from a commandline prompt, and then launch the IKAN ALM installer.
When you set JAVA_HOME from a commandline prompt, there are two possible pitfalls:
-
do not wrap the JAVA_HOME path in quotes, even when it contains spaces
-
when UAC is enabled (Windows Vista and later), the commandline prompt must have Administrative privileges (the title of the prompt must start with "Administrator:")